


– 123 –
No.
13
Part name
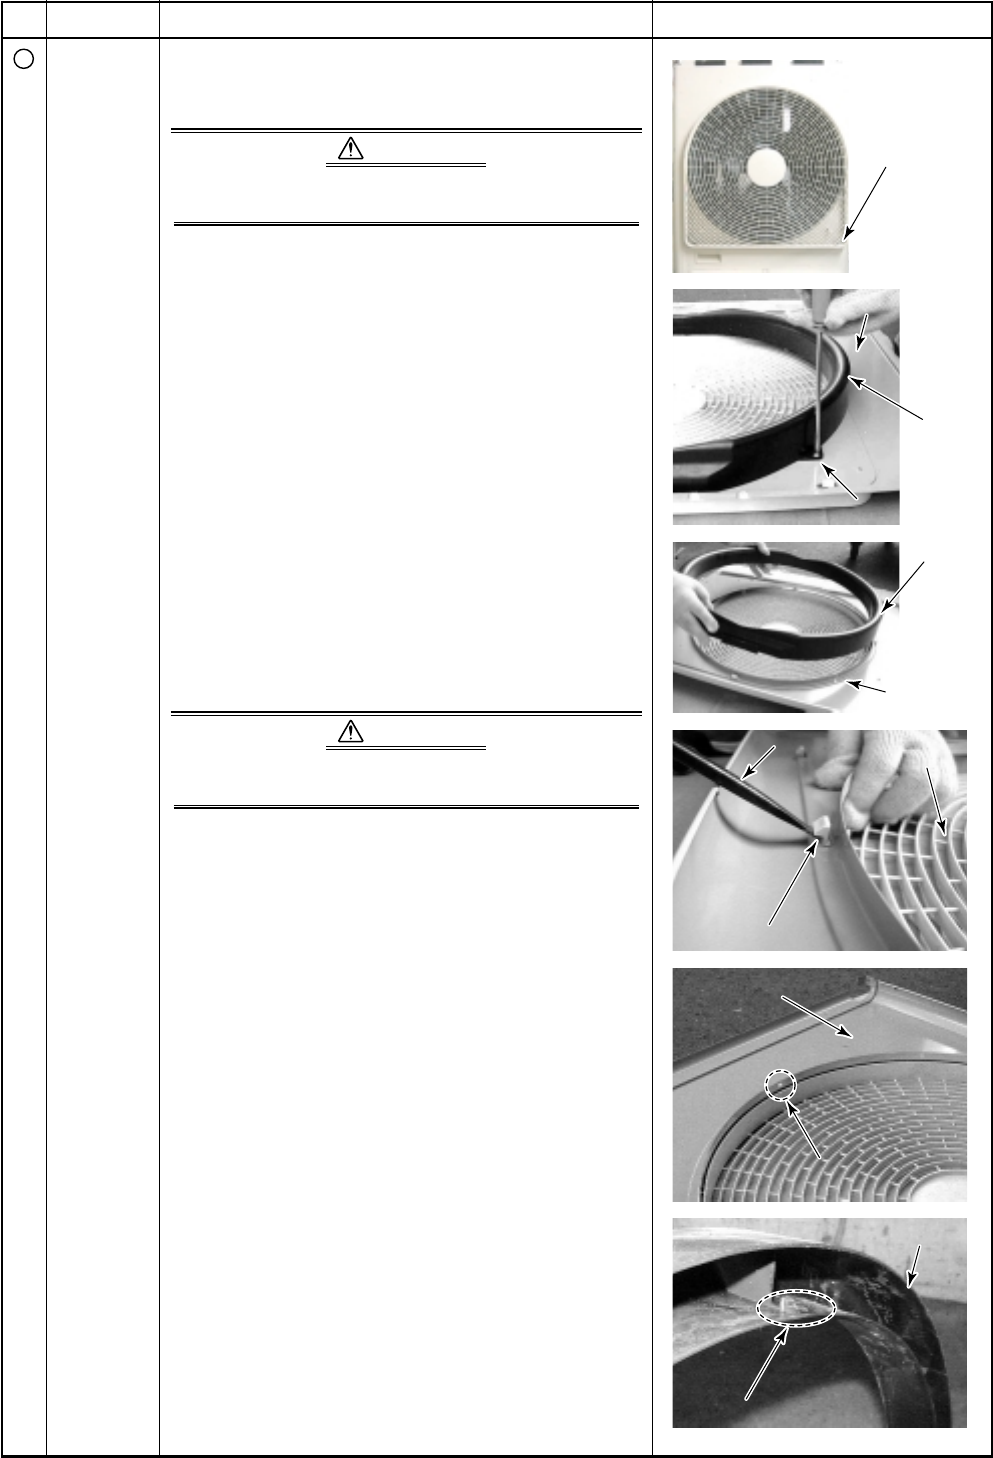
Fan guard
Procedure
1. Detachment
1) Carry out work of item 1. of
Q
and 1. of
S
above.
CAUTION
To prevent scratches to the product, carry out the
work on cardboard, cloth, etc.
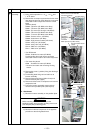
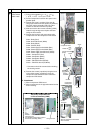
2) Remove the discharge port cabinet and place the
fan guard side facing upwards.
3) Remove the fixing screws for the fan guard.
(Hexagonal screws Ø4 × 10, 2 pcs.)
4) Remove the discharge port cabinet and then put on
it so that the fan guard side faces downward.
5) Remove the screws fixing the bellmouth.
(ST1T Ø4 × 8, 2 pcs.)
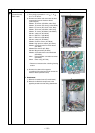
6) Remove bellmouth.
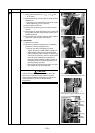
7) Press and remove hooking claw of fan guard with a
flat screwdriver.
2. Attachment
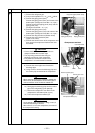
1) Press the projection on the upper side of the fan
guard into the hole of the discharge cabinet and
then push in the hooking claws.
Fix the claws by using your hands to press the
hooking claws (5 positions).
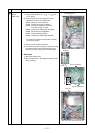
CAUTION
Check that all the hooking claws are fixed at the
specified positions.
2) After mounting, fix the fan guard with screws.
(Hexagonal screws Ø4 × 10, 2 pcs.)
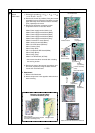
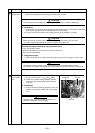
3) Attach and mount the claws (3 positions) on the
upper side of the bellmouth in the square hole of
the discharge cabinet.
4) After mounting, fix with a screw.
(ST1T Ø4 × 8, 2 pcs.)
Remarks
Claw (3 positions)
Claw (3 positions)
Bellmouth
Bellmouth
Square hole
Square hole
(3 positions)
(3 positions)
Discharge port cabinet
Discharge port cabinet
Hooking claw
Hooking claw
Flat
Flat
screwdriver
screwdriver
Discharge port cabinet
Discharge port cabinet
Bellmouth
Bellmouth
Bellmouth
Bellmouth
Claw (3 positions)
Bellmouth
Square hole
(3 positions)
Discharge port cabinet
Hooking claw
Bellmouth
Bellmouth
Discharge port cabinet
Discharge port cabinet
Remove screw (2 pcs.)
Remove screw (2 pcs.)
Fan guard
Fan guard
Flat
screwdriver
Discharge port cabinet
Discharge port cabinet
Remove screw (2 pcs.)
Fan guard
Remover screw
(2 pcs.)