All installations and services must be performed by qualified service personnel.
11
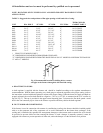
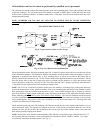
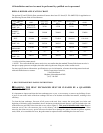
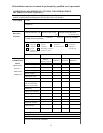
RIELLO BURNER APPLICATION CHART
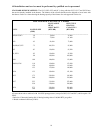
The optional F3 and F5 Riello flame retention oil burners have been UL listed (UL File #MP3252) for application on
the following Thermo Pride oil fired furnaces.
MODEL
PART
OH3
OC5, OL5,
OH5, OT5
OL11, OH11,
OT11
OL16, OH16,
OT16
OL20
MTG. PLATE
PART NO.
TOP-25752
BTM-35733
35750 35750 35750
35750
MTG. PLATE
GASKET
PART NO.
330090 330088 330088 330088 330088
**NOZZLE
SIZE
.50-60A .60-60A* .75-60A* .90-60A* 1.10-60A*
NOZZLE
PART NO.
380393 380394 380395 380396 380397
OIL PUMP
PRESSURE
170 PSI 145 PSI 145PSI 145 PSI 150PSI
BURNER
F3 F3 F5 F5 F5
BURNER
PART NO.
380215 380215 380216 380216 380216
* A refers to hollow pattern nozzle
** NOTE: The reason the Riello burner nozzle sizes are smaller than the standard Thermo Pride burner nozzles is
that pre-set pump pressures are higher, therefore achieving the same firing rate with a smaller nozzle.
For more specific burner information, specifications or service information, reference the training manual enclosed
with each Riello burner or contact: Riello Corporation of America,
5 Pond Park Road
Hingham, Massachusetts 02043
(617) 749-8292
I. HEAT EXCHANGER CLEANING INSTRUCTIONS:
?
??
?WARNING: THE HEAT EXCHANGER MUST BE CLEANED BY A QUALIFIED
SERVICE PERSON.
It is important to inspect and clean the heat exchanger once a year, or as necessary, to remove any build-up of soot.
A layer of soot on the inside of the heat exchanger will act as an insulator and reduce heat transfer, resulting in less
efficiency.
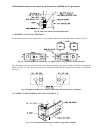
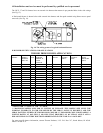
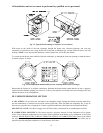
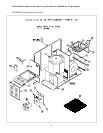
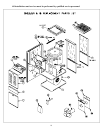
To clean the heat exchanger, first turn off all power to the unit. Next, remove the access panel (see below and
beginning of following page) immediately above the burner (on the horizontal furnace, it will be located to the side
of the burner) to gain entry to the clean-out covers, refer to figure 15. This panel is identified with a label.
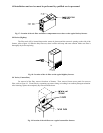
Remove
clean-out covers, the vent connector pipe to the chimney, the burner, and the burner mounting plates. When
removing the clean-out covers, special care must be taken not to damage the gaskets. Should the gaskets separate,
crack, break, or be unsuitable for reuse, the gasket must be replaced before reattaching the clean-out covers.


