


14
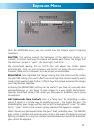
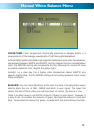
Image Adjustment Menu: Continued
FONT COLOR: What colors the on-screen text will be.
There are fifteen options, the default (white) is #3. The text will always have a black
border.
CONTRAST: Controls the dynamic range of the camera’s output. The higher the
contrast, the greater the difference between the blackest black and the whitest
white will be. Note that this setting will have no bearing on how the camera
actually captures images in situations with harsh lighting. Also, setting the contrast
too high will degrade the quality of your images and introduce digital noise and
grain into your images.
SHARPNESS: How crisp your images will be. Setting the sharpness too high will
make your pictures look pixilated, like old computer graphics. On the other hand,
setting the sharpness too low will make everything look soft and blurry – a bit like
looking through lightly frosted glass.
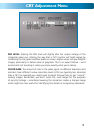
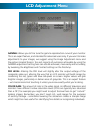
DISPLAY: Here you can customise the camera’s output specifically for the type
of monitoring device you have connected. For old-school televisions or bulky
computer monitors, choose CRT. For more modern screens, LCD is typically the
best choice. If you are using an unusual type of monitor (such as oLED or plasma)
you’ll probably have to experiment to see what works best on your screen.
NEG. IMAGE (Negative Image): Reverses the colors and luminance of the image.
So, white becomes black, black becomes white and so on. We would generally
recommend not using this setting – you can always invert the color later, anyway.
However, sometimes (particularly monitoring video feeds with low contrast) the
negative image function can make details more apparent to the eye.