


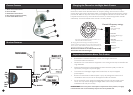
The Night Hawk Cameras can be switched to any of four frequencies to assist in avoiding
interference. Please see the illustration below for frequency settings. Unscrew the front of the
camera case to gain access to the channel switch. To change the frequency/channel on the receiver,
press the SEL button on top of the receiver to cycle through the channels. You can also switch the
Loop/Normal switch to Loop, which will allow the receiver to switch through all four channels
automatically. The lit LED indicates which channel is currently selected.
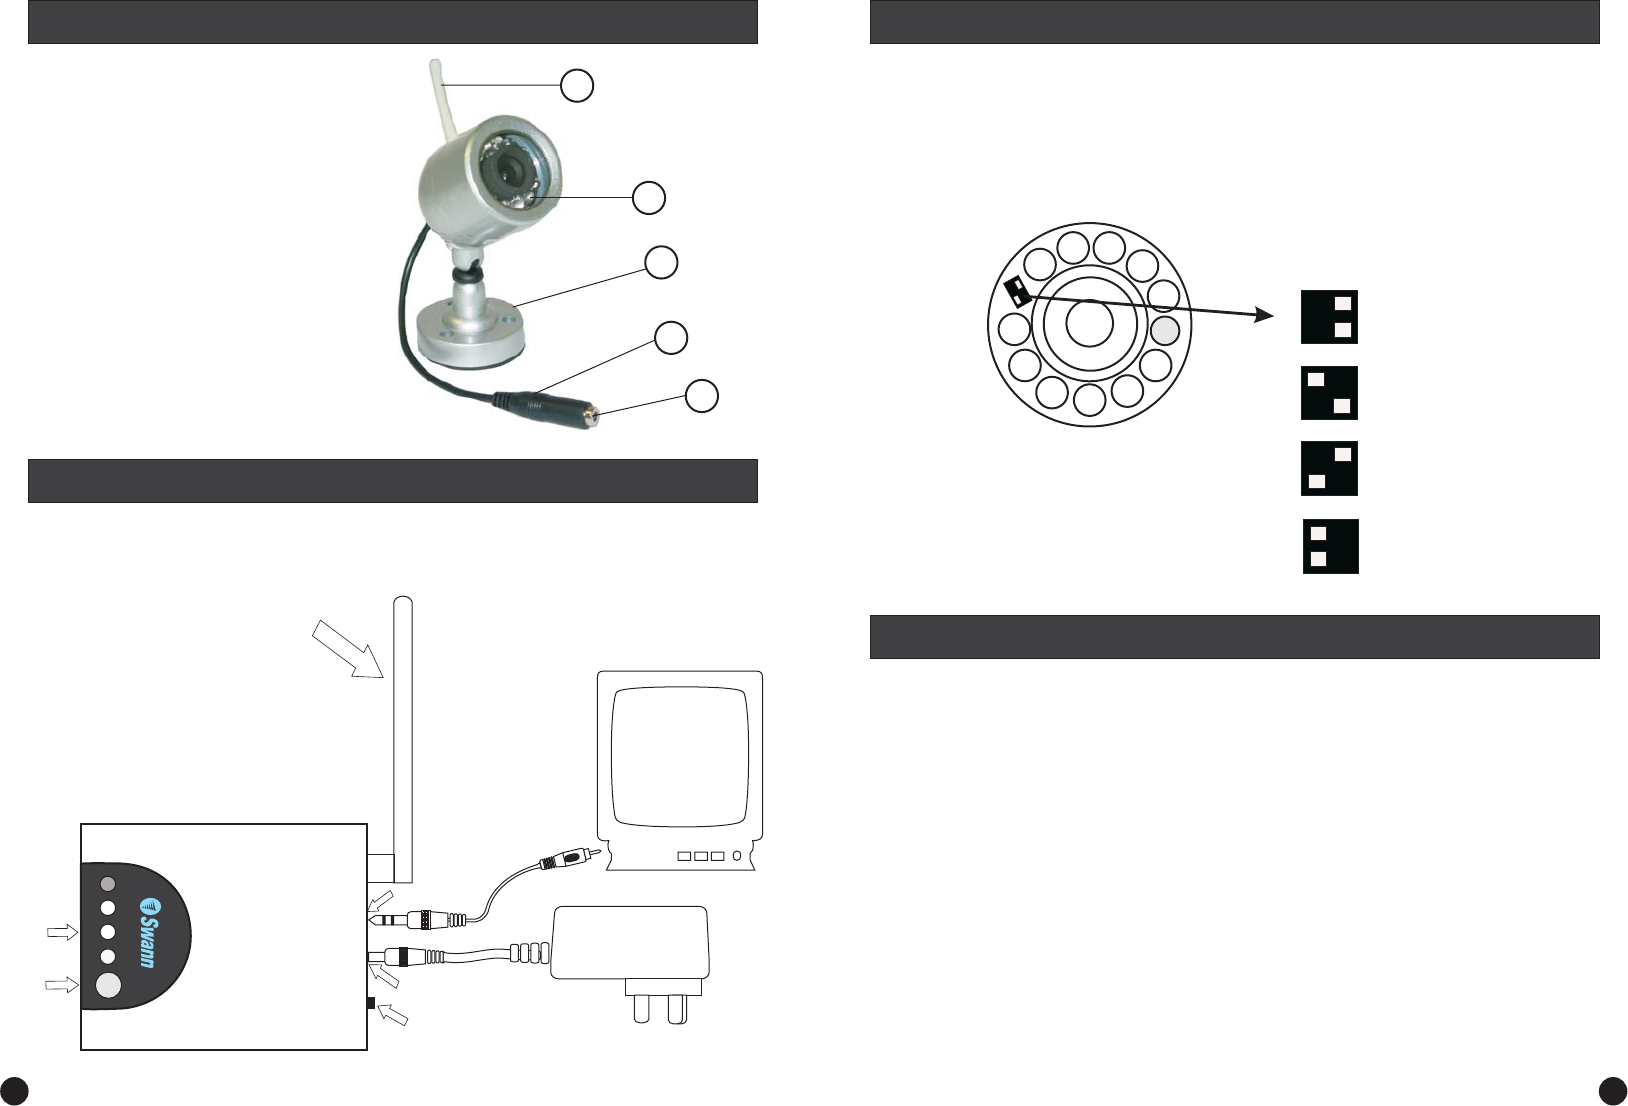
Channel & Frequency settings
By changing these switch settings, the frequency that the
Camera transmits on . Once you have set the channel
on the Camera, select the same channel on the receiver. If you
experience interference try a different channel.
changes
Do not set two Cameras to the same channel or they
will interfere with each others signal.
12
12
Channel 1
Both switches Right
2414MHz
Channel 2
Top Left & Bottom Right
2432MHz
Channel 4
Both switches Left
2468MHz
Front view of Switch Block (note the numbers1&2
indicate the left side of the switch)
12
Channel 3
Top Right & Bottom Left
2450MHz
12
12
• Best Results are achieved where there is a clear “line of sight” between the
Camera/Transmitter and Receiver.
• Interference from certain electronic equipment or the moving human body can also affect the
range obtainable.
• Please test all devices before final installation because transmission quality can often be
improved by moving the components slightly.
• To avoid the risk of damage to Night Hawk Camera Pack, use only the supplied
power adaptors.
• Beware of humid locations. Water droplets or spray may damage the receiver unit. If
condensation does occur, do not use the equipment until it has dried out.
• Do not cut the DC power cable of the Night Watch Camera to fit with another power
source. This may result in damage to the Night Watch Camera & any unauthorised
modifications will void your warranty.
1. Omni-directional Antenna
2. Infra-red LEDs
3. Detachable Camera Stand
4. Microphone (enclosed in socket)
5. Power Cable & DC Power
2
3
5
4
1
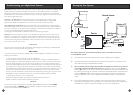
Receiver
Exter nal antenna
Audio / Video Out
To Audio and
Video IN
MonitororTV
DC Socket
Channel
Selector
Button
Loop / Normal Switch
Active
Channel
Leds
SEL
CH2
CH4
CH1
CH3
Receiver
Power Adaptor
4
5
Camera Features
Receiver Features
Changing the Channel on the Night Hawk Camera
Important Information About This Product
IMPORTANT: Due to the power consumption requirements of this product, we highly
recommend the use of a 9 volt battery only for short term portable use.