SECTION 5 OPERATING YOUR PORTABLE AIR CONDITIONER
15
5.3 OPERATING REMOTE CONTROL (MODEL KY-25Y ONLY) CONT’D...
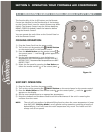
FAN-ONLY OPERATION:
1) Plug the Power Cord into the power outlet.
2) Turn on the unit by pressing the ON/OFF Button on the control panel or the remote control.
3) Press the Mode Button on the remote control or the control panel until the symbol
appears on the display.
4) Select the fan speed by pressing the Fan Button on either the remote control or the control
panel .
When in Fan-Only Mode, the exhaust duct is not needed, and the compressor and condenser side fan
motor will not work. Temperature setting has no meaning and no controlling action.
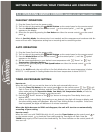
AUTO OPERATION:
1) Plug the Power Cord into the power outlet.
2) Turn on the unit by pressing the ON/OFF Button on the control panel or the remote control.
3) Press the Mode Button on the remote control or the control panel until the symbol
appears on the display.
4) Set the room temperature to your desired room temperature with “Down” or “Up”
Temperature Changing Buttons.
5) Select the fan speed by using the FAN Speed button on either the remote control or the
control panel .
When in the AUTO mode, the unit will be in Fan-Only Mode when the room temperature is below
81°F/27°C. It will operate in Cooling Mode when the room temperature is above 81°F/27°C.
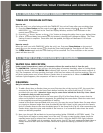
TIMER-ON PROGRAM SETTING:
How to set:
When the unit is off, you can set the timer to let the unit automatically turn on.
1) Press the Timer Set Button on the control panel or on the remote control . The “ “ will
flash in Timer Set Display Window, and the Timer Indicator, on the control panel, will turn on. The
other mode settings like Operation Mode, Fan Mode, Set Temperature Mode, will also be
displayed, allowing you to change or set them as well.
2) Press the “Down” button or the “Up” button to change the Timer delay time to your
desired time.
3 After a ten (10) second delay (not pressing on any buttons), the digit will change to display, and
the other setting modes will disappear. Now the Timer Setting Process is complete. Once some
time has passed, the digits will decrease in 6 minute increments.
When the digits decrease to ZERO and disappear, the unit will start to run automatically
according to your setting.
How to cancel:
When the unit is set with TIMER-ON while it’s off, press the Timer Button on the control panel or
on the remote control to check the Timer setting and the Time digits will flash. Press the
TIMER button again; this will cancel the timed setting. The Timer Indicator on the control panel will
then turn off.


