


17
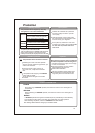
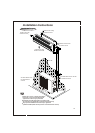
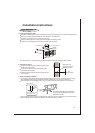
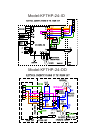
Fix with bolts and nuts tightly on a flat and strong floor.
If installed on the wall or roof, make sure to fix the supporter well to prevent it
from shaking due to serious vibration or strong wind.
3. Outdoor Unit Piping Connection
4. Outdoor Unit Cable Connection (see previous page)
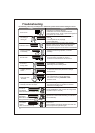
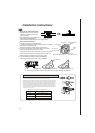
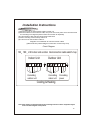
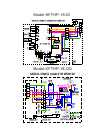
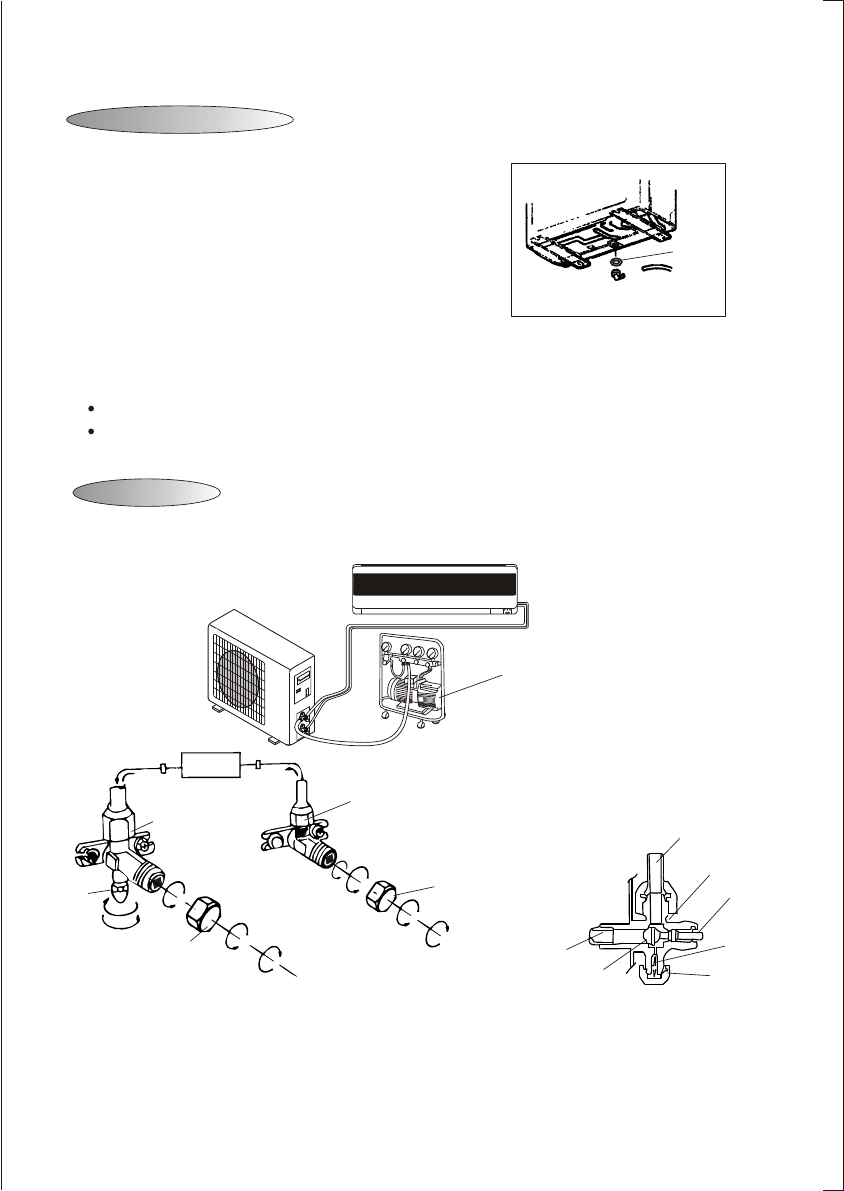
Remove the valve caps from the 2-way and 3-way valve.
Connect the pipes to the 2-way and 3-way valves separately according to the required torque.
2. Install and Fix Outdoor Unit
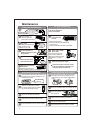
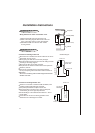
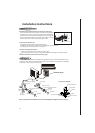
1.Install Drain Port and Drain Hose (for heat-pump model only)
Drain hose
(prepare by user)
Washer
Drain port
The condensate drains from the outdoor unit when the unit operates
in heating mode. In order to protect the environment, install a drain
port and a drain hose to direct the condensate water. Just install the
drain port and rubber washer to the chassis of the outdoor unit, then
connect a drain hose to the port as the right figure shown.
The air which contains moisture remaining in the refrigeration cycle may cause a malfunction on the
compressor. After connecting the indoor and outdoor units, evacuate air and moisture from refrigerant
cycle using a vacuum pump, as shown below.
Refrigerant flow direction
2-way valve
(6) Open 1/4 turn
valve cap
(1) Turn
(8) Tighten
(2) Turn
3-way valve
(8) Tighten
(1) Turn
(7) Turn to fully open the
valve
(7) Turn to fully open the valve
(8) Tighten
3-way valve diagram
connect to indoor unit
open position
spindle
service port cap
Service
port
Connect to outdoor unit
Valve core
needle
Vacuum pump
Valve cap
Installation Instructions
Air Purging
Note: To protect the environment, be sure not to discharge the refrigerant to the air directly.
Outdoor Unit Installation
Indoor unit
11