5
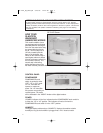
REPLACE UV BULB
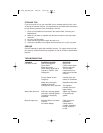
If the “REPLACE UV BULB WHEN LIT” signal light is illuminated during normal
use, the bulb must be replaced with the same special 3.5W bulb. See the
enclosed order form. The UV bulb will operate at maximum output for approxi-
mately 2,000 hours. The UV bulb may operate longer than 2,000 hours but at a
reduced output. To keep your humidifier operating at
maximum efficiency it is recommended that the UV bulb be replaced after 2,000
hours of use.
REFILL WHEN LIT - When illuminated, the water tank needs refilling. See
the section “Filling the Water Tank”. “rEF” will also be indicated in the “MODE”
window at this time. If still illuminated after full tank is placed on base, see
TROUBLESHOOTING section (Page 9).
SET HUMIDITY CONTROL - This controls the humidity level. For humidity
desired, the control touch switch should be continually pressed until the number
appears that reflects desired humidity.
NOTE: When you unpack your humidifier, you may find it has droplets of water
on some surfaces. This is normal as every unit is tested prior to shipping.
Carefully unpack humidifier and remove all packing material.
OPERATING INSTRUCTIONS
1. Place the base of the unit on a firm, flat level and water resistant surface.
2. Fill the Water Tank according to the instructions below and place on
humidifier base.
3. Plug the power cord firmly and completely into the wall outlet.
4. Push “POWER/MODE” touch switch to either the “HI” or “LO” position. Push
“SET HUMIDITY” touch switch until desired humidity appears in the “SET
HUMIDITY” window of the digital readout. The “SET HUMIDITY” can be se
in 5% increments between 30 and 90% relative humidity. Desired humidity
is normally set at 50% or below to avoid over humidification. The humidifier
will produce vapor until the relative humidity (indicated in the “HUMIDITY”
window of digital readout) reaches the “SET HUMIDITY” setting. It will be
normal for the humidifier to take 2 minutes to warm up and begin to mist.
5. When the water tank is empty, (after approximately 24 hours running time),
the “REFILL WHEN LIT” lamp will go on, and the unit will stop heating.
Refer to the “FILLING THE WATER TANK” section.
6. Whenever the water falls below the level of the FLOAT during operation, the
heating element will shut off and stop heating.
7. Mist output grille may be adjusted manually by pointing in desired direction.
NEVER point at wall.
8. For night time or other times when quieter operation is desired, push
“POWER/MODE” touch switch until “LO” appears in the “MODE” window of
digital readout.
FILLING THE WATER TANK
1. Before filling the water tank, push “POWER/MODE” touch switch until “OFF”
appears in “MODE” window and unplug unit.
2. Remove water tank from base, turn the tank upside down and remove tank
cap by turning counterclockwise. Fill tank with clean cold tap water.
Replace the tank cap by turning clockwise. Tighten firmly.
3. Carefully pick up tank, since it will be heavy when full, and slippery if wet.
GF-211D_OM_EFS.qxd 6/20/06 11:29 AM Page 5


