


For parts or assistance, call Simer Customer Service at 1-800-468-7867
Installation 3
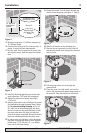
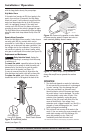
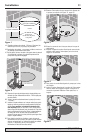
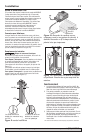
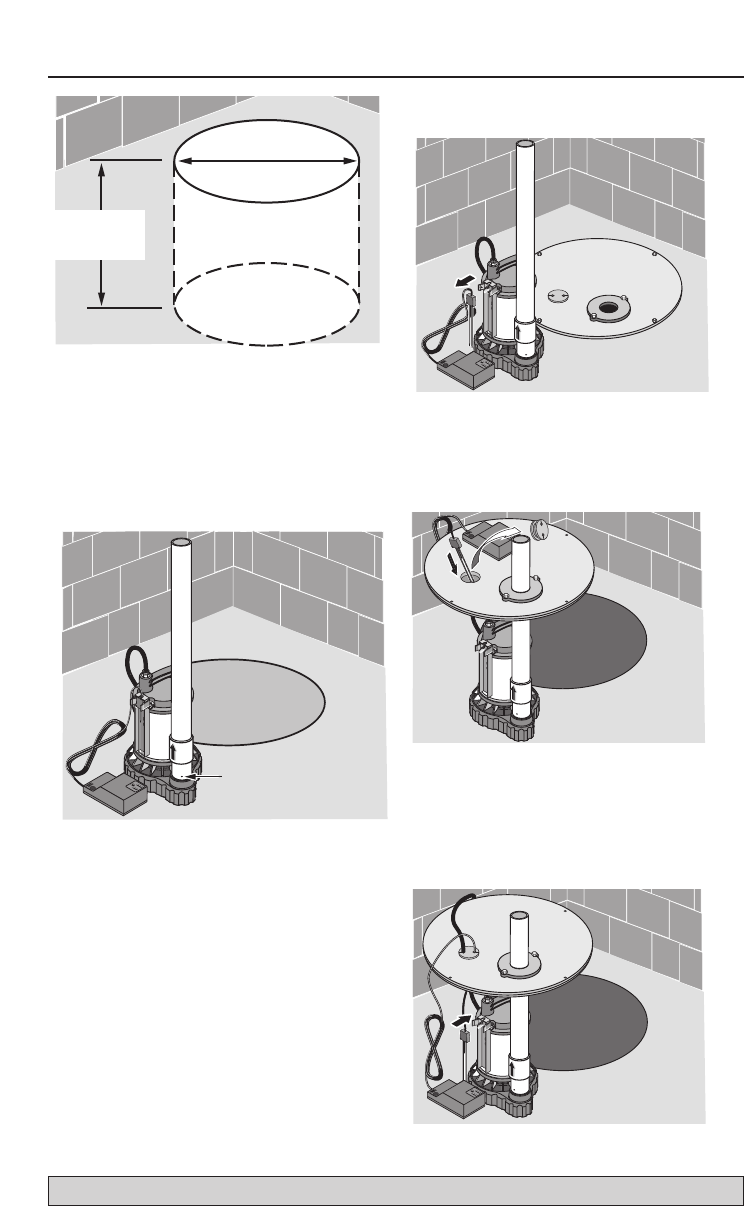
1A.Minimum sump size: 10" (254mm) diameter by
10" (254mm) depth.
1B.Construct the sump pit of tile, concrete, steel, or
plastic; it must meet code requirements.
1C.No clay, earth, sand, or gravel in the sump (they
will clog the pump). Keep the pump inlet screen
clear.
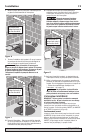
2A.Install the discharge plumbing and check valve,
using teflon tape - NOT pipe joint compound.
2B.Tighten the pipe into the pump (hand tight +
1-1/2 turns).
2C. Install a check valve in the vertical pipe to prevent
flow backwards through the pump when it shuts
off. To prevent airlocking the pump, drill a 1/8"
(3.2 mm) hole in the discharge pipe just above
where it screws into the pump discharge. Install
the check valve above this hole, but keep it as
close to the pump as possible. Be sure the hole is
below the waterline and below the check valve.
2D.To reduce noise and vibration, cut the discharge
pipe near the pump and fasten a short length of
rubber hose (1-7/8" (48 mm) I.D., e.g. radiator
hose) into it with hose clamps.
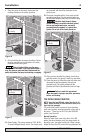
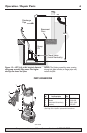
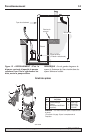
3A.Unsnap the switch from the switch bracket and
remove it from the pump (see Figure 11, Page 5).
3B.Slide the lid down over the discharge pipe.
3C.Remove the cord grommet from the sump lid
and pass the switch down through the grommet
hole in the lid.
3D.Pull the pump power cord up through the
grommet hole.
3E. Press the power cord and switch cord into the
slots in the grommet and replace the grommet in
the sump lid. Snap the switch into the bracket.
Hard Surface –
No Sand, Clay,
Gravel
Sump Pit
10" Minimum with
IntelliShield Switch
10" Min. with
IntelliShield
Switch
1/8" hole
Figure 1
Figure 2
Figure 3
Figure 4
Figure 5