9
ENGLISH
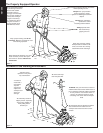
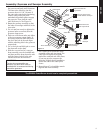
Assembly: Gearcase and Sweeper Assembly
PB17
CAUTION!
The two drum assemblies are
identical, but each drum must be
installed with its recessed end facing
toward the gearcase.
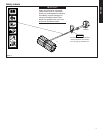
The PB2500 PowerBroom should now be completely assembled.
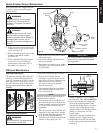
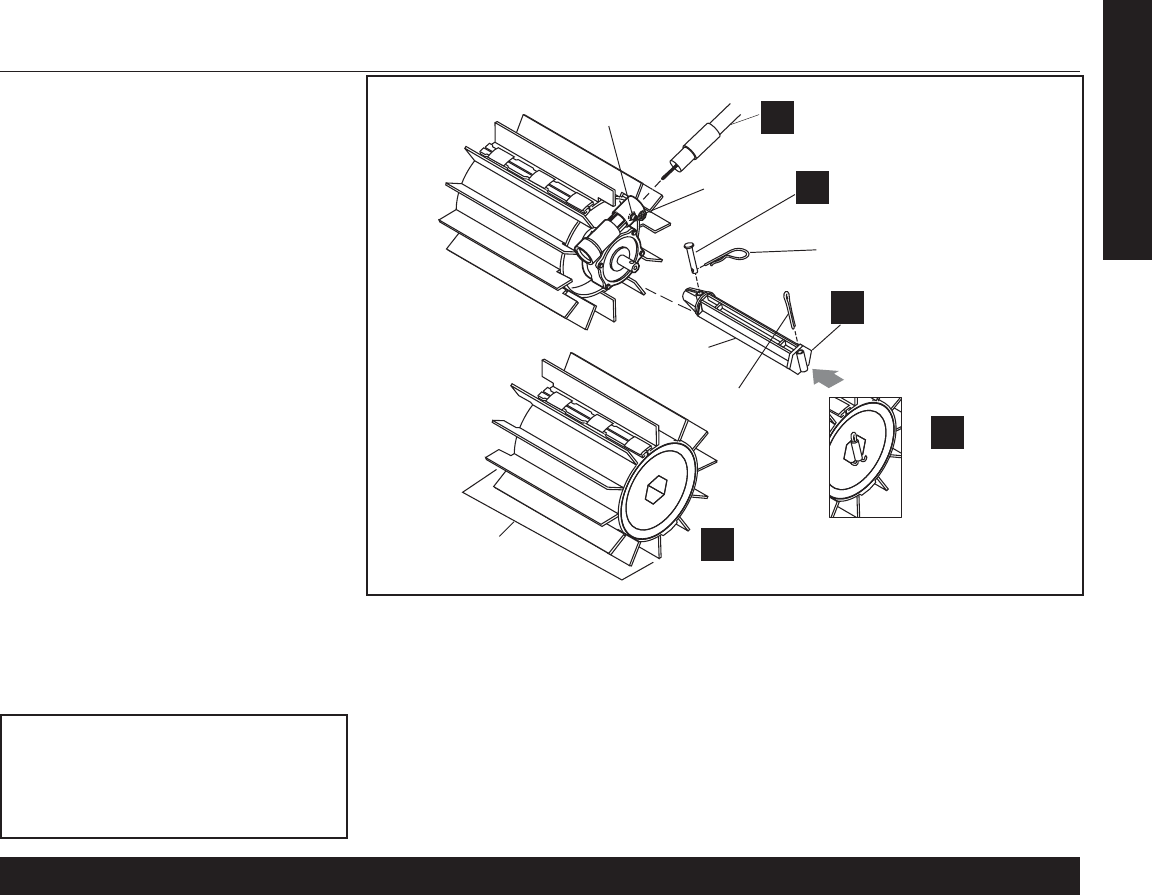
Install drum axle
onto output shaft
Drum Axle
Cotter Pin
Hitch Pin
Secure the drum axle to
the shaft with the clevis pin
4
Install the sweeper
drum assembly
Drum Assembly
4
Secure
with a
cotter pin
Figure 14
3
2
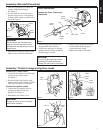
1. Insert the end of the outer tube into
the gearcase and push until it bottoms.
The outer tube should go into the
gearcase about 1-1/2 in. (38 mm). If
the outer tube stops before bottoming,
rotate it until you feel the inner
mainshaft (driveshaft) splines engage
the gearcase. Then push the outer
tube all the way in. See Figure 14.
2. Rotate the gearcase assembly so that
the index screw aligns with hole in the
outer tube.
3. Use a 4 mm hex wrench to tighten the
gearcase index screw first, then the
gearcase clamp screw.
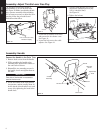
4. Push one of the drum axles onto either
of the two gearcase output shafts. If
necessary, rotate the drum axle until
the clevis pin hole in the axle aligns
with the matching hole in the gearcase
output shaft.
5. Use a clevis pin and hitch pin to secure
the drum axle to the shaft.
6. Slide the recessed end of a sweeper
drum assembly over the installed axle,
and then push the drum down the axle
until the cotter pin hole in the axle
extends above the drum surface.
1
Install outer tube into
the gearcase
Index Screw
Clamp
Screw
7. Use a cotter pin to secure the drum
assembly on the axle (see inset). The
cotter pin is designed to fit tightly
against the outboard end of the drum,
so you may need to compress the
drum face slightly during installation.
Spread the ends of the cotter pin to
secure.
8. Repeat Steps 4-7 to install the remain-
ing axle and drum assembly.


