


18
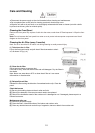
Installation of Outdoor Unit
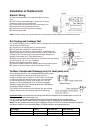
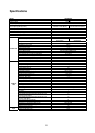
Electric Wiring
(1) Remove the handle on the right side plate of outdoor
unit.
(2) Take off wire cord anchorage. Connect and fix power
connection cord to the terminal board.
(3) Fix the power connection cord with wire clamps and
then connect the corresponding connector.
(4) Confirm if the wire has been fixed properly.
(5) Reinstall the handle.
Note: Incorrect wiring may cause malfunction of spare part. Please follow recommended instructions.
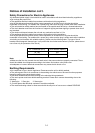
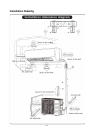
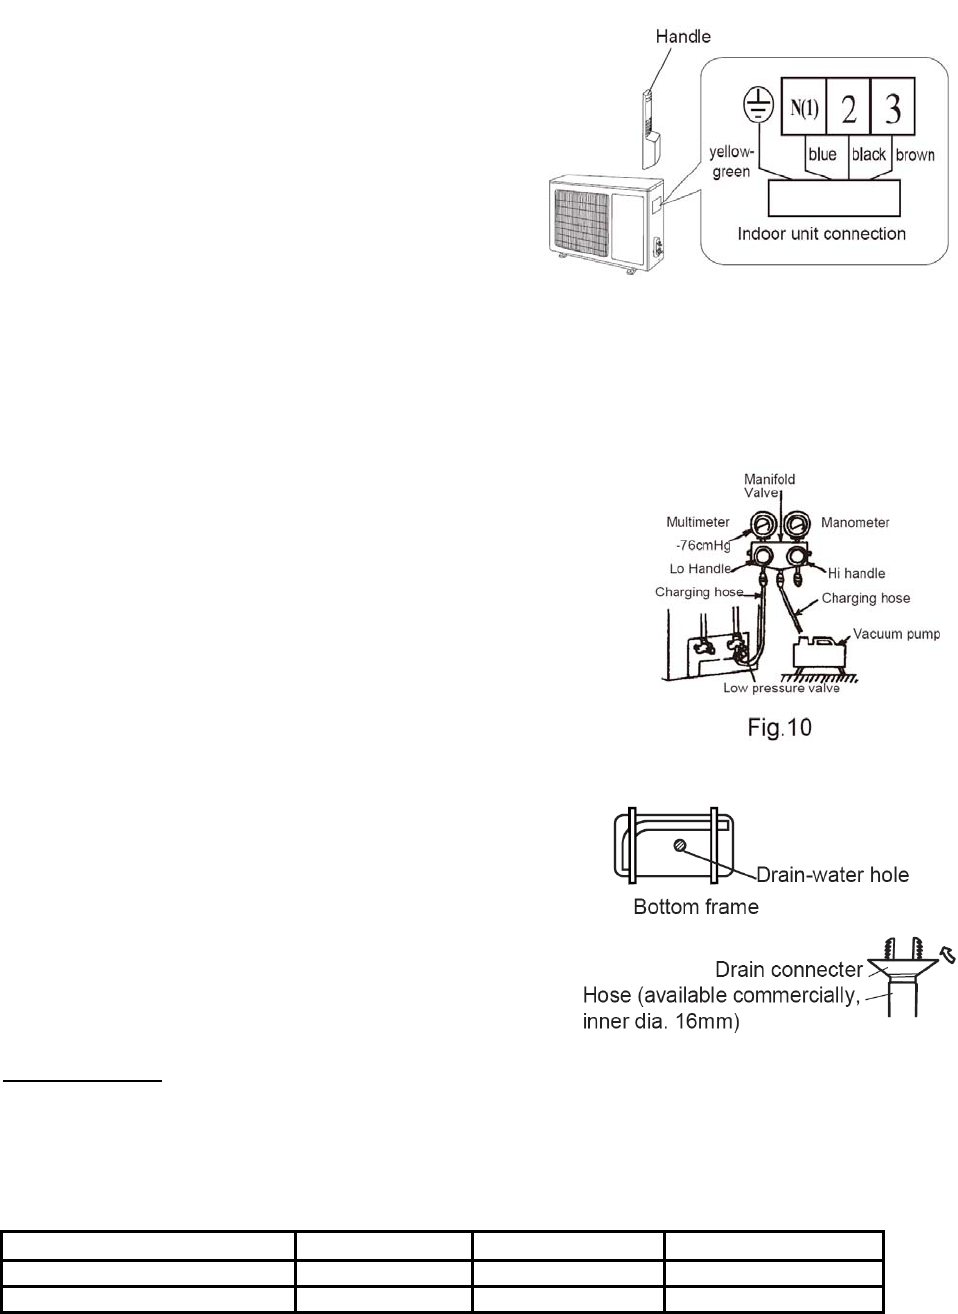
Air Purging and Leakage Test
(1) Connect charging hose of manifold valve to charge end of low pressure valve (both high/low pressure
valves must be tightly shut).
(2) Connect joint of charging hose to vacuum pump.
(3) Fully open the handle of Lo manifold valve.
(4) Open the vacuum pump for vacuumization. At the beginning,
slightly loosen joint nut of low pressure valve to check if there is air
coming inside. (If noise of vacuum pump has been changed, the
reading of multimeter is 0) Then tighten the nut.
(5) Keep vacuuming for more than 15mins and make sure the reading
of multi-meter is -1.0 x 10 pa (-76cmHg).
(6) Fully open high/low pressure valves.
(7) Remove charging hose from charging end of low pressure valve.
(8) Tighten lid of low pressure valve. (As shown in Fig.10)
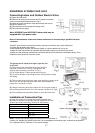
Outdoor Condensate Drainage (only for Heat pump unit)
During heating operation, the condensate and defrosting water
should be drained out reliably through the drain hose.
Install the outdoor drain connector in a Ø 25 hole or Ø 42 hole
on the base plate and attach the drain hose to the connector
so that the waste water formed in the outdoor unit can be
drained out .The hole diameter 25 or 42 must be plugged.
Whether to plug other holes will be determined by the dealers
according to actual conditions.
(The figures in this manual may be different with the material
objects, please refer to the material objects for reference)
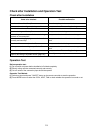
Important Notice
: All models are pre-charged with R410A refrigerant for a standard pipe run of 5 to 8
meters between outdoor and indoor unit.
For pipe runs over 8 meters additional R410A will need to be added as per the table below.
For pipe runs less than 5 meters the total charge will need to be reduced as per the table below.
Note: The only method when reducing the refrigerant charge of R410A is to reclaim the entire refrigerant
and then to weigh in a re-calculated charge of R410A based on the reduced pipe
run.
Pipe length
5~8m: less than 5m: more than 8m:
9K, 12K NJC No change reduce 20g/m Add 20g/m
18K, 24k, 28k NJC No change reduce 50g/m Add 50g/m