


CONSIGNES D’UTILISATION
OPERATING INSTRUCTIONS
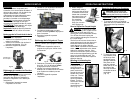
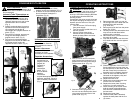
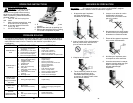
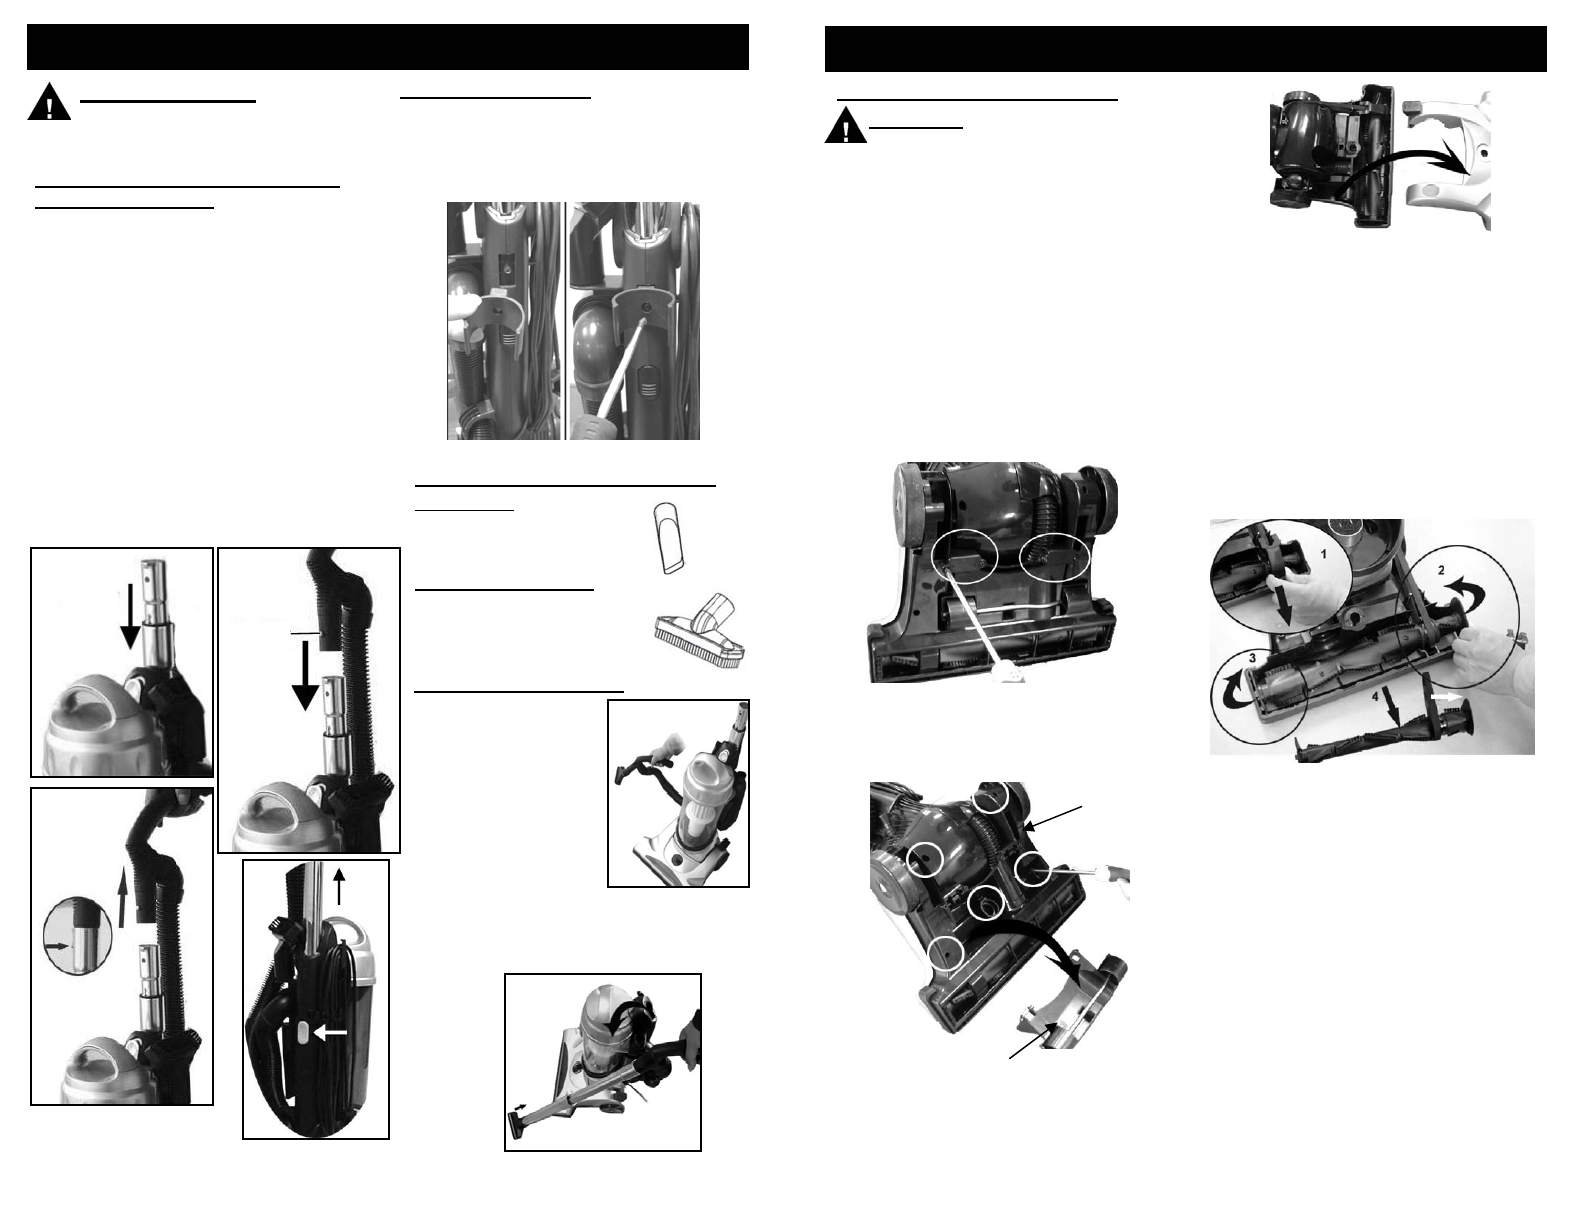
5. With the unit still lying down, turn
the unit over and lift the power head
cover starting from the back of the
power head. (Fig. 27)
6. Remove the belt cover (Fig. 28, #1)
7. Lift the right side of the brush bar first
and then lift the left hand side.
(Fig. 28 #2, #3)
8. Remove the brush bar from the power
head. (Fig. 28, #4)
9. Carefully remove any belt residue that
may exist in the belt area before
replacing with a new belt.
10. Remove the worn or broken belt from
the motor drive shaft.
11. Loop the new belt first over the motor
drive shaft and then over the agitator
pulley.
Fig. 27
Fig. 28
12. Insert the right side of the brush bar in
first by placing the end cap down into
the slot and then do the same with the
left side. Press firmly to make sure
that each end is completely inserted.
13. Check to make sure that the belt is
centered on the agitator pulley and
that the brush bar turns.
14. Replace the belt cover.
15. Replace the power head cover and
turn the unit over carefully.
16. Replace the lower plate, screwing
in the four (4) outer screws first.
17. When screwing in the center screw,
hold the carpet height adjustment
knob from the outside and screw in
the last screw.
18. Replace the lower plate.
19. Once the lower plate is attached,
replace the base plate with the four
(4) screws.
9
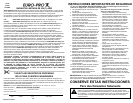
Base Plate
Lower Plate
Fig. 26
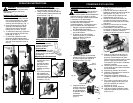
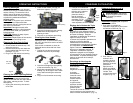
WARNING: To reduce the risk of
electric shock, the power cord must
be disconnected before removing the
dust cup, HEPA filter,changing the filters
or performing maintenance/trouble
shooting checks.
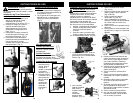
Occasionally the power nozzle drive belt
will require changing, the frequency will
depend upon the amount of use your
vacuum sees.
1. Turn the vacuum "Off" and unplug
from power supply.
2. Turn the vacuum upside down on a
flat level surface.
3. Using a Philips screw driver,
remove the four (4) screws that
attach the base plate to the lower
plate. (Fig. 25)
Fig. 25
Cleaning & Changing the Belt
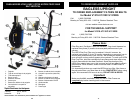
Pose des Accessoires
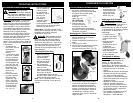
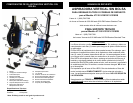
1. Pour attacher les
accessoires à la
poignée, retirez la
poignée de
l’appareil et
insérez-y
l’accessoire
désiré. (Fig. 7)
2. Si vous désirez
attachez
l’accessoire
au tube télescopique pour une
meilleure amplitude, retirez le
tube et insérez-y l’accessoire.
(Fig. 8)
AVERTISSEMENT: Retirez
toujours la fiche d’alimentation de la
prise murale avant d’installer ou de retirer
des accessoires.
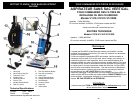
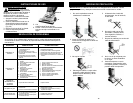
Insérez le Tube Télescopique au
Corps de l’appareil
1. Insérez le tube télescopique dans
l’ouverture située sur le dessus de
l’appareil. Assurez-vous que le tube
s’emboîte bien dans l’ouverture.
(Fig. 1)
2. Insérez la poignée dans l’ouverture
supérieure du tube télescopique en
vous assurant que la tige de
verrouillage de la poignée est bien en
place. (Fig. 2)
3. Pour retirer la poignée, appuyez sur
sa tige de verrouillage et tirez la
poignée vers le haut. (Fig. 3)
4. Pour retirer le tube télescopique,
appuyez sur le bouton de relâche de
la poignée situé à l’arrière de
l’appareil et levez le tube. (Fig. 4)
Fig. 7
Fig. 8
Fig. 5
Fig. 6
Fig. 1 Fig. 2
Fig. 3
Fig. 4
Tube
télescopique
Tige de
verrouillage
de la
poignée
Lever
Pousser
Lever
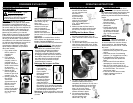
Pose de l’étrangleur
1. Placez l’étrangleur dans la fente
située à l’arrière de l’aspirateur (Fig. 5).
2. À l’aide d’un tournevis Philips et la vis
fournie, attachez l’étrangleur à
l’aspirateur (Fig. 6).
Utilisation avec les Accessoires
Suceur Plat
Pour radiateurs, fissures,
coins, plinthes et entre les
coussins.
Brosse à Épousseter
Pour les meubles, les stores
vénitiens, les livres,
les abat-jour et les tablettes.
4. After you have removed the base
plate, remove the remaining five (5)
screws from the lower plate using a
Philips screw driver. (Fig. 26)
28