


OPERATING INSTRUCTIONS
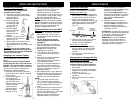
Charging Your Vacuum Cleaner
3
Before using the vacuum, charge the
vacuum cleaner for a minimum of 20
hours.
NOTE: Ensure that the On/Off switch
on the hand vac and on the floor brush
is in the “Off” position before charging.
NOTE: The power unit/hand vac does not
have to be in the power unit/hand vac
receptacle to charge the battery.
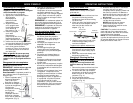
1. Place the vacuum near an electrical
power outlet (120 V., 60 Hz.) and plug
in the charger.
2. Connect the charger to
the charging jack.
The charging indicator
light will shine red to
indicate that the vacuum
cleaner is properly
connected to the
charger and that
the unit is being
charged. (Fig. 3)
3. The normal full charging time for this
vacuum is 20 hours. The vacuum
cleaner will run for maximum
operational time only if it has been
fully charged. To fully charge the unit,
run the vacuum cleaner until it stops,
then fully recharge the battery.
NOTE:
Peak performance may only be
realized after the unit has been charged
and discharged two (2) or three (3) times.
NOTE: The power unit/hand vac and the
floor brush will not operate when the
charger is plugged into the unit.
To Maximize the Life of your NiCd
Batteries
1. Charge for a minimum of 20 hours
before initial use. Failure to do so
will reduce the product’s battery life
significantly.
2. Do not store the unit with the
charging adaptor attached and
plugged in.
3. Only recharge when the batteries
are fully discharged (or as close to
fully discharged as possible).
4. Do not store in areas of high
temperature or humidity.
5. Fully discharge, then completely
re-charge the unit at least once a
month.
6. After three (3) months of storage,
the product should be fully
discharged and then recharged to
maximize battery power.
7. Use only the charger supplied with
the product. If other chargers are
used, the batteries can fail causing
damage to the battery, product or
personal property.
8. NiCd batteries have a long useful life
but at some time they will need to be
replaced. To purchase replacement
batteries visit www.sharkvac.com.
NOTE:
1. The on/off switch must be in the
“OFF” position in order to charge
the unit. If the charging indicator does
not light, depress the on/off switch
once.
2. If the product has never been used or
has been stored for an extended
period of time without use – it will take
several complete charge and
discharge cycles to realize the full
operational time of your product.
Fig. 3
Charging
Jack
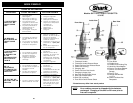
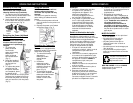
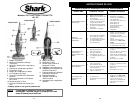
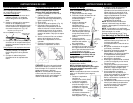
Fig. 1
Bolts
Hex
Nuts
Fig. 2
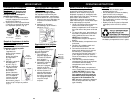
Assembling the Handle
Note: Ensure that the unit is not
connected to the charger before
assembling the handle.
1. Remove the screws on the handle.
2. Press the telescopic handle release
button and lift the
telescopic tube up.
3. Align the opening
on the handle with
the telescopic tube
on the power unit
housing. (Fig. 1)
4. Slide the handle
onto the telescopic
tube until it is
seated firmly into
position.
5. Insert the hex nuts into the
openings on the side of the
vacuum. (Fig. 2)
6. With the help of the eraser end of a
pencil, hold the hex nut in while
screwing the bolts in on the other side.
(Fig. 2)
Caution: Do not over tighten. Over
tightening could strip the screw holes.
Do not operate the vacuum without the
handle screws in place.
MODE D’EMPLOI
5. Rincez le filtre à l’eau froide et
attendez qu’il soit complètement sec
avant de le remettre dans la
coupelle. Ne nettoyez pas le filtre
de coupelle à poussière à la laveuse.
N’utilisez pas de séchoir à cheveux
pour le sécher. Séchez à l’air
seulement.
6. Replacez le filtre de coupelle à
poussière dans son compartiment.
N’utilisez jamais l’aspirateur sans le
filtre de coupelle à poussière.
7. Attachez la coupelle à poussière à
l’aspirateur sans fil.
ATTENTION : La trappe de succion doit
être ouverte et libre de toute obstruction,
en tout temps. Sans quoi, le moteur
surchauffera et s’endommagera.
REMARQUE: Il est recommandé de
remplacer le filtre de la coupelle à
poussière tous les trois (3) à six (6)
mois, selon l’emploi, pour assurer un
rendement optimal à l’appareil.
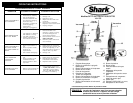
Fig. 11
24
Fig. 12
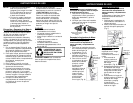
Emploi du suceur plat
Le suceur plat s’emploie avec le boyau
souple ou directement sur l’aspirateur.
Mode d’emploi du boyau :
1. Retirez l’aspirateur du réceptacle du
bloc-moteur et le boyau souple de sa
pince de retenue, située à l’arrière.
2. Insérez une extrémité du boyau
souple dans l’adaptateur de boyau de
l’aspirateur. Insérez l’autre extrémité
dans l’adaptateur du suceur plat.
(Fig. 10)
Suceur plat
Adaptateur
de boyau
du suceur plat
Adaptateur
de boyau
de l’aspirateur
Fig. 10
3. Insérez le suceur plat, qui se trouve
dans le chariot de chargement
intégré, dans son adaptateur.
Pour poser sur l’aspirateur:
1. Retirez l’aspirateur du réceptacle
du bloc-moteur et le boyau souple
de sa pince de retenue, située à
l’arrière.
2. Posez le suceur plat directement
sur l’aspirateur.
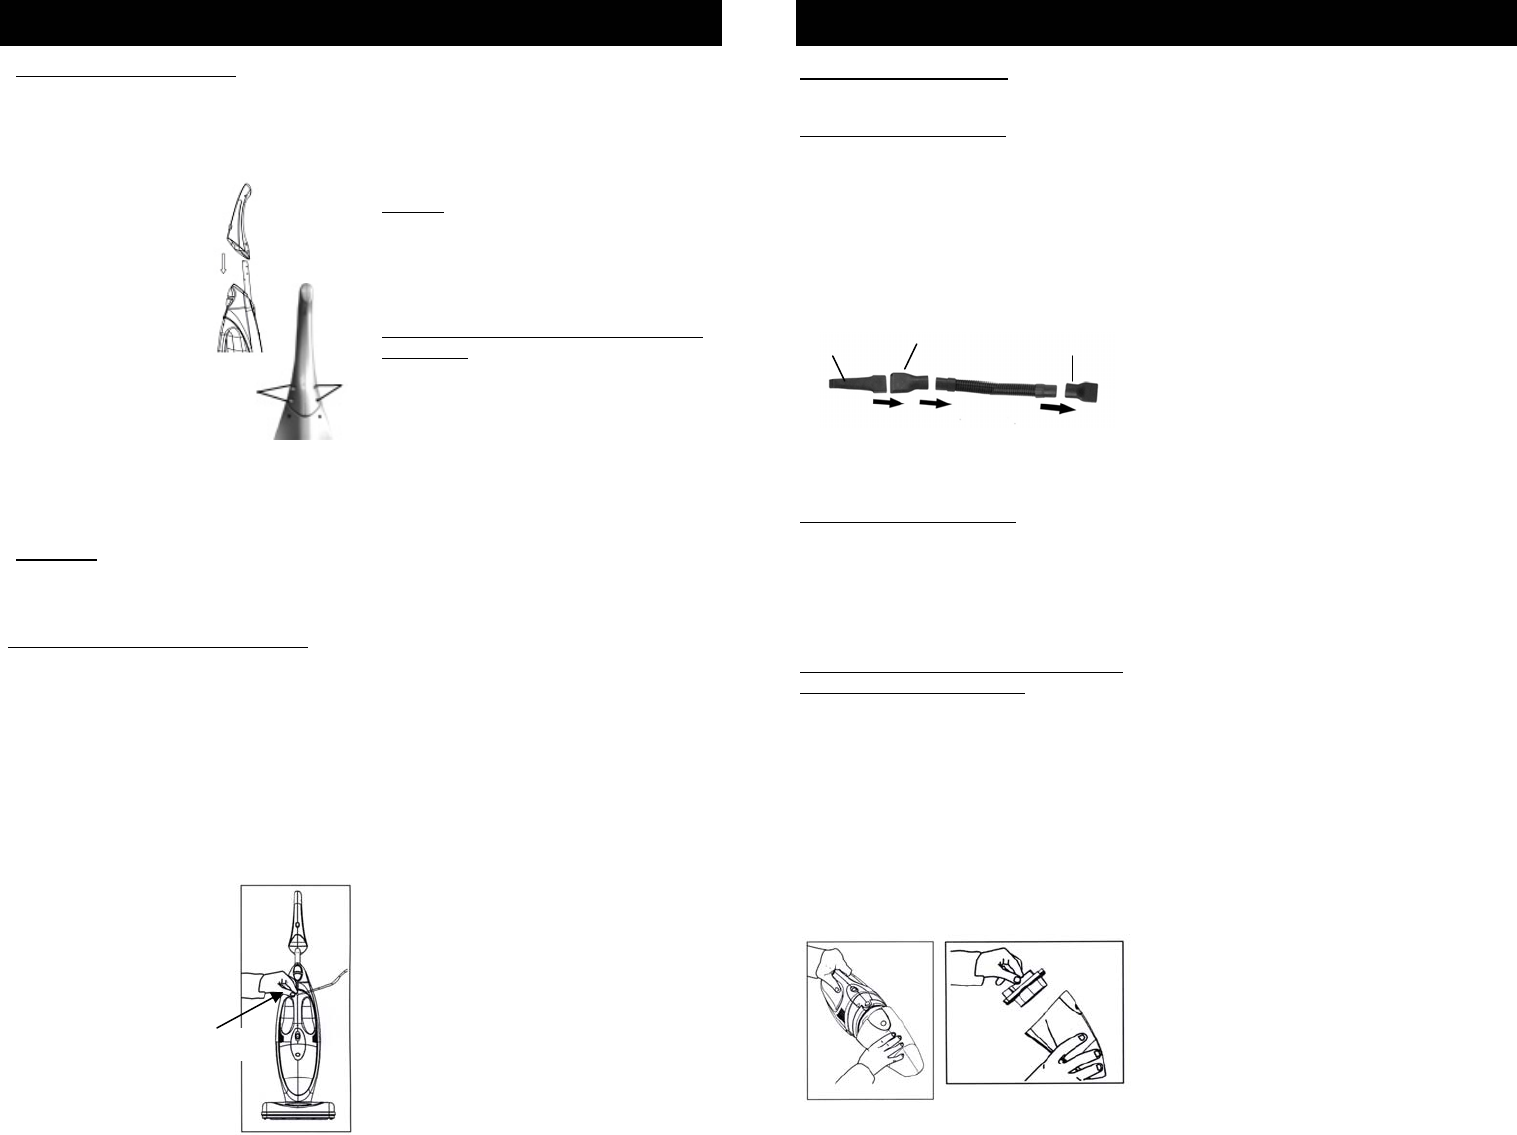
Changement et nettoyage du filtre
de coupelle à poussière
Afin d’obtenir un rendement supérieur,
videz la coupelle à poussière et
nettoyez-la après chaque utilisation.
1. Retirez l’aspirateur du réceptacle du
bloc-moteur.
2. Pour retirer la coupelle à poussière,
appuyez sur son bouton de relâche
et retirez-la. (Fig. 11)
3. Retirez le filtre de coupelle à
poussière.
4. Videz la poussière de la coupelle.
(Fig. 12)