


TOLL FREE: 1-800-798-7398
15www.sharkclean.com
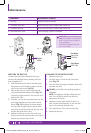
Fig. 25
Fig. 24
Fig. 26
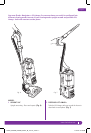
CLEANING THE POST-MOTOR HEPA FILTER
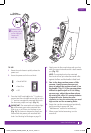
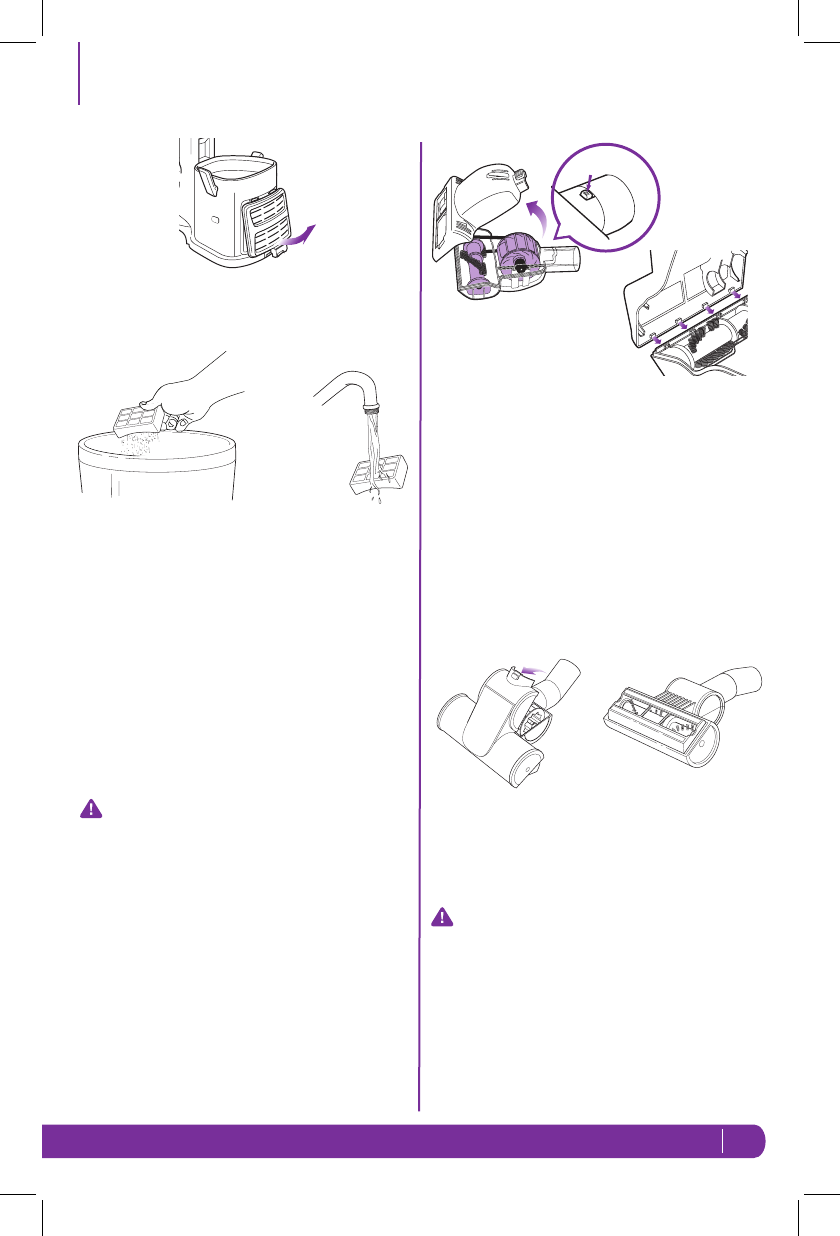
1 Remove the filter cover from the front of the
vacuum by pulling up on the tab and pulling the
cover away from the vacuum. (Fig. 24)
2 STake out the HEPA filter by pulling it straight out.
3 Turn the filter over so that the dirty side is on
the bottom and vigorously tap it clean against a
garbage can to remove any dust. (Fig. 25)
4 Wash the filter under the tap using lukewarm
water with the dirty side face down until the water
runs clear. (Fig. 26)
DO NOT put the filter in the washing machine or
dishwasher.
NOTE: The material in the filter will discolor over
time. This is NORMAL and will not affect the
performance of the filter.
5 Allow the filter to air dry for 24 hours. Do not use
a hair dryer or other heating methods to dry.
6 Once the HEPA filter is dry, replace it back into the
vacuum.
7 Replace the cover by inserting the two tabs into
the holes at the top and then swinging the cover
down until it clicks into place.
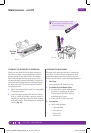
Fig. 30
Fig. 29
a
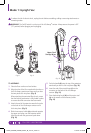
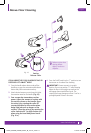
CLEANING THE POWER BRUSH (model NV356E,
NV356K, NV357 only)
1 Slide the locking latch (a) forward and gently tilt
brush housing upward to open. (Fig. 29)
IMPORTANT: DO NOT force; it will not open all
the way.
2 Carefully remove any blockage or debris.
3 Turn the power brush over to inspect the rotating
brush and cut away any build-up of hair or string
wrapped around the rotating bristle brush with
scissors. (Fig. 30)
4 Push the housing back down and slide the locking
latch backward to lock.
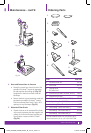
CLEANING THE POWER BRUSH
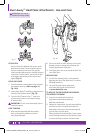
(model NV355 only)
1 Slide the locking latch (a) forward and tilt the
bottom cover upward to remove. (Fig. 27)
2 Carefully remove any blockage or debris and
cut away any build-up of hair or string wrapped
around the rotating bristle brush with scissors.
3 To reassemble, insert the tabs on the front edge
of the bottom cover into the matching holes in the
top half and tilt it back down until it clicks into
place. (Fig. 28)
Fig. 28
Fig. 27
a
Maintenance - cont’d
NV355_NV356E_NV356K_NV357_IB_110714_3.indd 15 11-07-20 9:32 AM