


Door Closer Installation Manual
Door Closer Installation Manual
SECO-LARM U.S.A., Inc.
Fig. 2 -- Parts List
Fig. 3
2 x 3/16" UNC Arm Door Frame Bracket Screws
4 x 3/16" - 24 Door Closer Body Attachment Screws
1 x Arm Axle Screw
1 x Arm Assembly
1 x Axle Cap
1 x Cover Plate
Installation:
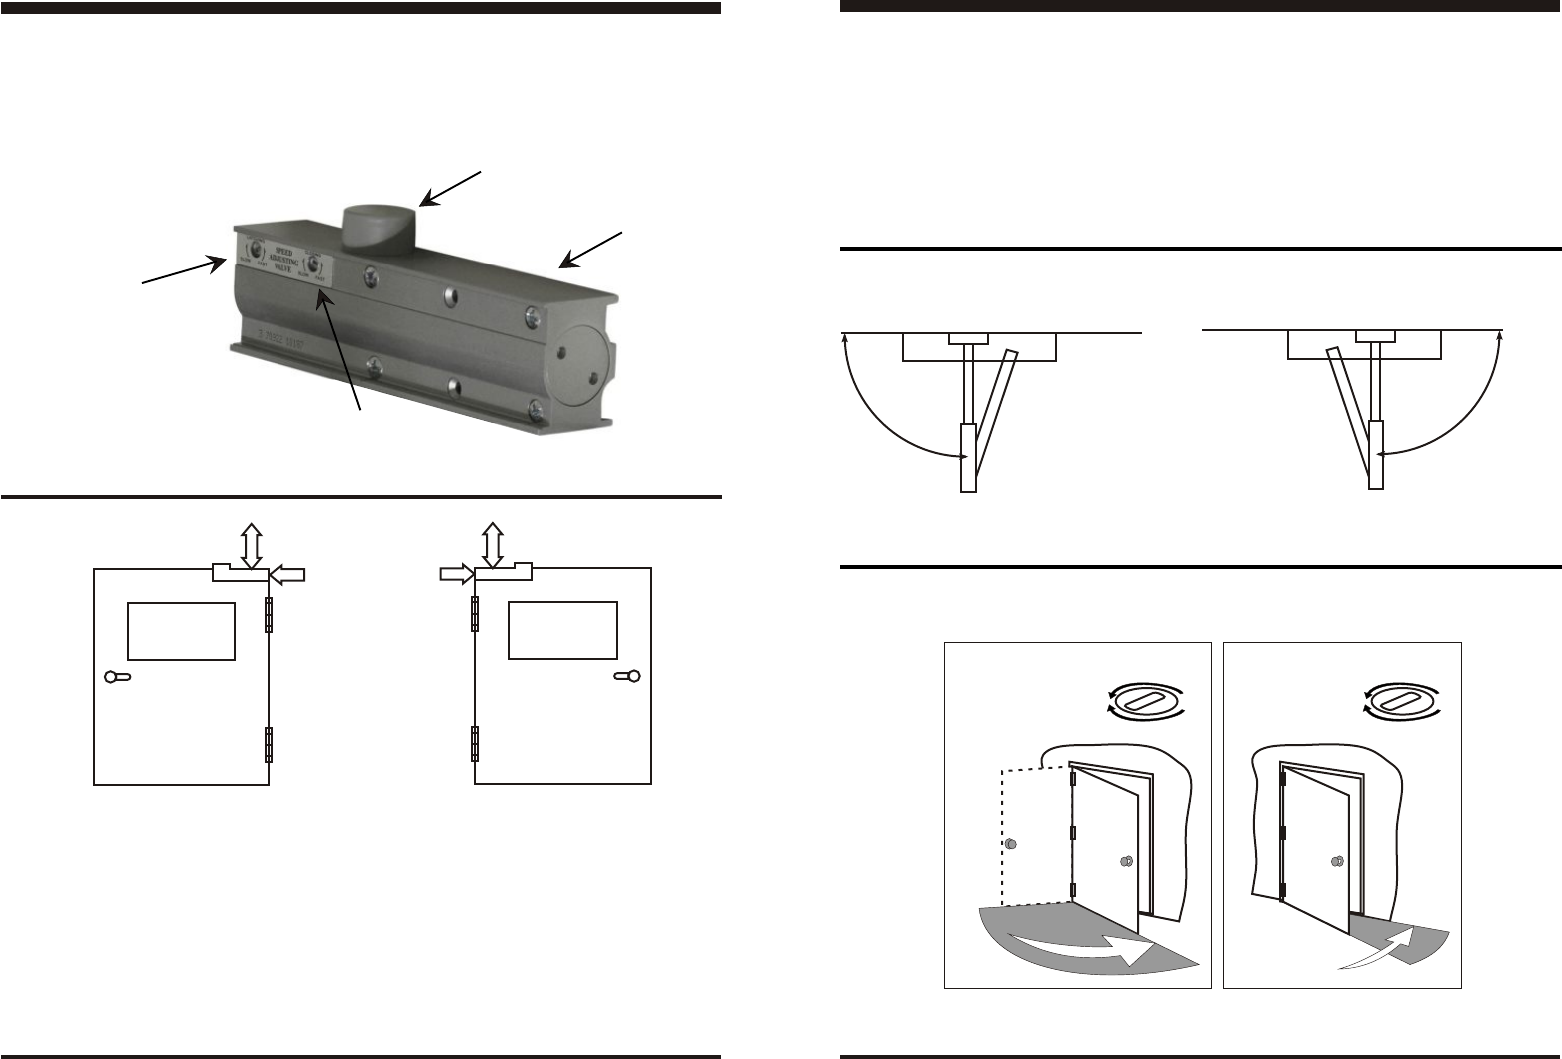
1. Determine the type of door swing (see Fig 3).
2. Select the appropriate template (Right Hand or Left Hand). Attach the template to the door.
3. Mark the mounting holes. 4 holes for the door closer body and 2 holes for the door frame arm
bracket.
4. Drill pilot holes for the screws.
5. Attach the door closer to the door and frame.
6. Adjust the door closer (see caution at the front of the manual).
Adjustment:
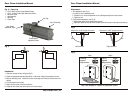
1. Arm adjustment: (see Fig. 4).
•
Loosen jam nut on adjustment arm.
•
Thread arm in or out until adjustment arm is at 90 degree angle from the door frame.
•
Tighten jam nut.
2. Closing speed adjustment: (see Fig. 5)
•
Adjust sweep speed to the desired closing speed.
•
Adjust latch speed so that just before the door closes all the way it slows just before latching.
Left-Hand Door Right-Hand Door
Left-Hand Door Right-Hand Door
Fig. 4
Fig. 5
Note: See template for location of adjustment screws.
Step 1 Step 2
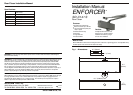
Door Closer Body
Axle Cap
Latch Speed
Adjustment Screw
Sweep Speed
Adjustment Screw
Sweep
speed
adjustment
Latch
speed
adjustment
Faster
Slower
Faster
Slower
o
90
o
Adjust arm to 90 angle from door
o
90
o
Adjust arm to 90 angle from door