16
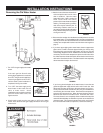
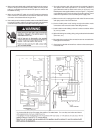
4. Make sure that the plastic tubing is still attached from the air pressure
switch to the port on the blower housing. Make sure the plastic
tubing is not folded anywhere between the pressure switch and
the blower housing.
5. Make sure the ON/OFF switch is in the OFF position and that the
outer harness is connected from the blower control box to the
connector on the bottom side of the gas valve.
6. If the outer harness is not factory installed, make sure the ON/OFF switch
is in the OFF position and then connect the harness from the blower
control box to the connector on the bottom side of the gas valve.
7. Do not plug in power cord until vent system is completely installed.
This power vent heater operates on 110-120 Vac, therefore a
grounded outlet must be within reach of the six (6) foot (1.8 m)
flexible power cord supplied with the unit (see Figure 1). The power
cord supplied may be used only where local codes permit. If local
codes do not permit the use of a flexible power supply cord:
a.) Make sure the unit is unplugged from wall outlet. Remove screws
and open panel on front of control box.
b.) Cut the flexible power cord, leaving enough to be able to make
connections and remove the strain relief fitting from box.
c.) Install suitable conduit fitting in side of enclosure and then follow
(d.) and (e.) below.
d.) Splice field wiring into existing wiring using code authorized method
(wire nuts, etc.).
e.) Be certain that neutral and live connections are not reversed when
making these connections.
f.) Close panel on the side of control box, make sure that access panel
is secured shut.


