


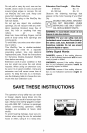
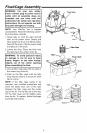
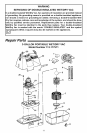
FilterAssembly
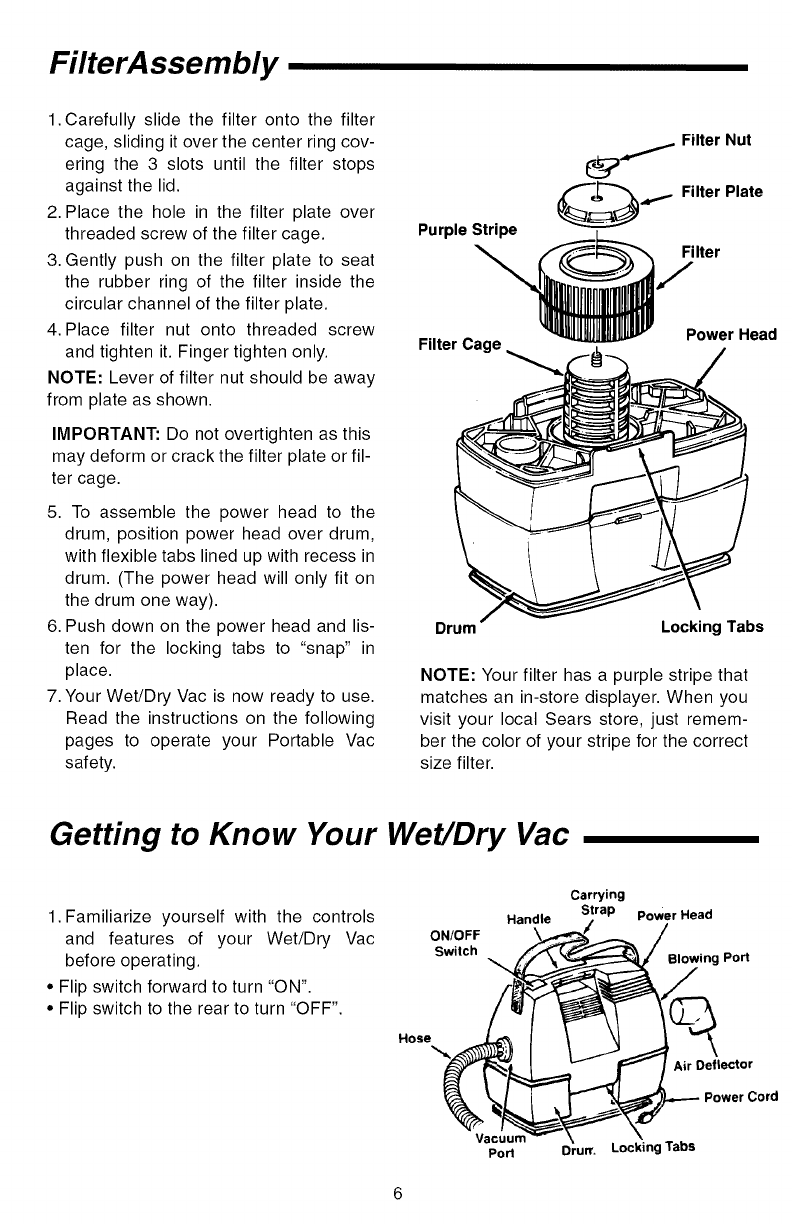
1.Carefully slide the filter onto the filter
cage, sliding it over the center ring cov-
ering the 3 slots until the filter stops
against the lid.
2. Place the hole in the filter plate over
threaded screw of the filter cage.
3. Gently push on the filter plate to seat
the rubber ring of the filter inside the
circular channel of the filter plate.
4. Place filter nut onto threaded screw
and tighten it. Finger tighten only.
NOTE: Lever of filter nut should be away
from plate as shown.
IMPORTANT: Do not overtighten as this
may deform or crack the filter plate or fil-
ter cage.
5. To assemble the power head to the
drum, position power head over drum,
with flexible tabs lined up with recess in
drum. (The power head will only fit on
the drum one way).
6. Push down on the power head and lis-
ten for the locking tabs to "snap" in
place.
7. Your Wet/Dry Vac is now ready to use.
Read the instructions on the following
pages to operate your Portable Vac
safety.
Purple Stripe
\
Filter Cage
_ Filter Nut
_..,... Filter Plate
Filter
Power Head
Drum Locking Tabs
NOTE: Your filter has a purple stripe that
matches an in-store displayer. When you
visit your local Sears store, just remem-
ber the color of your stripe for the correct
size filter.
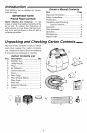
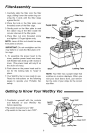
Getting to Know Your Wet/Dry Vac
1. Familiarize yourself with the controls
and features of your Wet/Dry Vac
before operating.
• Flip switch forward to turn "ON".
• Flip switch to the rear to turn "OFF".
ON!OFF
Switch
Hose
Handle
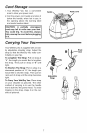
Carrying
Strap
Vacuum
Port Drurr.
Power Head
Blowing Port
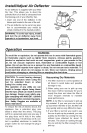
Air Deflector
Cord
Locking Tabs