


CLEANING
Any debris or soot from the chimney or flue or, any soot that is formed during operation should be removed.
Should any soot accumulation become excessive, the appliance should be allowed to cool completely before
removing the fuel effect pieces from the fire for cleaning. Cleaning should be carried out in a well-ventilated
area or in the open air, by gently brushing with the pieces held away from your face so that you avoid inhaling
the dust. We do not recommend the use of a normal domestic vacuum cleaner, which may blow dust back into
the air. If debris has located in the burner slots (both front and rear) it may be easily removed by using a small
piece of thin cardboard to ease out any foreign matter. Be sure to remove the cardboard after use.
NOTE: Should any ‘coals’ or the coal bed become damaged, lost or broken, only the correct replacements must be
obtained and fitted before the appliance is used. Extra coals etc. must not be added to the coal bed and the coal
must always be assembled as detailed.
The front & fret can be cleaned with a hand brush or, washed with soapy water. The brass front & fret can be
polished with an ordinary brass cleaner.
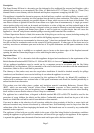
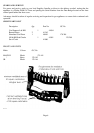
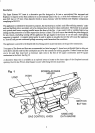
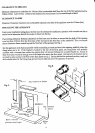
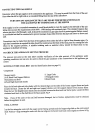
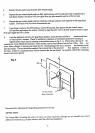
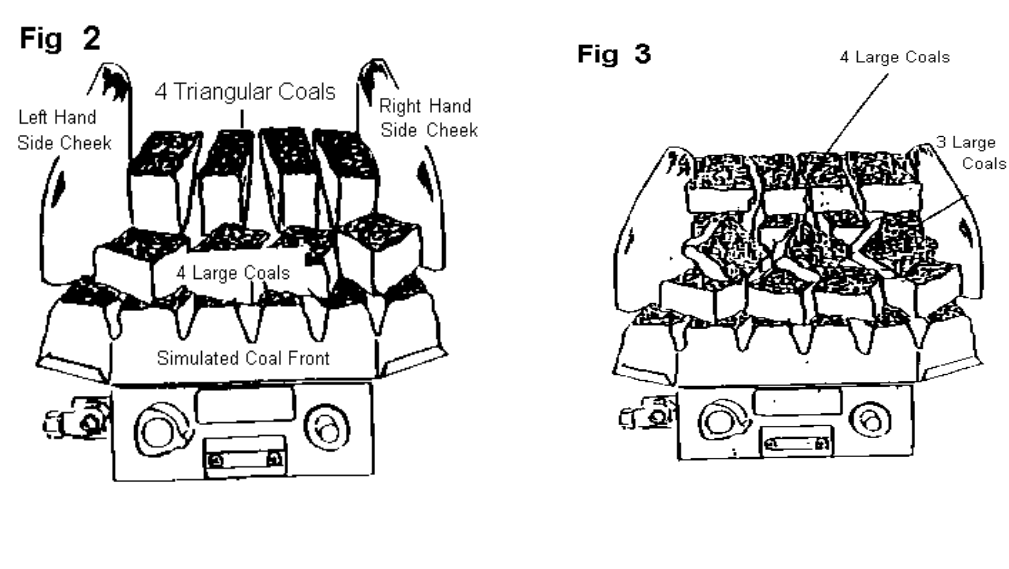
TO RE-LAY THE COAL BED (e.g. after cleaning) See figs 2,3,4 & 5.
Replace the two Tee shaped burner inserts ensuring that the base of the insert sits between the two parallel burner
ports. Stand the left and right hand side cheeks against the sides of the chairbrick and into the retaining flanges of
the appliance, then replace right and left hand rear coal supports ensuring that the rebate is facing downwards and
located over the fibre support channel flange. The correct location of the coal supports will be verified by the
presence of a gap approximately 6mm between the front edge of the coal support and the rear edge of the burner.
Note that there are two additional stops provided for the front edge of the coal supports. The front simulated coal
can now be positioned on the support platform immediately above the control panel. (Figs 2 & 3). Note that the
two front tapered edges of the simulated coal locate between the two raised flanges.
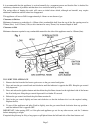
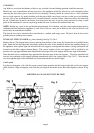
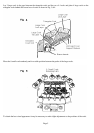
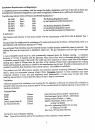
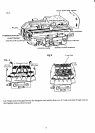
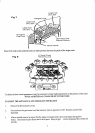
Coal Layout
Lay the four triangular coals with the square corner facing upwards and the longest edge laid on the coal support
shelf. Position 4 large rectangular coals with the rear edge on the burner insert and rotate slightly as shown in fig.
2.
ADDITIONAL COALS MUST NOT BE USED
Page 4