


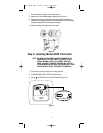
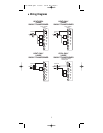
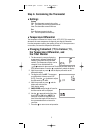
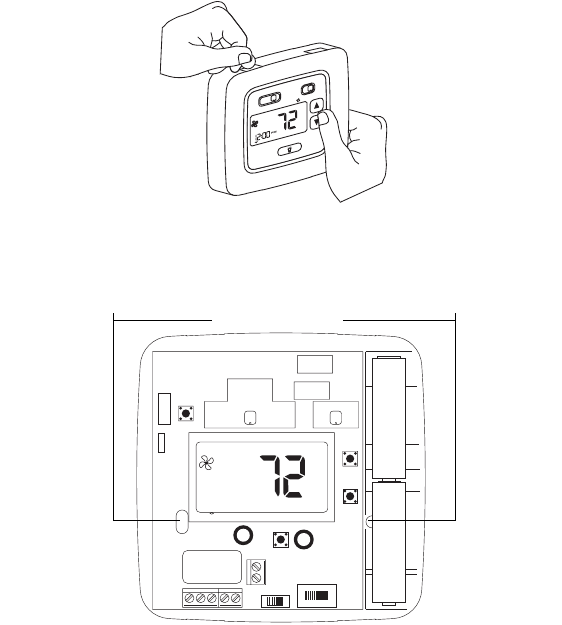
4. Remove the cover using a coin or screwdriver (Figure 3). Set aside.
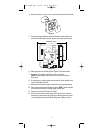
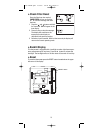
5. Place thermostat against the wall at desired location. Make sure
wires will feed through opening (Figure 4) on base of thermostat.
6. Mark placement of mounting holes (Figure 4). Set base aside.
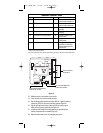
7. If mounting on drywall, tap plastic anchors into wall.
NOTE: Enclosed plastic anchors do not require a drilled hole
for drywall.
8. If mounting on a surface other than drywall, drill the marked holes
using a 3/16" (5mm) drill bit.
9. Align base with plastic anchors and feed wires through opening.
10. Secure base to wall with supplied screws. NOTE: The thermostat
will mount horizontally on a single gang junction box.
11. Strip end of wires 5/16” (8mm) if needed.
12. Terminal screws are already loose and ready for wire insertion.
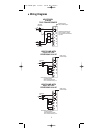
Insert wires into terminal strip (Figure 4) matching the label to the
corresponding terminal (see Wiring Diagrams). Tighten screws.
4
he
at off cool
hold
vac
prog
run/set
hold
tem
p
clock
set
auto on
M
O
N
°
F
Figure 3
RC
RH
GOBY1W1
ELEC GAS
NON_HP HP
°
F
+
–
+
–
Figure 4
Mounting Holes
110-1086B.qxd 3/8/05 10:26 AM Page 4