


SECTION 15: REMOVAL AND REPLACEMENT PARTS
29
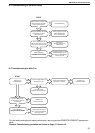
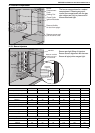
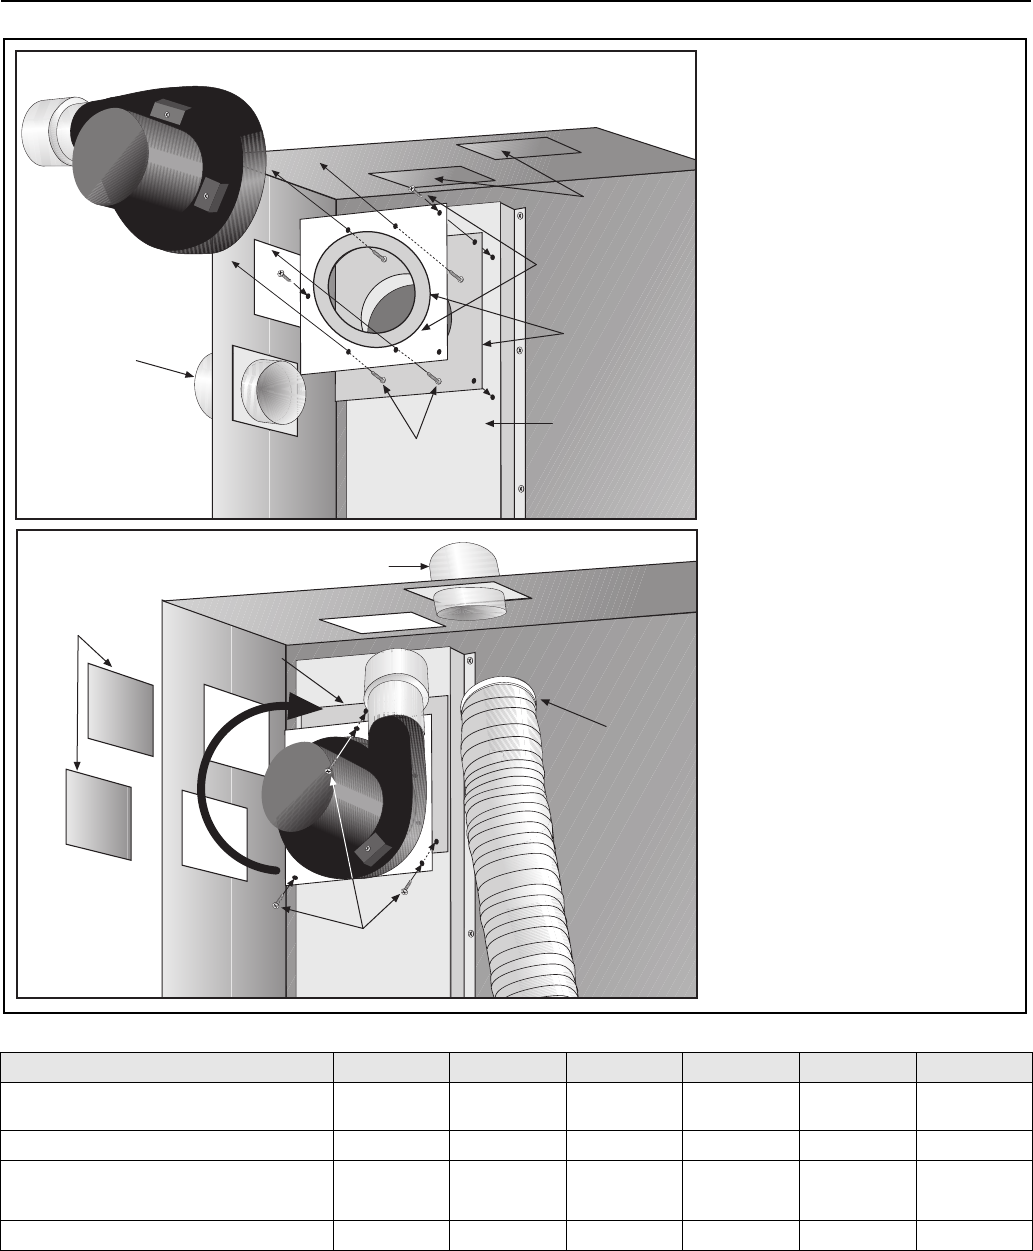
15.4 Flue Fan Vertical Installation
IT IS IMPORTANT THAT ONLY THE CORRECT FLUE FAN SPECIFIED FOR EACH MODEL TYPE IS
USED WHEN REPLACING THESE ITEMS.
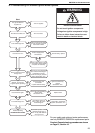
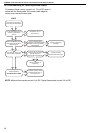
Carry out a commission after working on or changing a flue fan. See Page 18, Section 11.
MODEL CTCU-7 CTCU-11 CTCU-15 CTCU-22 CTCU-27 CTCU-32
Flue Fan
Fasco
7021-11767
Fasco
7021-11768
Fasco
7021-11769
Tor in
S6818
Sit Controls
P1210838
Sit Controls
P1210838
RG P/N 90710470 90710470 90710470 90710460 90710460 90710460
Air Plate mm Ø 35 44 57 64 109.2 109.2
in Ø 1. 3 8 1. 75 2.25 2.50 4.3 4.3
RG P/N 11111210 11112210 11113210 11114210 11115210 11115210
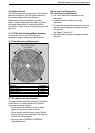
Gasket
Mounting Plate
to Vent Box
fixing screws
Intake &
Exhaust
Covers
Air Intake Adapter
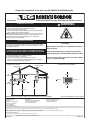
Flexible Duct
Vent Box
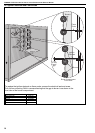
Gaskets
Mounting Plate
to Vent Box
fixing screws
Mounting Plate
to Flue Fan
fixing screws
Air Intake
Adapter
Intake &
Exhaust Covers
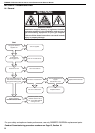
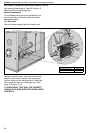
To remove the fan, remove 3
screws securing the fan and
mounting plate to the vent box.
To remove the fan from the
mounting plate, remove the 4
screws.
Refit in reverse order.
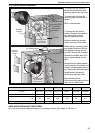
To change the flue and air
intake orientation from back to
top, remove the fan and
mounting plate as above.
Remove intake and exhaust
covers from top of the heater.
Rotate the fan, mounting plate
and gasket clockwise until the
flue adapter lines up with the
top hole. Secure with 3 screws.
Remove the flexible duct from
the air intake adapter on the
back.
Remove the air intake adapter
from the back of the heater and
install in the appropriate hole on
top. Reconnect the flexible duct.
Install intake and exhaust
covers over the back holes.
Ensure sealed joints.
Ensure mounting plate orifice is
clear and not obstructed.