


4
Rinnai Corporation RHFE-263FAⅡ Conversion Manual
Adjust Gas Pressure Settings
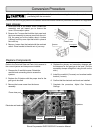
1. Turn off the gas and the power supply.
2. Hold both ends of the bottom cover (undercover
assembly) and pull toward you to remove the
cover. Cover snaps in place.
3. Remove the 7 screws that hold the front panel
and the louver assembly to remove panel from
the unit. Pull the panel out at the bottom about 4
inches (100 mm) and lift up over clips that hold it
in place at the unit’s top.
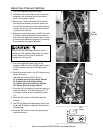
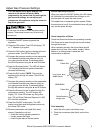
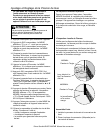
4. Remove two test point screws (1/8 NPT tap) with
3/16 Allen wrench and attach the manometer to
both test ports. Both ports must be used in order
to measure the differential pressure. Ensure that
the manometer is properly calibrated.
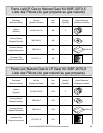
5. Turn on the gas and power supply to the
appliance. With the unit in the Off position, press
the SW1 switch at the top of PC board until it
beeps.
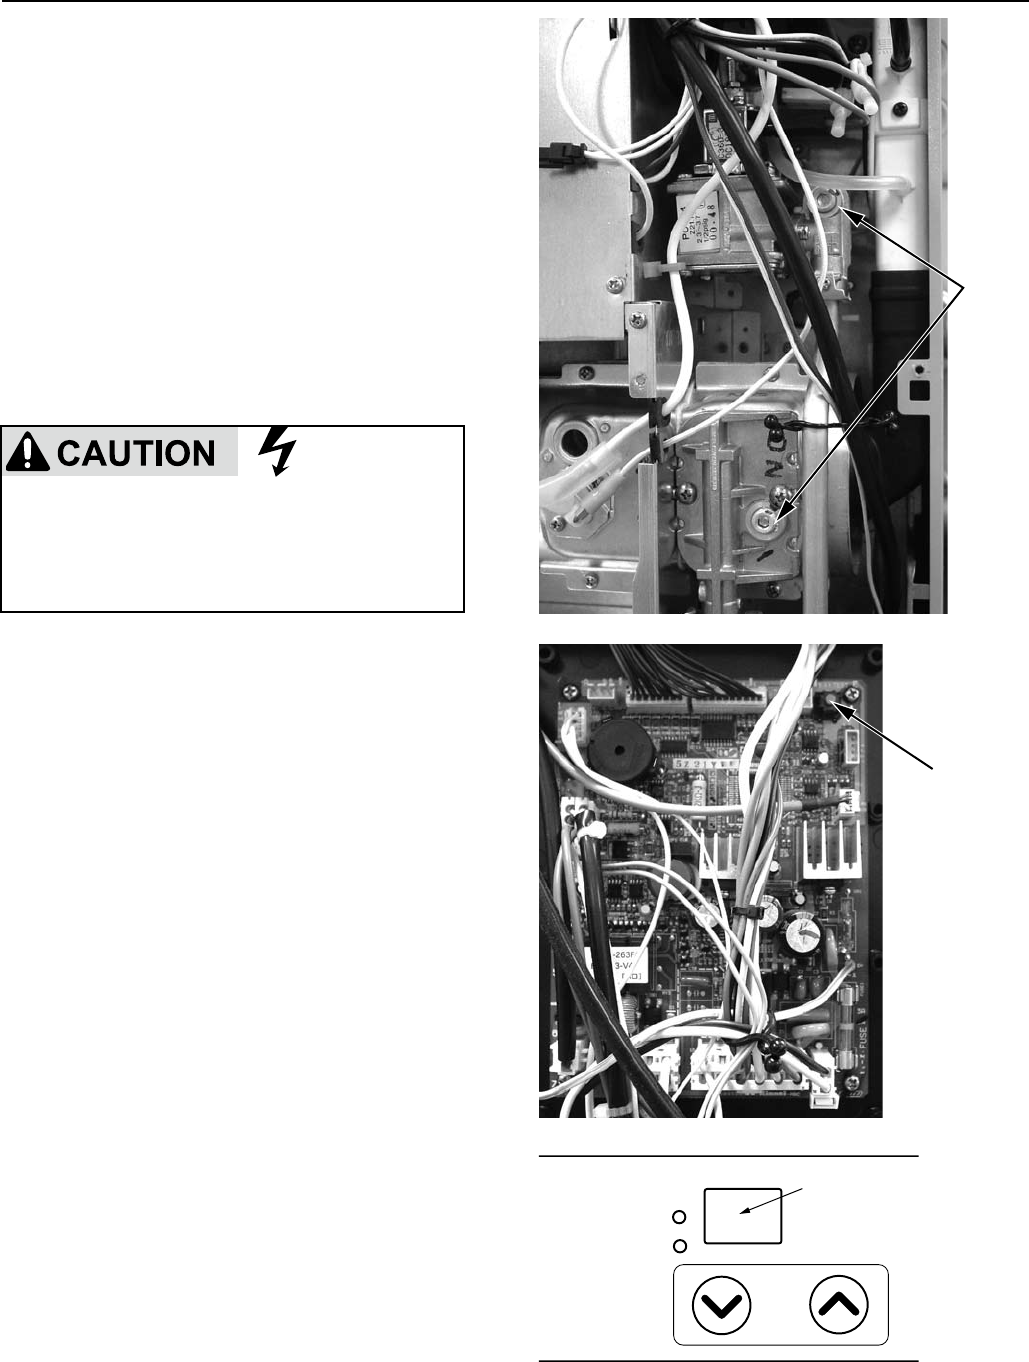
6. Select the correct code on the LED display using
▲ and ▼ buttons:
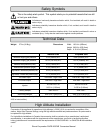
High altitude is above 2000 ft (610 m).
L1: Propane gas at low (sea level) altitude
L2: Propane gas unit at high altitude
A1: Natural gas at low (sea level) altitude
A2: Natural gas unit at high altitude
7. Press the SW1 test button to record the gas type
code into memory. The LED will display “F1”. If
not shown, use the ▲ and ▼ buttons to obtain
“F1”.
8. Press the SW1 switch to enter this code into
memory.
9. The LED will display the temperature scale. Use
the ▲ and ▼ buttons to select the Fahrenheit or
Celsius scale.
10.Press the SW1 switch to enter the temperature
scale into memory.
Test
points
SW1
Do not touch any other areas on the PC board
besides the “SW” switches while power is supplied
to the appliance. Parts of the PC board are
supplied with 120 volts AC.
LED
display