


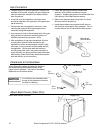
Rinnai Corporation EX17C / EX22C Manual 15
Installation Instructions
• A qualified service technician should install the
appliance and inspect it before use.
• If you move, check the gas type in your new area.
The local gas authority will be able to advise on
local regulations.
• The installation must conform with local codes or, in
the absence of local codes, with the National Fuel
Gas Code, ANSI Z223.1/NFPA 54, or the Natural
Gas and Propane Installation Code, CSA B149.1.
• A manufactured home (USA only) or mobile home
OEM installation must conform with the
Manufactured Home Construction and Safety
Standard, Title 24 CFR, Part 3280, or, when such a
standard is not applicable, the standard for
Manufactured Home Installations, ANSI/NCSBCS
A225.1, or the standard for Gas Equipped
Recreational Vehicles and Mobile Housing, CSA
Z240.4.
• The appliance, when installed, must be electrically
grounded in accordance with local codes or, in the
absence of local codes, with the National Electrical
Code, ANSI/NFPA 70, or the Canadian Electrical
Code, CSA C22.1.
• Appliance input ratings are based on sea level
operation and need not be changed for operation up
to 2000 ft (610 m) elevation. For operation at
elevations above 2000 ft (610 m), follow the
procedure in the section, Adjust Gas Pressure
Settings.
• The appliance and its appliance main gas valve
must be disconnected from the gas supply piping
system during any pressure testing of that system at
test pressures in excess of 1/2 psi (3.5 kPa).
• The appliance must be isolated from the gas supply
piping system by closing its equipment shut off valve
during any pressure testing of the gas supply piping
system at test pressures equal to or less than 1/2
psi (3.5 kPa).
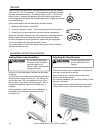
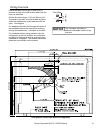
• If the flooring is carpet, tile, or other combustible
material other than wood, then the appliance must
be installed on a metal or wood panel extending the
full width and depth of the appliance.
• Rinnai suggests that a dedicated electrical circuit
with a 120V AC, 60 Hz, 10 amp power source be
used.
• This appliance discharges a large volume of warm
air next to the floor. Any particles in the air such as
cigarette smoke could cause discoloration in carpet.
The warm air flow could discolor nylon carpets
containing dyes or vinyl surfaces. To prevent
discoloration of the floor covering a mat may be
placed under the appliance which extends about 30
inches (750 mm) in front of it. (Wood is included in
the shipping container that can be cut to size and
used if needed.)
• This appliance is not designed to built in.
• This appliance is only for use with the type of gas
indicated on the rating plate. This appliance is not
convertible for use with other gases unless a
certified kit is used. If a conversion of the unit is
needed, conversions must be performed by a
qualified service provider at the owner’s expense.
• Follow the Adjust Gas Pressure Settings (page
28) and confirm that the correct code is used for
your gas type and altitude.
• This appliance must not be connected to a chimney
flue serving a separate solid-fuel burning appliance.
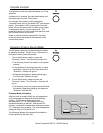
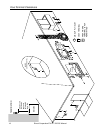
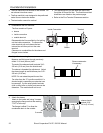
• Two 1/8 in test plugs are provided for testing of
manifold differential pressure. They are located on
the modulating gas valve and on the burner
manifold.
• The appliance should be correctly sized for the
space it is required to heat. It is recommended that
an industry standard BTU Heat Loss Calculation be
conducted to determine the proper sizing.
• Follow the installations instructions and those in
Care and Maintenance for adequate combustion
and ventilation air.
• The flow of combustion and ventilation air shall not
be obstructed.
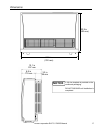
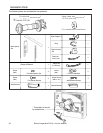
• Clearances to access the appliance during servicing
are 2 inches (50 mm) from the sides, 40 inches (1
m) from the front, and 9 inches (225 mm) from the
top.
• Locate the heater where outdoor air does not affect
the room air thermistor. Otherwise, the sensible
temperature control feature will be affected.
General Instructions
WARNING
Do not use substitute materials.
Use only parts certified with the appliance.
If installation is at a location above
2001 ft (611 m), then follow the Adjust
Gas Pressure Settings section.
If installation is at or below 2000 ft
(610 m) then the pressure settings do
not need to be adjusted.
NOTICE