


INSTALLING THE FAN - HUGGER STYLE
NOTE:
The S hook is to be used for hugger style mounting.
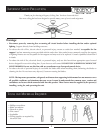
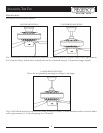
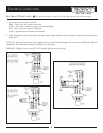
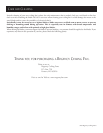
1. Remove the plastic trim ring from the canopy to expose the 6 mounting holes. The downrod, ball and cotter pin will
not be used for this mounting (Fig. 1).
2. Feed fan wires through the canopy and position the canopy over the mounting collar on top of the fan. The collar's 2
security screws will not be used and can be turned all the way into the collar to make attaching the canopy easier.
3. Align the canopy on top of the fan so the 3 large holes are over the 3 screws holding the collar to the fan. The 3 small
holes will then be aligned with the 3 open holes in the top of the fan.
4. Securely attach the canopy to the top of the fan using the 3 hugger mounting screws provided.
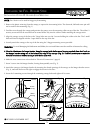
WARNING:
To avoid damaging the blade arms and blades, do not install them onto fan until fan is fastened to ceiling.
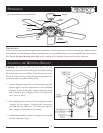
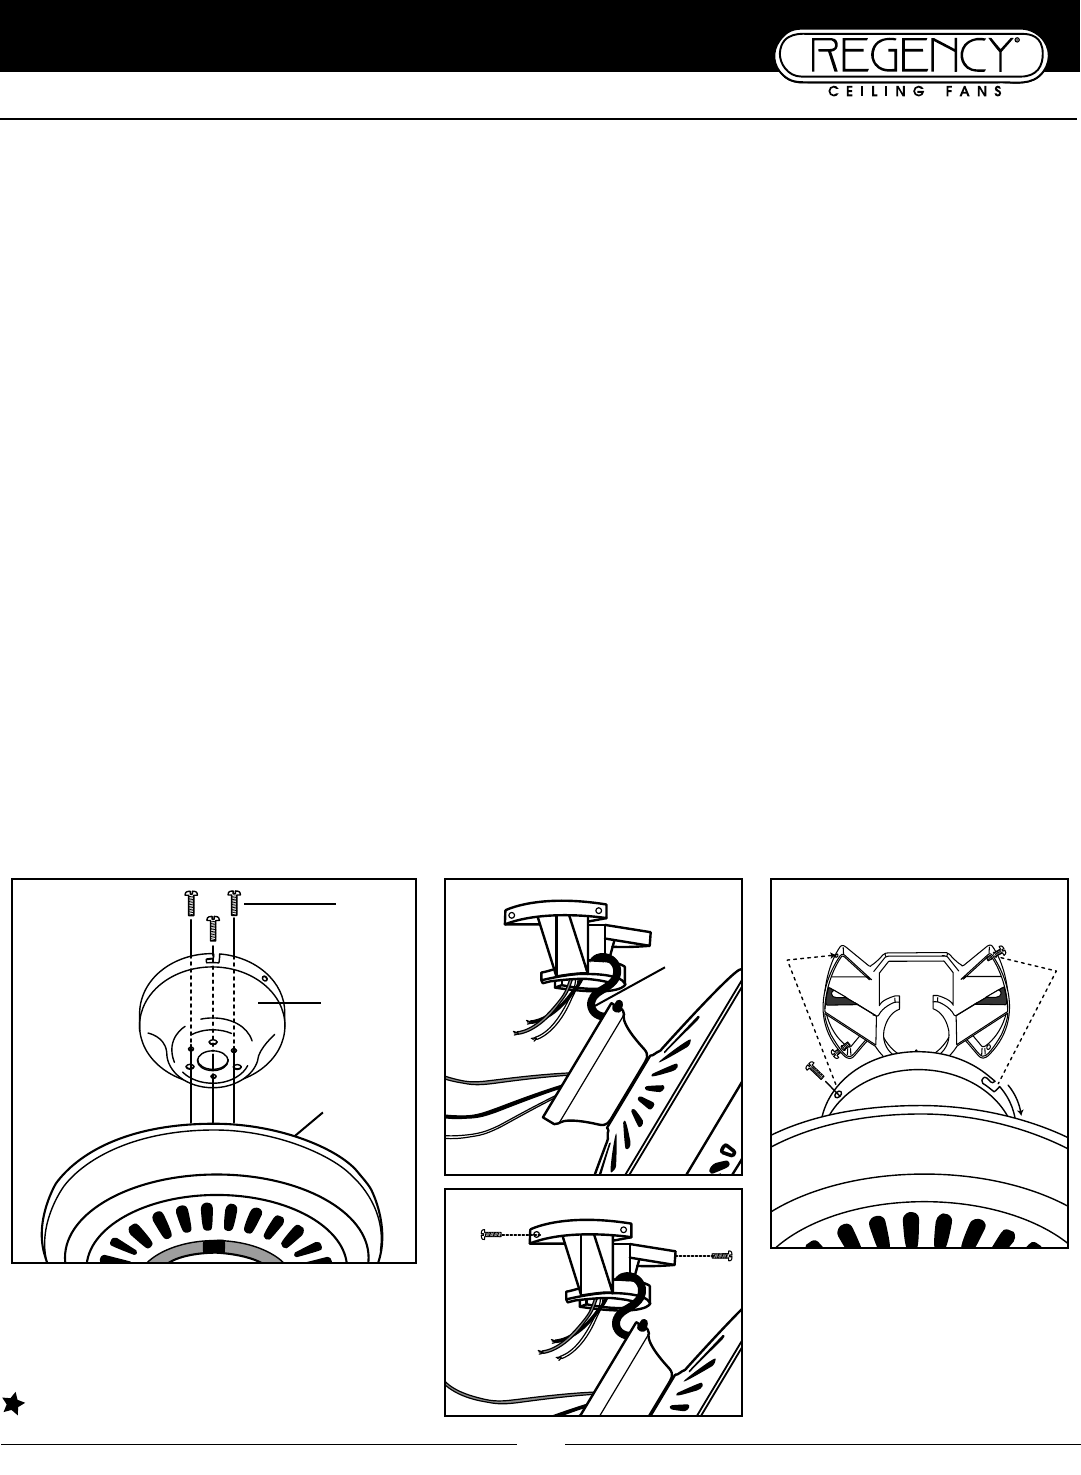
5. Place the S hook onto the hanger bracket. Hang the canopy (with the fan motor housing attached) from the S hook on
the hanger bracket using one of the holes in the edge of the canopy (Fig. 2). This will permit you to make the
electrical connections without having to hold the fan up as well.
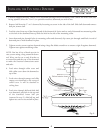
6. Make the wire connections as described in "Electrical Connections" (page 8).
7. Insert 2 screws into the hanger bracket, leaving them partially out (Fig. 3).
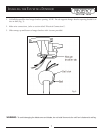
8. Attach the canopy to the hanger bracket by inserting the slotted openings of the canopy on the hanger bracket screws
(Fig. 4), and turn the fan to the right to engage the screws in the slots.
9. Insert the 2 remaining screws through the remaining canopy holes and tighten all 4 screws.
5
Fig. 1
Screws
6-hole
Canopy
Motor
Housing
Fig. 2
Fig. 3
Fig. 4
INSTALLATION OPTION #1: HUGGER STYLE MOUNTING
S Hook
REVISED NOVEMBER 2007