26
PV500-45U 06/12
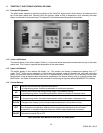
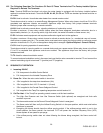
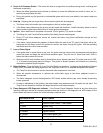
12.2 The Following Describes The Functions Of Each Of These Terminals And The Factory-Installed Options
Required To Activate The Terminals:
Note: Terminal P1-P2 are functional only when the water heater is equipped with the factory installed options
required to activate the terminals. Terminals R1-R2, A1-A2, C1-C2 and T1-T2 are standard pre-wired functions on
all models.
R1-R2: Used to activate / de-activate water heater from remote master control.
Terminals are wired to a relay in a remote Energy Management System. When relay closes, circuit from R1 to R2 is
completed and appliance controls are enabled. Appliance ships from factory with jumper between terminals
Remove jumper when connecting to a remote controller.
A1-A2: Used to activate a remote alarm, signaling shutdown of combustion control.
Provides a maximum 10 amp relay contact closure when the flame safeguard terminates combustion due to a
tripped safety interlock (i.e.: air proving switch, high limit switch, low water flow switch or flame sensor, etc.).
P1-P2: Activates remote equipment and requires confirmation signal back to the appliance.
Provides a maximum 10-amp relay contact closure to activate a remote device (i.e.: mechanical room air louvers,
draft inducer or power vent, etc.). The remote device must send return signal via proving switch to confirming proper
operation to terminals C1-C2, prior to the appliance being able to energize. Options Required - Consult Factory.
C1-C2: Used for proving operation of remote device.
Terminals are wired to a proving switch on a remote device such as a power venter. When relay closes, circuit from
C1 to C2 is completed and appliance controls are enabled. This appliance ships form the factory with jumper
between terminals.
T1-T2: Used for external modulation control.
To connect external modulation control, disconnect and cap the blue wire connected to terminal T2 and connect the
external modulating signal to terminals T1 (positive) and T2 (negative).
13 SEQUENCE OF OPERATION
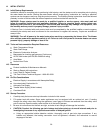
1. Incoming 120VAC
a. Full time power to the Main Control Switch
b. Full time power to the Variable Frequency Drive
2. Power On - When the main control switch is turned on:
a. 120v is applied to the step-down transformer (24v)
b. 120v is applied to the L.W.C.O. terminal L1 (if used)
c. 120v is applied to the Fenwal Flame Safeguard Control
d. 24v is applied to the TempTrac operating temperature control terminal L1
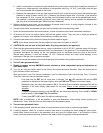
3. Call For Heat - If the TempTrac operating control senses a call-for-heat condition:
a. The High Gas Pressure and Low Gas Pressure Switch (both optional) are energized and their safe
condition is proved.
b. The thermostat contact on the Fenwal Flame Safeguard Control is energized.
c. The flame control will then verify the Airflow-Proving Switch is in the open position, which must exist before
the blower is powered.
d. Energizing the blower should close the airflow proving switch. If the airflow-proving switch is not in the
closed position, the flame control’s fan terminals F1-F2 will power the Variable Frequency Drive (VFD)
blower system at low speed for pre-purge.
e. If the airflow-proving switch does not close following the blower being energized, the flame control will
lockout.


