


12
b.manual select of main
burner:
Press BURNER button, the flame is
on “MAN” select. At this selection, the
main burner will keep working no matter
what the temperature is set at. If there is
a need to shut off the main burner, just
press the “BURNER” button to make the
burner on the “OFF” select.
c.shut off the main burner:
the main burner is on “OFF” selection,.
The main burner will shut off.
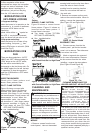
OPERATIONS OF
TIMING
1.Auto on:
when the burner is in a state of
readiness. Transmitter and burner is off.
Press TIMER button. Then press
¡ø¡ø
¡ø¡ø
¡ø or
¨‹¨‹
¨‹¨‹
¨‹
change to the scheduled time, then press
the TIMER button again, the TIMER starts
timing and the TIMER is flashing and the
operation light(green) begin flashing.
When the timer goes on the scheduled
time, the burner opens automatically.
2.Auto off:
when the burner is in operation, press
TIMER button. Then press
¡ø¡ø
¡ø¡ø
¡ø or
¨‹¨‹
¨‹¨‹
¨‹ to
change to the scheduled time, then press
the TIMER button again, the TIMER starts
timing and the TIMER is flashing and the
operation light begin flashing. When the
timer goes on the scheduled time, the
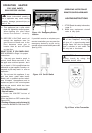
burner closes automatically.(See Fig 14)
OPERATIONS OF
TURN-OFF
1.Manual turn-off: when the heater is in
operation, press the IGN/OFF button to
shut off the heater.
2.Auto turn-off: refer to the second step
of “Operations of Timing”
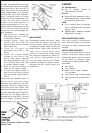
OPERATIONS OF
BURNER
1.Plug-in 110V electrical outlet, you will
hear a high pitch sound and power light
(red) on the front will be lit that indicates
that the burner is ready to be operated.
Before plugging in the outlet make sure that
the appliance is connected to the gas
supply, then continue to the next step.
2.Point directly the remote transmitter to the
burner. Press IGN/OFF button, the electric
spark starts igniting the pilot and operation
light (green) on the front will be lit. Wait five
(5) minutes to clear out any air. If you
smell gas. STOP! Please check the gas
connection.
There are three selections: “AUTO” “MAN”
and “OFF”
a.auto select of main burner:
Press BURNER button, the flame is
on “AUTO” select. Press
¡ø¡ø
¡ø¡ø
¡ø or
¨‹¨‹
¨‹¨‹
¨‹to set
temperature. If the room temperature is two
degree lower than the set temperature on
the remote, the main burner will turn on
until the surrouding temperature is two
degree higher than the set temperature.
Once it reaches temperature on the
remoter, the main burner will automatically
shut off.
(Note: on the auto select of main
burner, the main burner does not
respond imm-ediately to the set tempera-
ture until about one minute later.)
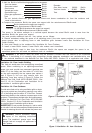
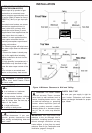
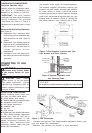
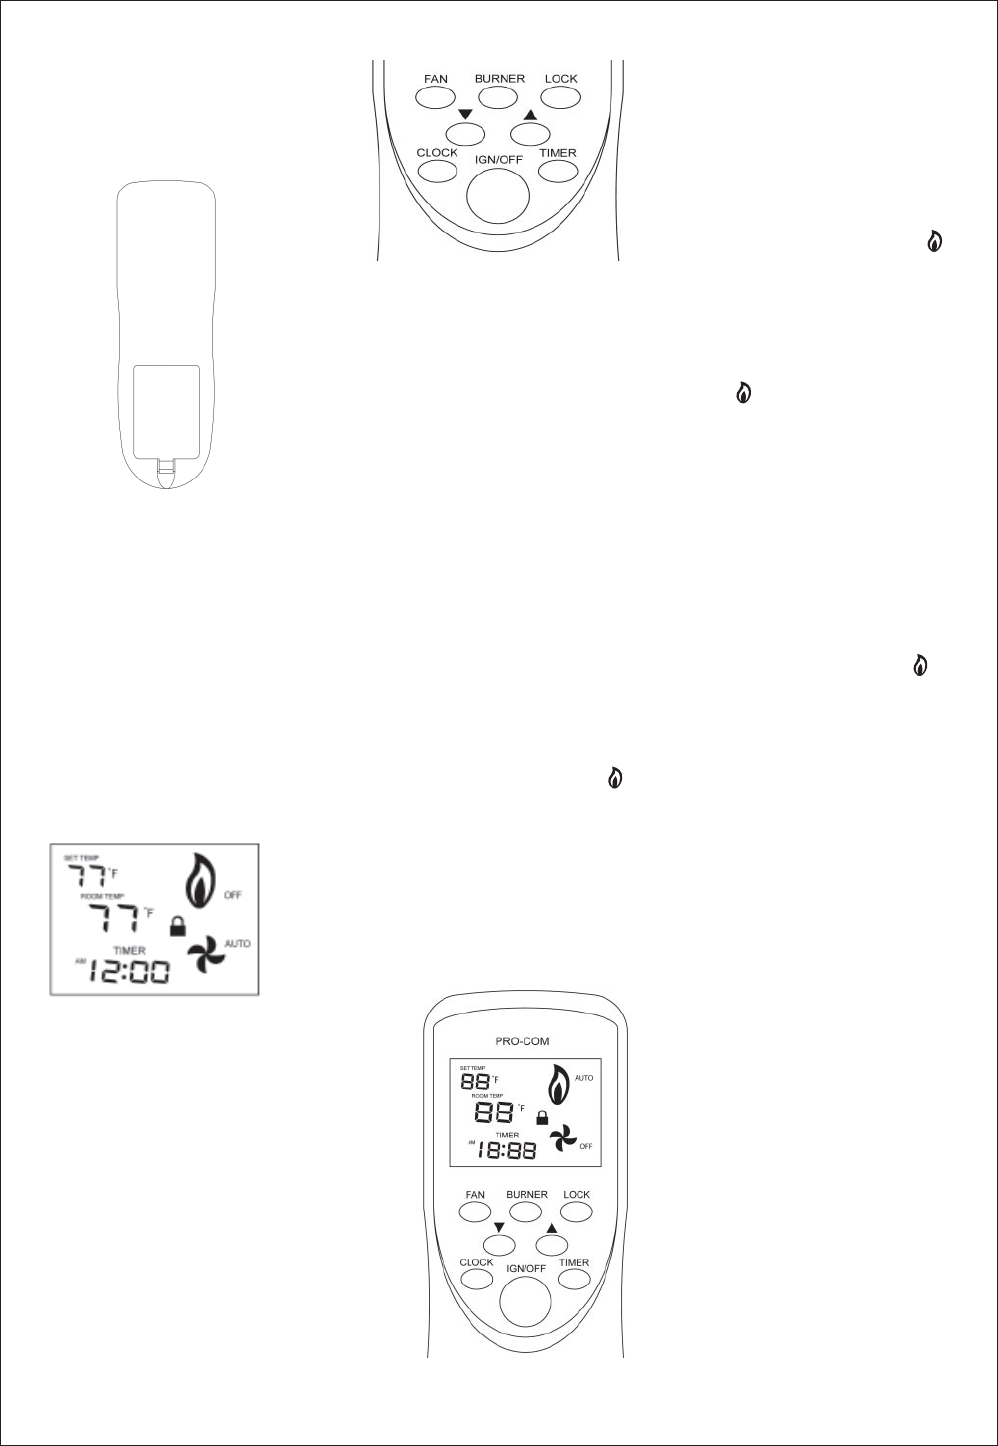
Fig16 Control board
Fig 14 Back of the Transmitter
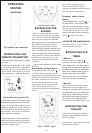
OPERATIONS OF
REMOTE TRANSMITTER
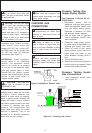
1.Install three AAA SIZE batteries in the bat-
tery holder.
The initial start-up on the LCD is: SET TEMP
is 77°F, ROOM TEMP is 77°F, clock is AM12:
00, burner is on “OFF” select, and fan is on
“AUTO” select. Divide Points of hour and
minute are flashing (i.e. the timer is operating).
2.Clock setting: Press CLOCK button on the
remote transmitter panel to select item (hour,
minute). The selected item is flashing. Press
¡ø¡ø
¡ø¡ø
¡ø
oo
oo
o
rr
rr
r
¨‹¨‹
¨‹¨‹
¨‹to change to the correct actual hour
(s); Press
¡ø¡ø
¡ø¡ø
¡ø
oo
oo
o
rr
rr
r
¨‹¨‹
¨‹¨‹
¨‹
tt
tt
t
oo
oo
o change to the cor-
rect minute(s), then press CLOCK button
again, time setting is finished.
3. When in operation, point the remote trans-
mitter to the remote receiver on the burner in
a maximum distance of 20 feet without any
obstruction between them.
Fig 25 Initial start-up on the LCD
OPERATING
HEATER
Continued
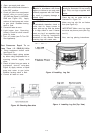
Fig17 “AUTO” select