


Installation Instructions Page 5
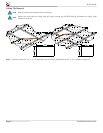
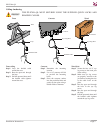
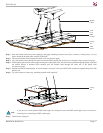
Ceiling Anchoring
Truss Concrete Wood
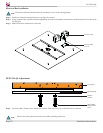
Truss ceiling
Step 1. Loop the braided cable
around the truss.
Step 2. Run the open end through
the loop.
Step 3. Pull the open end down until
the braided cable tightens
around the truss.
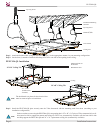
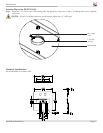
Wood Joist
Step 1. Secure the four (4) ¼” eye
lag screws to the wood joist
in the ceiling.
Step 2. Make sure eye lag screws
are properly secured to the
joist before securing the wire
to the cable locks on the
plate.
Step 3. Run the open end through
the hole in the eye lag
screw.
Step 4. Run the open end through
the loop.
Step 5. Pull the open end down until
the braided cable tightens
around the eye lag screw.
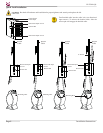
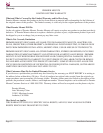
Concrete
Step 1. Determine the mounting
location.
Step 2. Use a 1/4” masonry drill bit
to pre-drill the mounting
holes.
Step 3. Place the concrete anchor
into the pre-drilled hole and
gently tap into place using a
rubber mallet or hammer.
Truss
Loop
Braided Cable
Loop
Eye Lag Hole
Eye Lag Hole
Concrete
Wood Joist
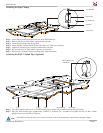
THE PP-FCMA-QL MUST SECURED USING THE SUPPLIED QUICK LOCKS AND
BRAIDED CABLES.
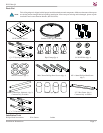
PP-FCMA-QL
Braided Cable