5
Connections
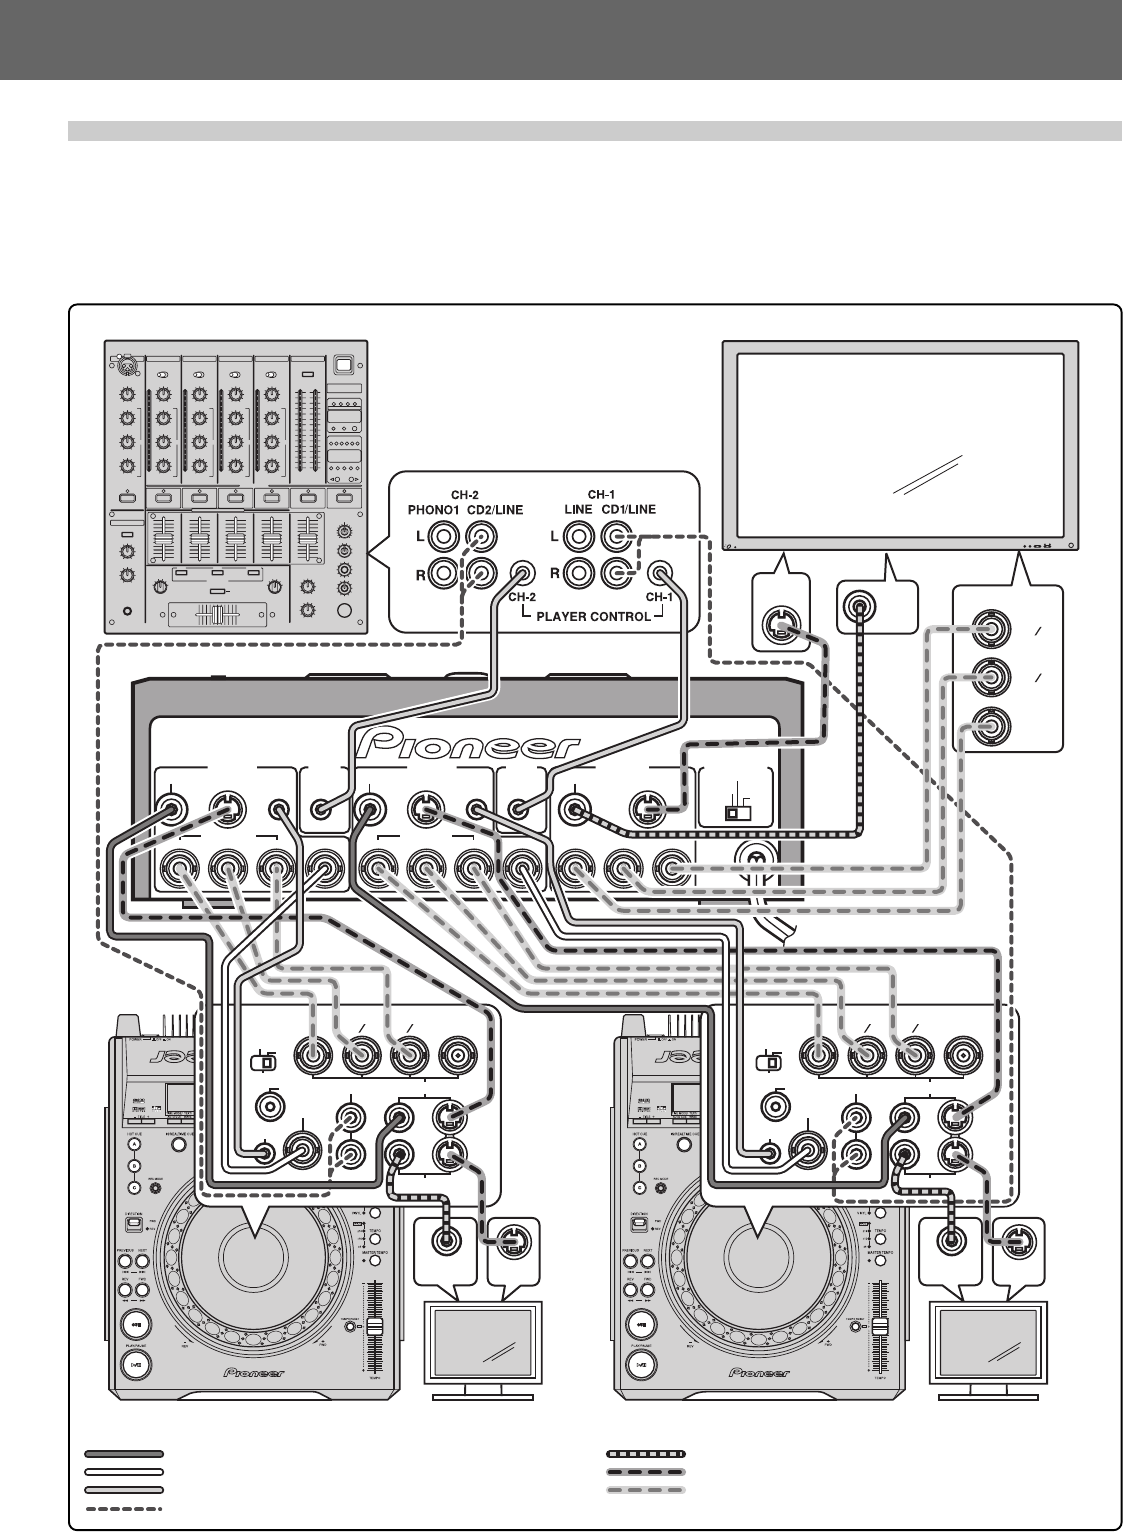
Basic Connections
This unit is designed to allow switching between component video, S-Video, and composite video signals, but does not support signal
conversion. As a result, the same signals required for output must be input. Further, while three different types of signals can be
connected simultaneously for switching between them, only one of the types must be selected for chroma signal synchronization.
When connecting or changing the installation of components, always turn off power and disconnect power cord’s plug from
their outlets before proceeding.
VSW-1
DVJ-X1
DVJ-X1
PLAYER B PLAYER AMIXER MIXER VIDEO OUT
CHROMA SYNC
COMPONENT
COMPOSITE
S
COMPOSITECOMPOSITECOMPOSITE
COMPONENT
SSS
C
B
/ P
B
C
B
/ P
B
COMPONENT
C
B
/ P
B
YYY SYNCSYNC
PL A CONTPL B CONT PL CONTPL CONT
C
R
/ P
R
C
R
/ P
R
C
R
/ P
R
MODE
OUT
L
YC
B
C
R
P
R
P
B
R
S
S
SYNC IN
AUDIO OUT VIDEO OUT
COMPOSITE
PREVIEW OUT
DIGITAL
DJ
NORMAL
CONTROL
VIDEO
INPUT
S-VIDEO
INPUT
MODE
OUT
L
YC
B
C
R
P
R
P
B
R
S
S
SYNC IN
AUDIO OUT VIDEO OUT
COMPOSITE
PREVIEW OUT
DIGITAL
DJ
NORMAL
CONTROL
VIDEO
INPUT
S-VIDEO
INPUT
VIDEO
INPUT
S-VIDEO
INPUT
Y
C
B
C
R
P
R
P
B
COMPONENT
VIDEO INPUT
DJ mixer Main monitor
Player B Preview monitor Player A Preview monitor
Video cable furnished with DVJ-X1
BNC plug coaxial cable furnished with this unit
Control cable furnished with this unit or with DVJ-X1
Audio cable furnished with DVJ-X1
Video cable (sold separately)
S-Video cable (sold separately)
BNC plug coaxial cable (sold separately)
Power cord connection
After all other connections are completed, insert the power cord’s plug into a wall power outlet or the auxiliary power outlet of an
amplifier.


