


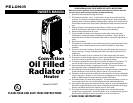
UNPACKING AND SET-UP INSTRUCTIONS
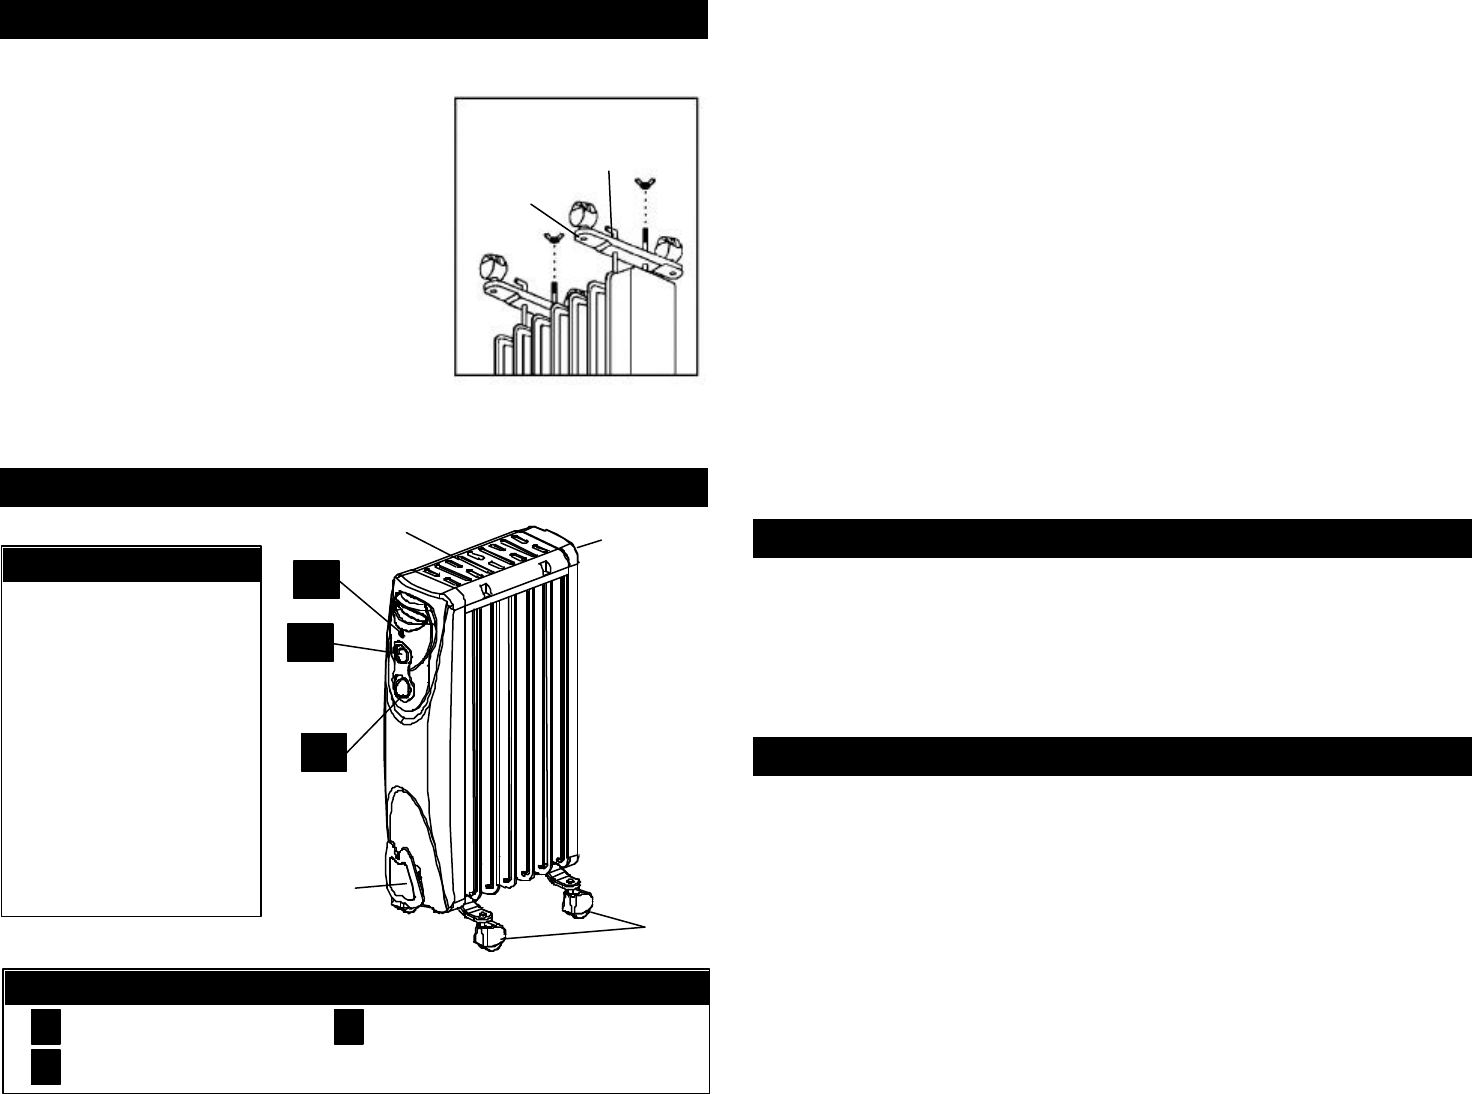
Unpack your heater and remove the wheel assemblies from the package. Refer to Fig. 1 below:
1. Make sure the heater is unplugged and in the
”OFF” position.
2. TURN THE HEATER UPSIDE DOWN.
3. Position the wheel base assemblies between
the end fins as shown.
4. Insert each U-shape screw into the holes of
each wheel holding plate.
5. Insert the butterfly nuts and screw them tightly.
6. Turn the heater upright.
Your heater is now ready for use.
CAUTION: Risk of fire – Do not operate heater without wheel assemblies attached. Operate
heater in upright position only (wheels on bottom, controls on top). Any other position could
create a hazardous situation.
OPERATING INSTRUCTIONS
• Place the heater on a firm level surface free from obstructions, and at least 3 ft. away
from any wall and any other objects such as furniture, curtains, plants or combustible
material.
• With the Power and Setting Control “A” in the ”OFF” position, plug the heater into a
grounded 120V outlet.
• Turn the heater ”ON” by turning the Power and Setting Control “A” clockwise to your
desired power setting (LOW, MED, or HIGH). The Power Indicator Light “C” will
illuminate.
• Turn the Thermostat Control “B” to your desired setting from “MIN” to “MAX”.
Setting for Optimum Comfort:
When the room reaches a comfortable temperature, slowly turn
the Thermostat Control “B” counter-clockwise until the heater turns off. This is the point at
which the thermostat setting equals the room temperature. At this setting, the thermostat will
automatically turn the heater on and off to maintain this selected temperature.
CAUTION: This heater includes an Overheat Protection System that shuts the unit off if it
overheats due to abnormal conditions. If this occurs, turn the heater ”OFF”, unplug it, and
inspect and remove any objects on or adjacent to the heater. Allow it to cool for a few
minutes, plug it back in, and resume normal operation.
ADDITIONAL FEATURES
This heater has additional features:
• Safety Cover -
Helps keep children or pets from touching the top hot surface of
the heater.
• Cord Wrap - Neatly stores power cord when the heater is not used.
• Convenient Carry Handle and Heavy-Duty Caster Wheels - Allow for easy
maneuvering from room to room.
TROUBLESHOOTING
If your heater fails to operate, please follow these instructions:
• Ensure that your circuit breaker or fuse is working properly.
• Be sure the heater is plugged in and that the electrical outlet is working properly.
• Check for any obstruction. If you find any obstruction, turn the heater “OFF”.
Unplug the heater and wait a few minutes for it to cool down. Carefully remove
the obstruction. Plug the heater in and turn it on again by referring to the
OPERATING INSTRUCTIONS.
NOTE: IF YOU EXPERIENCE A PROBLEM WITH YOUR HEATER, PLEASE SEE THE
WARRANTY INFORMATION FOR INSTRUCTIONS. PLEASE DO NOT ATTEMPT TO OPEN
OR REPAIR THE HEATER YOURSELF. DOING SO MAY VOID THE WARRANTY AND COULD
CAUSE DAMAGE OR PERSONAL INJURY. IF THE PROBLEM STILL PERSISTS, PLEASE
CONTACT US BY REFERRING TO THE SERVICE & SUPPORT INFORMATION ON THE
FOLLOWING PAGE.
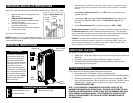
Built
-
in Handle
(behind unit)
IMPORTANT!
Your heater is equipped with a
polarized alternating current
line plug (a plug having one
blade wider than the other).
This plug will fit into the power
outlet only one way. This is a
safety feature. If you are
unable to insert the plug fully
into the outlet, try reversing the
plug. If the plug should still fail
to fit, contact your electrician
to replace your outlet. DO NOT
defeat the safety purpose of
the polarized plug.
C
B
A
Control Panel Functions
Power and Setting Control Power Indicator Light
Thermostat Control
A
B
C
Fig. 1 - Upside down view
Wheel
holding
plate
U
-
shape
screw
Cord
Wrap
Safety Cover
Caster
Wheels