C2400M-B (1/06) 5
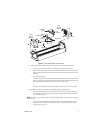
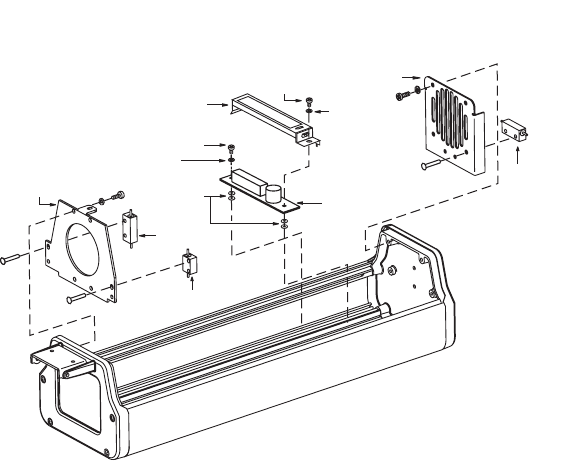
Figure 1.
Heater and Defroster Kit Installation
7. If you are installing the HD3515 heater and defroster kit, perform the following steps:
a. If a blower was previously installed in the enclosure, remove the blower now.
b. Place the rear heater bracket (with attached heater) at the rear of the enclosure (refer to
Figure 1). Be sure the heater is at the bottom of the enclosure and faces the rear of the
enclosure.
c. Do one of the following:
If a blower was previously installed, place the blower against the rear heater bracket and
attach to the enclosure using the screws previously removed from the blower. Be sure the
arrow on the blower housing is pointing toward the viewing window.
Or…
Using the screws provided, attach the rear heater bracket to the rear of the enclosure.
8. Do the following only for enclosures in the EH3512 Series and EH3515 Series:
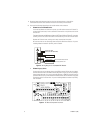
a. Place the PC board at the rear of the enclosure in front of the blower (if installed) and
heater bracket. Lay the PC board across the bottom of the enclosure with the thermostat
and connectors facing up.
NOTE:
If a blower is not installed, place the PC board approximately 1.5 inches in front of the rear
heater bracket.
b. Using the two 6-32 x 3/8-inch self tapping screws, two lock washers, and four nylon
washers provided, attach the PC board to the slots running along the bottom of the
enclosure (refer to Figure 1).
PC BOARD
SCREW
REAR
HEATER
BRACKET
FRONT
HEATER
BRACKET
PC BOARD
COVER
SCREW
LOCK WASHER
NYLON
WASHER
HEATER
DEFROSTER
LOCK
WASHER
HEATER


