


6 Pelco Manual C490M-D (1/96)
4.5 ELECTRICAL CONNECTION
After the cable has been routed, all wire connections
should be made (i.e., video, lens, camera power, heaters).
A 6-position terminal block has been provided to assist
in this.
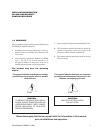
CAUTION: When a single power source is
used for both the camera and accessories, the
camera power consumption must be taken into
consideration when determining the wire gauge.
Also, make certain that all electrical connections
are done properly and meet electrical codes.
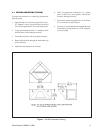
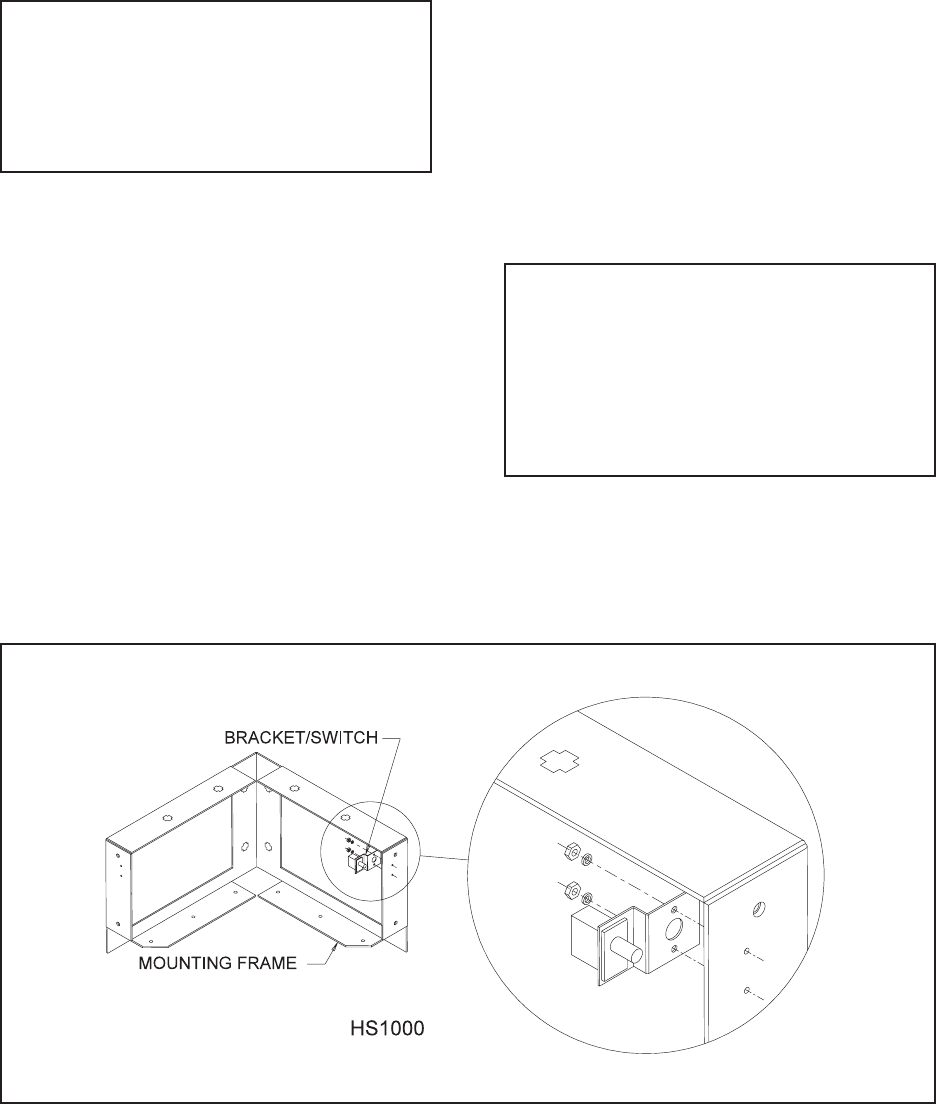
4.6 TAMPER SWITCH INSTALLATION
The HS1000 enclosures come standard from the fac-
tory with a tamper switch installed. Should it become
necessary to install a replacement switch, refer to Fig-
ure 3 for the correct position of the bracket/switch and
perform the following steps:
1. Remove the front cover.
2. Install the bracket/switch and secure with
lockwashers and nuts.
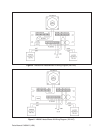
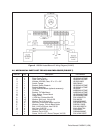
Figure 3. HS1000 SeriesTamper Switch Installation
4.6.1 Tamper Switch Wiring
The tamper switch comes with both a “Normally Open”
contact and a “Normally Closed” contact.
For a “Normally Open” circuit, use the “open ” and “com-
mon” terminals; for a “Normally Closed” circuit, use the
“closed” and “common” terminals.
5.0 CARE AND MAINTENANCE
Maintenance performed at regular intervals will help pro-
long the operational life and appearance of the equipment.
Clean the Lexan window with a mild nonabrasive deter-
gent in water with a soft cloth regularly to maintain pic-
ture clarity. For a heavily soiled window, use vinyl cleaner.
NOTE: Pelco offers a 24-hour, seven-day-a
week Technical Assistance Program (TAP)
designed to assist any customer with a technical
problem involving Pelco equipment whether it’s
the weekend or late at night. For technical
assistance dial (800) 289-9100 and you will be
connected to a Pelco TAP member who is trained
to answer your questions.
Pelco also guarantees one-day turnaround on any Pelco
equipment sent in for repair. This includes warranty and
non-warranty items. Refer to the section on warranty and
return information in this manual for the proper proce-
dure.