


4 C2406M-F (4/04)
INSTALLATION
The following parts are supplied:
1 Camclosure integrated camera system
1Watertight mounting plate
1 1/8-inch pin-in-hex Allen wrench bit
3 10-32 x 0.5-inch Phillips screws
3 #10 internal tooth lock washers
1 Hole plug
PREPARE MOUNTING SURFACE
1. Remove the cover of the ICS200. Use the
screwdriver bit that is provided to loosen the three
tamperproof screws, and then lift the cover from
the base.
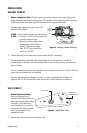
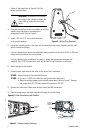
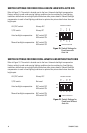
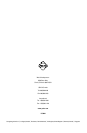
2. Remove the camera module from the base: remove
the Phillips screw on each side of the camera
assembly and unplug the electrical connectors.
Refer to Figure 1.
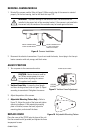
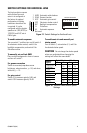
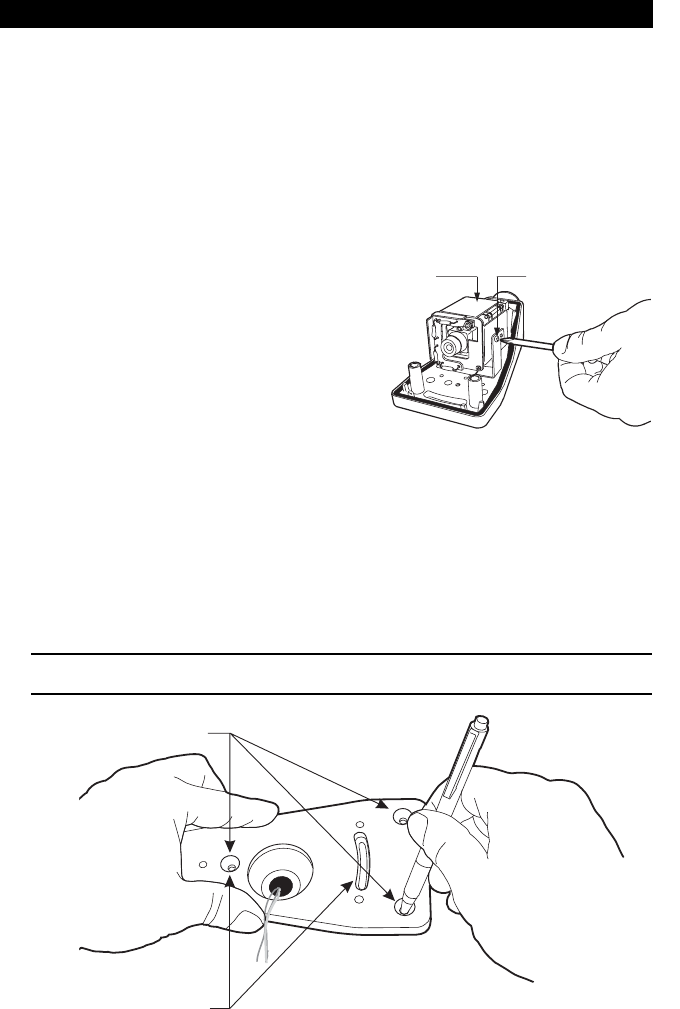
3. Outdoor Installation – Refer to Figure 2 and select the mounting pattern: fixed or adjustable.
Use the watertight mounting plate as a template and mark the fastener hole positions on the
mounting surface. Prepare the holes for the fasteners.
Indoor Installation – Refer to Figure 2 and select the mounting pattern: fixed or adjustable.
Use the base of the ICS200 as a template and mark the fastener hole positions on the
mounting surface. Prepare the holes for the fasteners.
NOTE: The watertight mounting plate is not required for indoor installations.
Figure 1. Removing Camera Module
Figure 2. Mounting Patterns (Watertight Mounting Plate Shown)
CAMERA
ASSEMBLY
PHILLIPS
SCREW
FIXED MOUNTING
PATTERN
ADJUSTABLE
MOUNTING
PATTERN