Pelco Manual C2408M-F (4/03) [ 5 ]
NOTCH
3 Attach Base
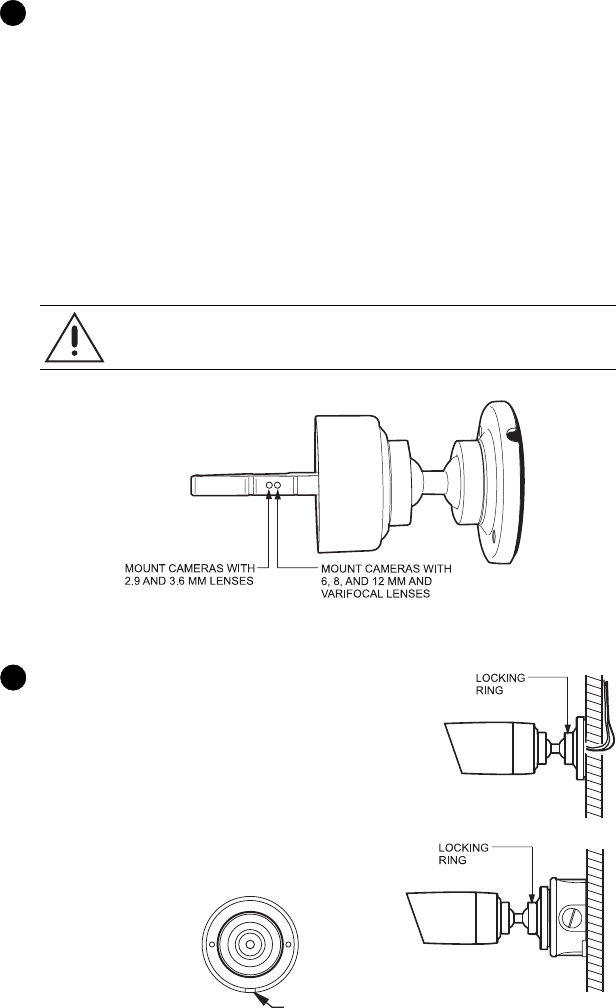
Release the base locking ring for access to the mounting holes.
Mounting hardware is not supplied if you attach the base directly
to a wall or ceiling.
To attach the base to an adapter plate or conduit adapter, two
6-32 x 1.25-inch tamper-resistant screws are supplied with the
adapters. Use the 1/8-inch hollow screwdriver bit supplied with
the Camclosure.
2 Connect Video and Power
1. Some indoor installations do not require a heater. If the installation does not require a heater,
disconnect the heater wiring.
a. Remove the cover with the supplied 1/8-inch hollow screwdriver bit.
b. Remove the camera from the mounting bracket and unplug the four-pin heater connector in
the base. The connector has orange, red, and black wires.
c. Reinstall the camera.
d. Reseat the O-ring on the cover and reinstall the cover.
2. Depending on the input voltage, wire either the 12 VDC or 24 VAC connector (supplied) to the
input power wires. Plug the connector into the mating connector in the base.
3. Connect the video cable.
TIP
For waterproof installation,
be sure the notch in the
base is pointed down.
Apply sealant around
notch.
WARNING: To prevent damage to the camera or lens, the camera must be installed in
the proper hole of the mounting bracket. If the camera is not installed in the correct
hole, the window of the enclosure may be forced against the lens.


