


TQZH507 Printed in Japan
Assembly & Placement
Manual
Assembly
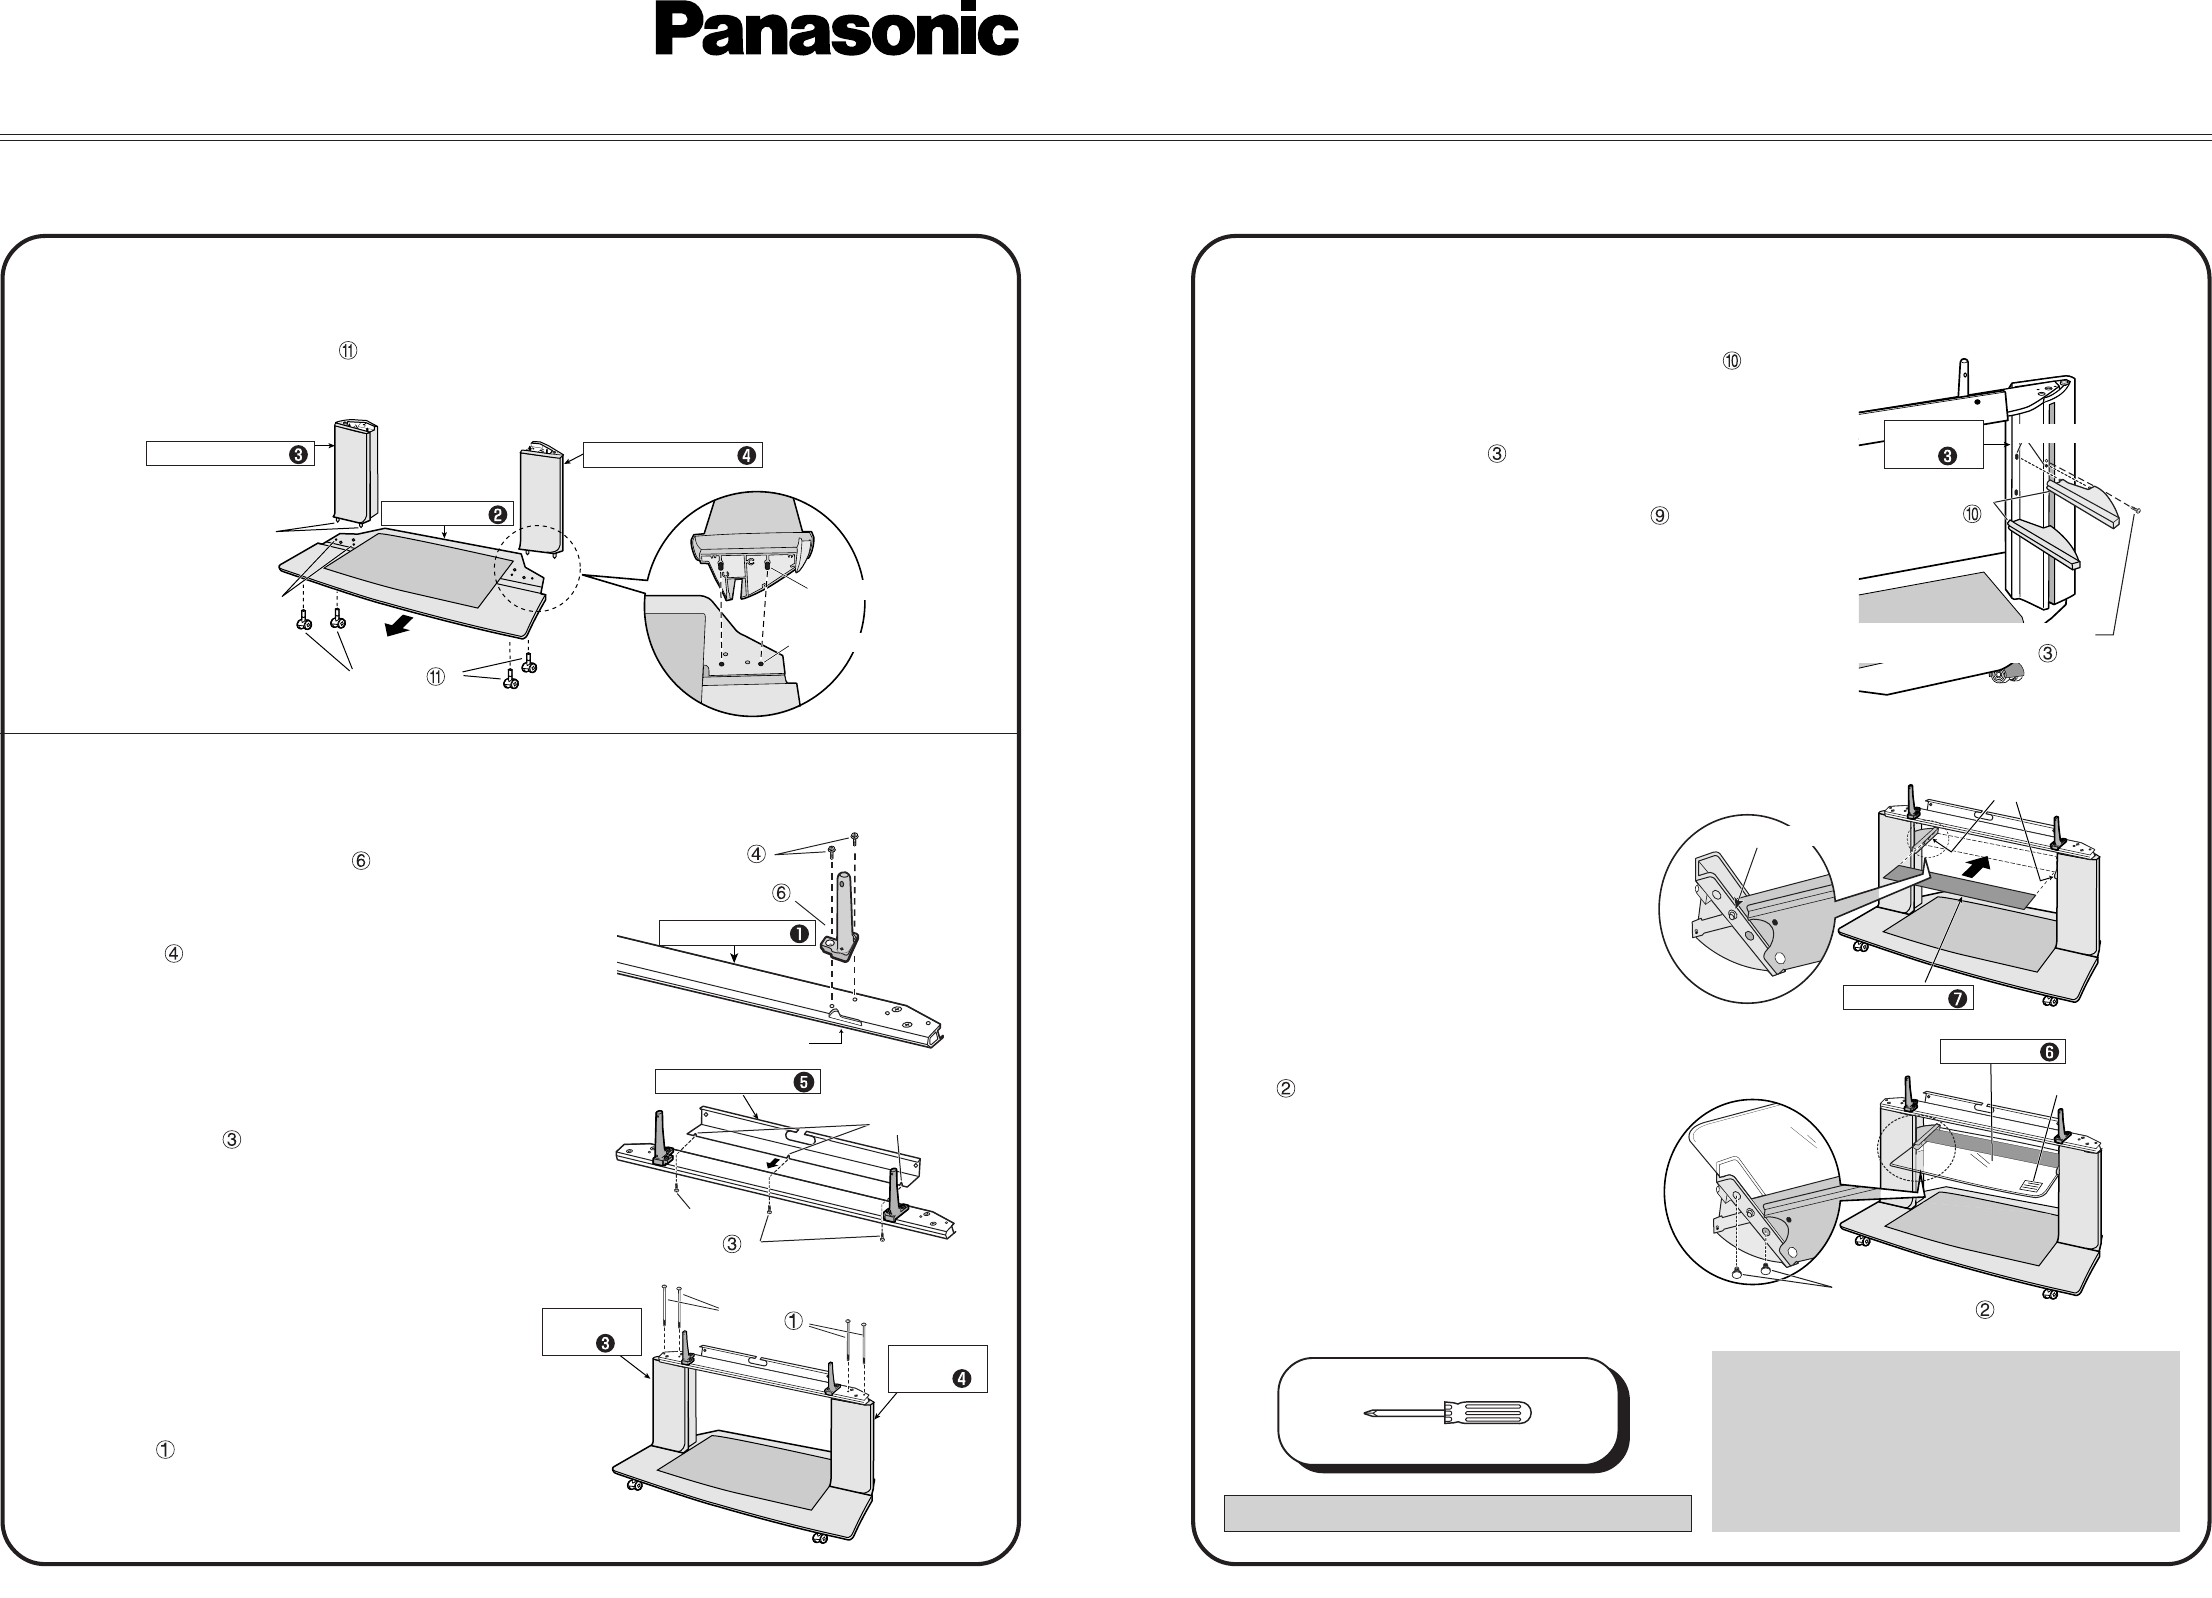
4. Attach the caution label to one
glass shelf on the right side,
facing the front. Insert the glass
shelf in parallel with the grooves
in the glass shelf supports (left
and right), and securely fasten
to the bottom of the (left and
right) glass shelf supports using
the glass shelf fastening screws
(× 4). Fit the other glass shelf
in the same manner.
TY-S42PX20U
TY-S50PX20U
Model No.
1. Securely insert the casters (× 4) into the bottom panel.
2. Align the dowels of the side panels (left and right) with the dowel holes in the bottom panel and
insert.
Rear cord cover
Notches
Rear cord cover fastening
screws (Black screws)
Glass shelf support fastening
screws (Black screws)
Dowel holes
Glass shelf
supports (Left)
1. Align the dowels in the glass shelf supports (left) (× 2)
with the dowel holes in the side panel (left) and insert.
Securely fasten with the glass shelf support fastening
screws (black screws)
(×1).
2. Attach the glass shelf supports (right)
in the same
manner.
3. Insert a cord holder in parallel with the glass shelf supports
(left and right), and align the dowels of the cord holder
with the dowel holes in the glass shelf supports. Attach
the other cord holder to the other glass shelf supports in
the same manner.
Glass shelf supports
(left and right)
Cord holder
Dowel / hole
Caution label
Glass shelf
Glass shelf
fastening screws
Top crosspiece
Support pole (Right)
Support pole
fastening screws
Notches
1. Align the support pole (right) with the notch
on the right side of the top crosspiece, and
securely fasten with the support pole fastening
screws
(× 2) using a Phillips head (+)
screwdriver. Fasten the support pole (left) to
the left side in the same manner.
2. Insert the rear cord cover fastening screws
(black screws)
(× 3) into the screw holes on
the back of the top crosspiece and partially
fasten. Slide the 3 notches in the rear cord
cover behind the screws and securely fasten
the screws.
3. Align the dowels of the side panels (left and
right) with the dowel holes in the top crosspiece
and insert. Securely fasten with assembly
screws
(× 4).
Side panel (Left)
Dowels
Dowel holes
Front
Bottom panel
Side panel (Right)
Casters
Dowels
Dowel holes
Assembly
screws
∗ Position the glass shelf such that the caution
label is on the top surface, on the near side.
∗ Do not load either glass shelf with equipment
weighing over 12 kg (26 Ib.). Do not load the
bottom storage area with equipment weighing
over 20 kg (44 Ib.).
STEP 1
Attaching of bottom panel, side panels and casters
STEP 2
Attaching of top crosspiece and rear cord cover
Side panel
(Right)
Side panel
(Left)
∗∗
∗∗
∗ Do not use electric powered screwdrivers.
STEP 3
Attaching of glass shelf and cord holder
The tools required:
Plus (Phillips) (+) screwdriver
Side panel
(Left)