


11
HOW TO ATTACH THE DRAIN PAN (OPTIONAL)
COMO INSTALAR LA BANDEJA DE DRENAJE (OPCIONAL)
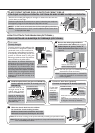
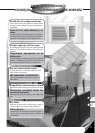
13/32”
Maximum
Máxima
de 13/32”
Condensed water
Agua condensada
C
L
O
S
E
V
E
N
T
O
P
E
N
Drain water
Drenaje de agua
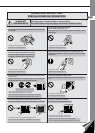
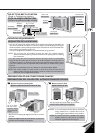
To get the maximum cooling efficiency, this
air conditioner is designed to splash the
condensed water on the condenser fin.
This method is called “Slinger-Up System”.
If the splashing sound annoy you, you can
provide an outside drain by using the
following procedure which may, however,
cause a small loss of performance.
Para obtener la máxima eficiencia de
enfriamiento, este acondicionador de aire
fue diseñado para salpicar el agua sobre
el serpentin de condensación. Este
método se llama “Sistema tipo salpicador”.
Si el ruido producido al salpicar le molesta,
puede instalar una manguera de drenaje
usando el siguiente procedimiento, sin
embargo, esto producirá una baja en el
rendimiento.
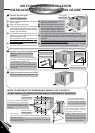
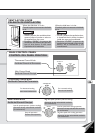
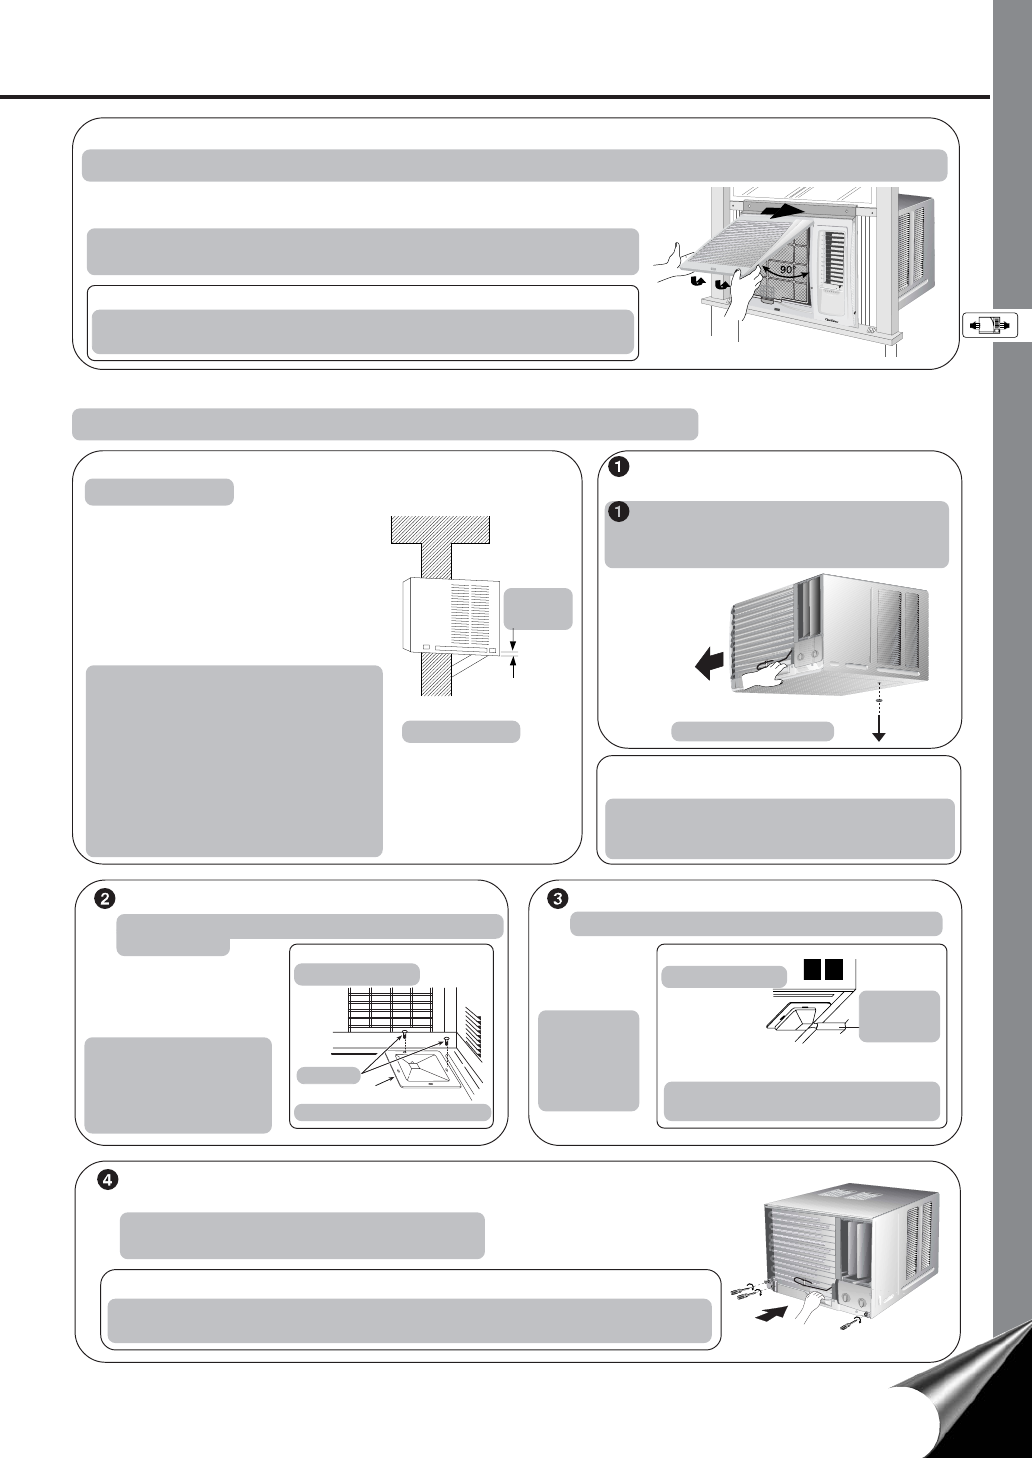
Slide the front intake grille slightly to the right to reattach the tabs and then
push it down to close tight.
Deslice la rejilla frontal de toma de aire un poco a la derecha para readjuntar
las lengüetas y luego tire hacia abajo para dejar bien cerrado.
NOTE:A “click” sound can be heard when the front intake grille is pushed down.
NOTA: Se puede escuchar un “click” cuando la rejilla frontal de la toma de aire
es empujada hacia abajo.
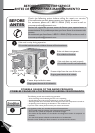
PLACE FRONT INTAKE GRILLE ONTO THE FRONT GRILLE
COLOQUE LA REJILLA FRONTAL DE TOMA DE AIRE SOBRE LA REJILLA FRONTAL
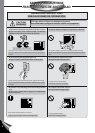
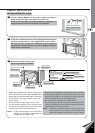
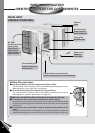
Remove the rubber plug and slide the
chassis out from the cabinet (refer to page 8)
Quite el tapon de goma y deslice el
chasis hacia afuera del caja (diríjase a ia
página 8)
Remove the rubber plug
Quite el tapón de goma
Screws
Tornillos
INTERNAL VIEW
VISTA INTERIOR
Drain pan (optional)
Bandeja de drenaje (opcional)
Install the drain pan at
the right corner of the
cabinet using 2 screws
(part no. CWG86C733).
Instale la bandeja de
drenaje en la esquina
derecha de la caja con
dos tornillos (serie no.
CWG86C733).
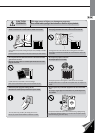
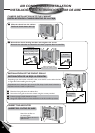
Connect a drain hose (optional)
Conectar la manguera de drenaje (opcional)
Fit the drain
hose to the
drain pan.
Inserte la
manguera
de drenaje a
la bandeja
de drenaje.
EXTERNAL VIEW
VISTA EXTERIOR
Under-side view with drain pan and hose
in place.
Vista inferior con la bandeja de drenaje y
la manguera de drenaje ya instaladas.
Note: Drain hose or tubing can be purchased locally to satisfy your particular needs.
Nota: El tubo o la manguera de drenaje puede ser comprado localmente de acuerdo
a sus necesidades particulares.
Note: The drain pan (part no. CWH40175) can be
obtained from nearest servicenter.
Nota: La bandeja de drenaje (serie no. CWH40175)
puede ser obtanido en su servicentro más
cercano pagadero.)
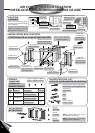
Slide the chassis back into the cabinet
Re-install the chassis locking bracket
Deslice el chasis hacia el interior de la caja
Reinstale los soportes de bloqueo del chasis
Install the optional drain pan (part no. CWH40175)
Instale la bandeja opcional de drenaje (serie no.
CWH40175)
Drain hose
(not included)
Manguera
de drenaje
(no incluido)