


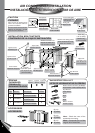
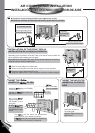

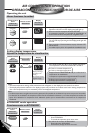
9
O
F
F
/
O
N
O
P
E
R
A
T
IO
N
T
E
M
P
/
T
I
M
E
R
C
O
O
L
F
A
N
H
I
G
H
M
E
D
L
O
W
M
O
D
E
F
A
N
S
P
E
E
D
S
E
T
T
I
M
E
R
S
E
T
/
C
A
N
C
E
L
h
r
F
E
C
O
N
O
M
Y
W
ire
le
s
s
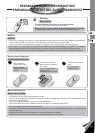
Remote Control
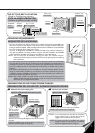
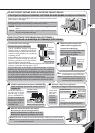
CABINET INSTALLATION
INSTALACION DEL CAJA
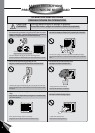
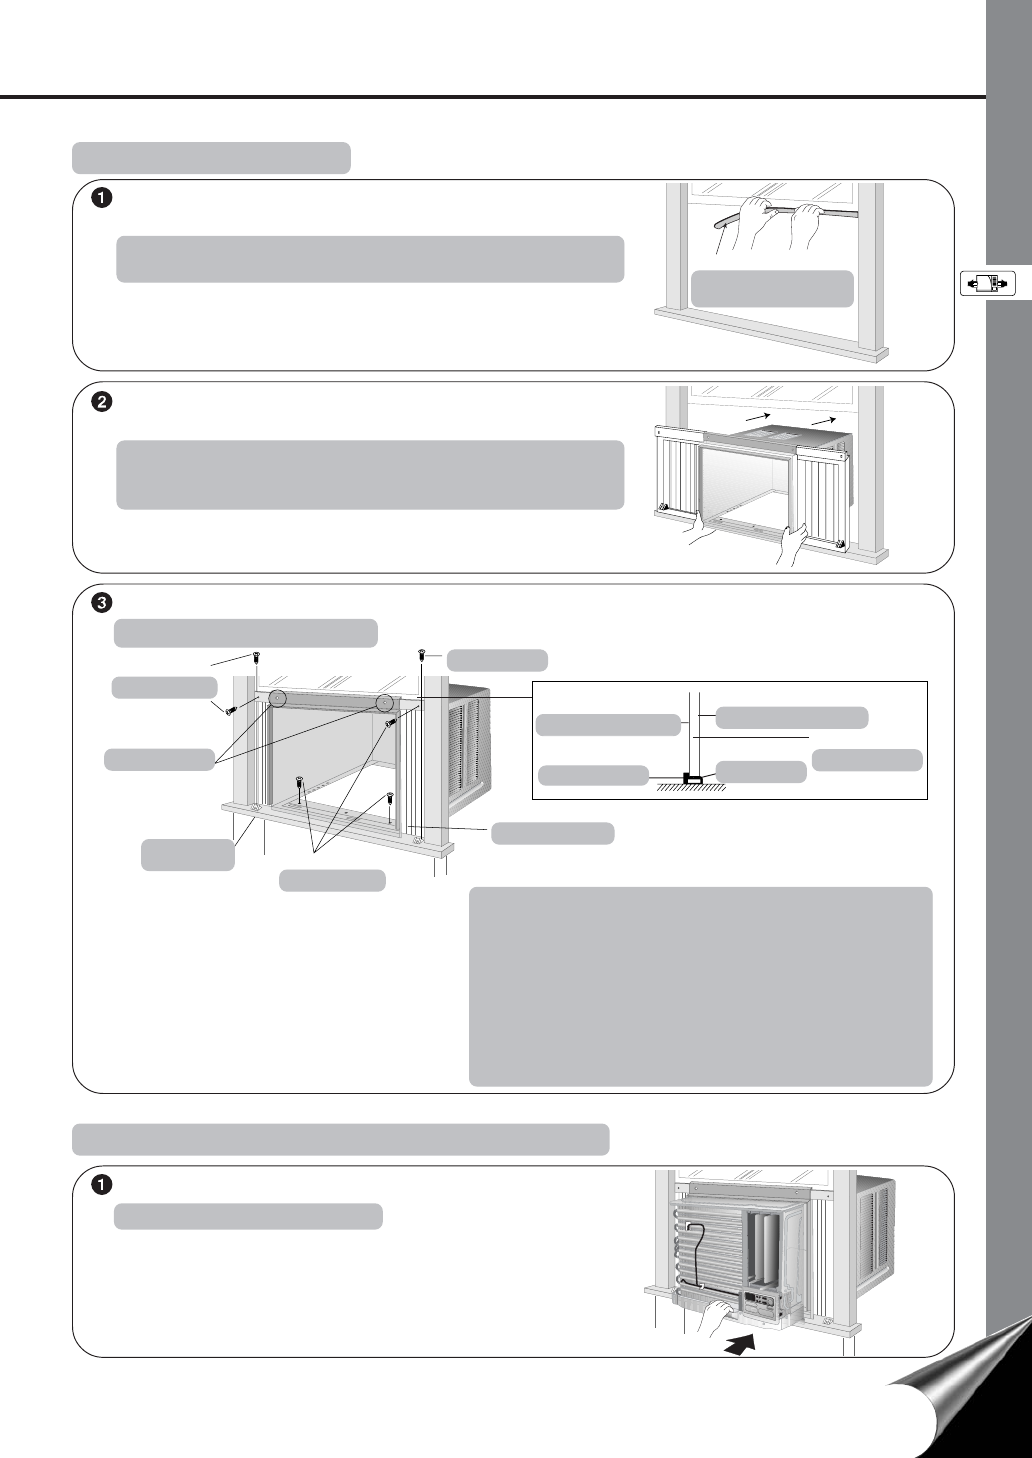
• Expand the expandable panel fully into the grooves of the
window frame, secure the expandable panel, left, right and
top mounting frames to the bottom of the window sash
using 6 type A screws and 2 type C screws.
• Secure the cabinet using 2 type A wood screws.
• Cut the window sash foam seal to the proper size and
seal the opening between the top of the inside window
sash and the outside window sash.
Note : If a gap exists between the unit and window sash,
you may use “Sealer” supplied with the installation
kit for a better seal.
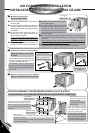
Window sash sealing ribbon
Cinta de sellado de la hoja
móvil
Cut the “Sealing Ribbon” to the proper length, and attach it
along the bottom edge of the bottom window sash.
Corte la cinta de sellar del largo apropiado y colóquela a lo
largo de la parte inferior de la ventana de guillotina.
To prevent condensation water from dripping inside, the cabinet
should be installed level or very slightly tilted to the outside.
Para prevenir que el agua de condensación gotee dentro, el
caja debe ser instalada al nivel o con una muy ligera inclinación
desde adentro hacia fuera.
Secure the cabinet using screws.
Fije la caja usando los tornillos.
Type A screw
Tornillo tipo A
Window sill
Alféizar de la
ventana
Type A screws
Tornillos tipo A
Expandable panel
Panel extensible
Type A screws
Tornillos tipo A
Type C screws
Tornillos tipo C
• Expande el panel extenible completamente dentro del marco de la
ventana, asegúrelo a la parte inferior de la hoja de la ventana por la
izquierda, a la derecha y por la parte superior, usando 6 tornillos tipo
A y 2 tornillos del tipo C.
•Fije la caja usando 2 tornillos para madera tipo A.
• Corte la cinta para sellar de la hoja de la ventana del tamafío correcto
y selle la abertura entre la parte superior del interior y del exterior
de la hoja de la ventana.
Nota : Si existiera un espacio entre la unidad y la hoja de la ventana,
puede usar el sellador que está dentro del paquete de instalación,
para obtener un mejor sellado.
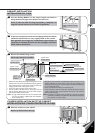
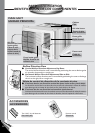
CHASSIS INSTALLATION INTO THE CABINET
INSTALACIÓN DEL CHASIS DENTRO DE LA CAJA
Slide the chassis into the cabinet
Deslica el chasis dentro del caja
Inside of sash
Interior de la hoja móvil
Top bracket
Soporte superior
Sealing ribbon
Cinta de sellar
Window sash
Hoja de la ventana
Outside of sash
Exterior de la hoja móvil