6
CARE & CLEANING CARE & CLEANING
• Switch off the power supply before cleaning.
• Do not touch the aluminium fi n, sharp parts may cause injury.
CAUTION
RemoveRemove
• Do not use benzene, thinner or scouring powder.
• Use only soap (
pH7) or neutral household detergent.
• Do not use water hotter than 40°C.
HINT HINT
• To ensure optimal performance of the unit, cleaning
maintenance have to be carried out at regular intervals.
Dirty unit may caused malfunction and you may retrieve
error code “H99”. Please consult authorized dealer.
FOR SEASONAL INSPECTION AFTER EXTENDED FOR SEASONAL INSPECTION AFTER EXTENDED
NON-USENON-USE
• Checking of remote control batteries.
• No obstruction at air inlet and air outlet vents.
• Use Auto OFF/ON button to select Cooling/Heating operation,
after 15 minutes of operation, it is normal to have the following
temperature difference between air inlet and air outlet vents:
Cooling: ≥ 8°C Heating: ≥ 14°C
NON SERVICEABLE CRITERIASNON SERVICEABLE CRITERIAS
TURN OFF POWER SUPPLY then please consult
authorized dealer under the following conditions:
• Abnormal noise during operation.
• Water/foreign particles have entered the remote control.
• Water leaks from Indoor unit.
• Circuit breaker switches off frequently.
• Power cord becomes unnaturally warm.
• Switches or buttons are not functioning properly.
FOR EXTENDED NON-USEFOR EXTENDED NON-USE
• Activate Heat mode for 2~3 hours to remove moisture left in
the internal parts thoroughly to prevent mould growth.
• Turn off the power supply.
• Remove the remote control batteries.
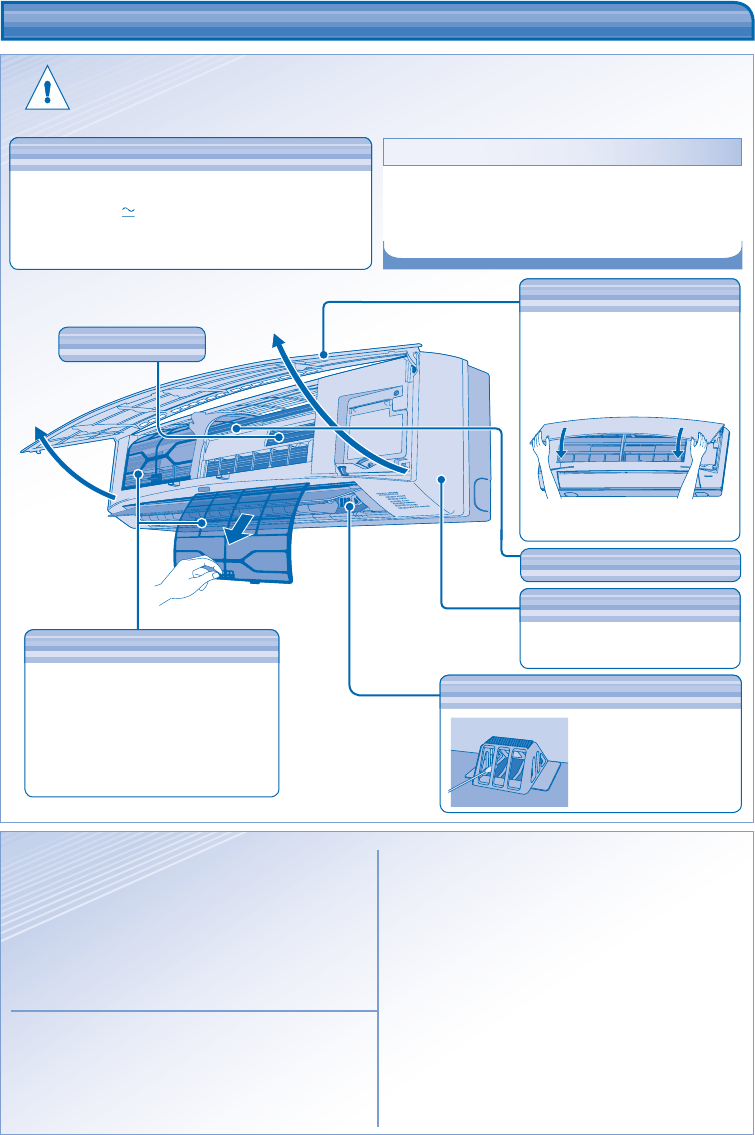
ALUMINIUM FINALUMINIUM FIN
• Clean the fi lters regularly.
• Wash/rinse the fi lters gently with water
to avoid damage to the fi lter surface.
• Dry the fi lters thoroughly under
the shade, away from fi re or direct
sunlight.
• Replace any damage fi lter.
e-ion FILTERSe-ion FILTERS
Clean with dry cotton bud.
• Active e-ion
generator cleaning is
recommended every 6
months.
ACTIVE e-ion GENERATORACTIVE e-ion GENERATOR
WASHING INSTRUCTIONSWASHING INSTRUCTIONS
e-ion e-ion CHARGING WIRECHARGING WIRE
INDOOR UNITINDOOR UNIT
Wipe the unit gently with a soft,
dry cloth.
Remove Front Panel
• Raise and pull to remove
the front panel.
• Wash gently and dry.
Close Front Panel
• Press down both ends of the
front panel to close it securely.
FRONT PANELFRONT PANEL
F566901-OYTK0903-00.indd 6F566901-OYTK0903-00.indd 6 5/5/2009 2:48:50 PM5/5/2009 2:48:50 PM


