


4
© 2006 Oreck Holdings, LLC. All Rights Reserved. All word mark, logos, product configurations, and registered trademarks are
owned and used under the authority of Oreck Holdings, LLC.
3323-3018 REV H 01/06 ECN# R-8239, R-8240
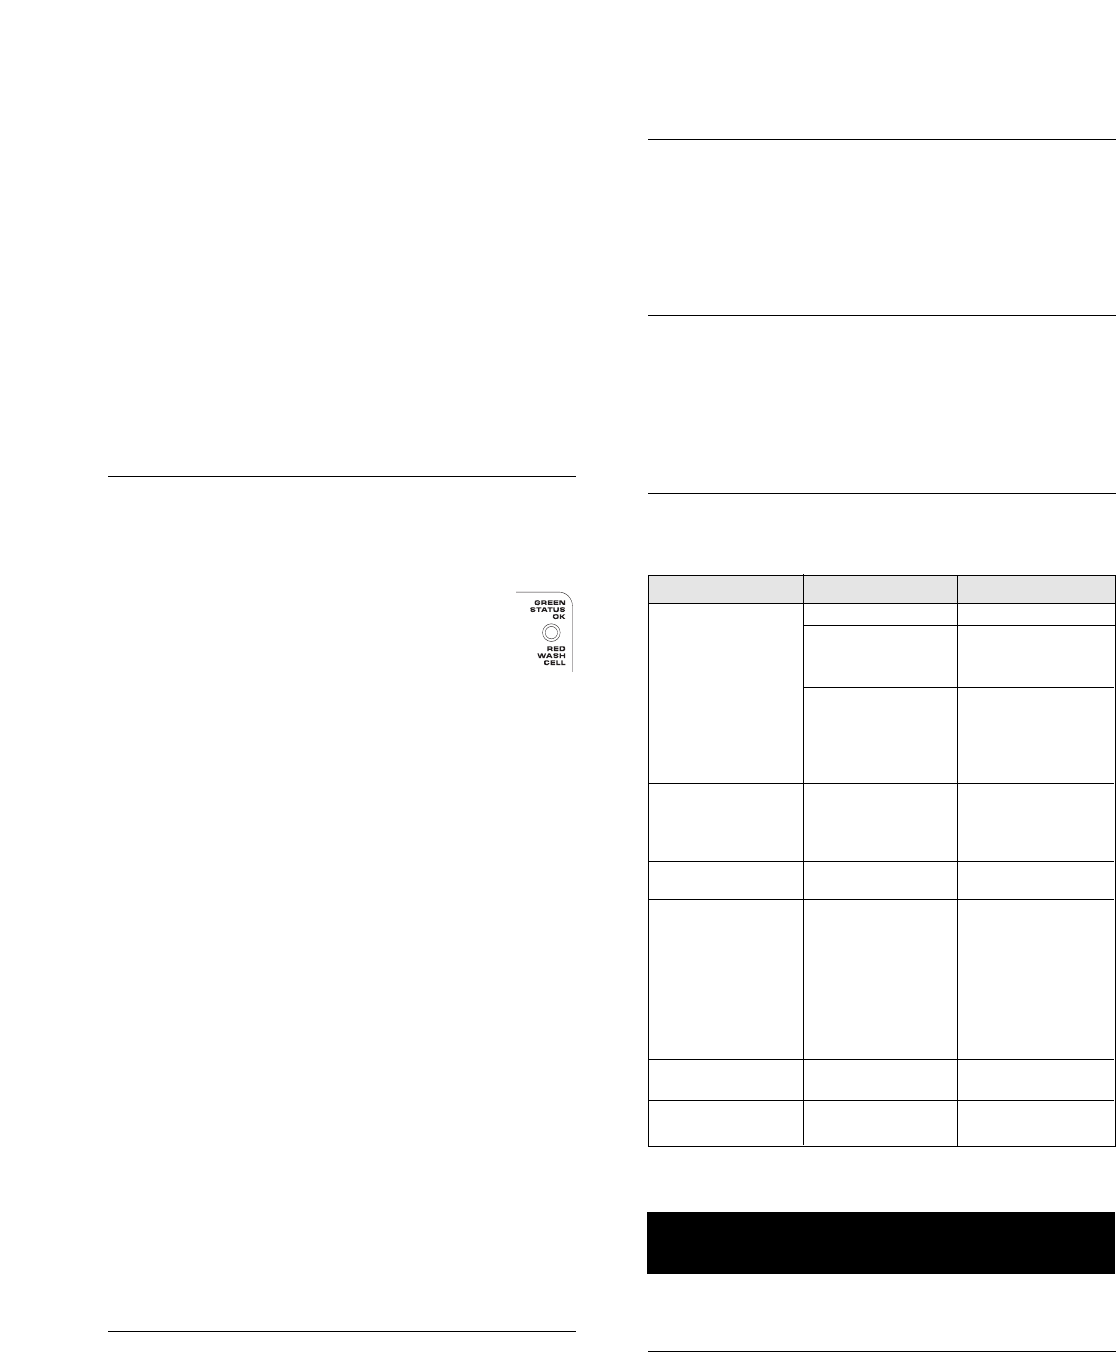
UNIT
DOES NOT TURN
ON
INDICATOR LIGHT ON
UNIT IS FLASHING RED
OR HAS TURNED RED
UNIT DOES NOT
REMOVE POLLUTANTS
UNIT SPARKS,
CRACKLES AND POPS
DOES NOT REMOVE
ODOR
UNIT STILL DOES NOT
OPERATE PROPERLY
1. Power Cord
2. Selector Switch
3. Front Grill
Ionizer/collector cell
Ionizer/collector cell
Ionizer/collector cell
Old Charcoal Odor
Absorber
Check all the above
points
1. Plug in power cord
2. Set selector switch
for desired blower
speed.
3. Reinsert front grill
until it is flush with
cabinet front. Tap grill
lightly, if necessary, to
fully insert.
Wash ionizer/collector
cell. Make sure it is
thoroughly clean & dry
before re-installing it.
Wash cell
A little is normal. Make
sure the cell is
thoroughly dry before
re-installing it.
If it persists, clean cell.
If that doesn’t help, cell
may be damaged and
needs replacing.
Replace Charcoal
Odor Absorber.
Return unit to the
Service Center.
PROBLEM CHECK WHAT TO DO
Whenever calling, please be sure to have your model and serial
number from data plate.
CALL CUSTOMER SERVICE HOT LINE
US:1-800-989-3535 Canada:
1-888-676-7325
ALL OTHER SERVICING SHOULD BE DONE BY AN
ORECK AUTHORIZED SERVICE CENTER.
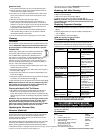
Accessories
ITEM PART #
1. Pre-Filter 7780-8041
2.
Ionizer/Collector Cell
09-5510-7065
3.
Charcoal Odor
Absorber (Set of 4)
A
T4PK7
4. Wall Mounting Kit 8660-0201
5. Oreck Fresh Air
®
Scent Cartridges
Spring Mulberries
®
, 8pk.
F
A2PK
Blooming Jasmine
®
, 8pk. FA3PK
IMPORTANT NOTES:
●
Your air purifier works best if you leave it in operation all the time.
●
Place or mount the air purifier near a standard electrical outlet. Do
not block either the air intake or outlet grill.
●
Never place your air purifier on soft surfaces (such as bed, sofas or
carpet), near computers or next to sources of heat (such as stove
tops, ovens, etc.)
●
Make sure the front grill is securely locked in place.
●
A safety switch is installed behind the grill of your electronic air
purifier. If the grill is not properly secured in place, the unit will not
operate. If your unit fails to operate, remove the front grill and reinstall
it, being sure that the lower right-hand side of the grill (next to the
control panel) is firmly locked in place.
●
Plug the power cord into the nearest available standard electrical
outlet. (See data label on bottom of your air purifier for electrical
specifications and power consumption.)
●
Do not use an extension cord to supply power to your air purifier.
Cleaning
The Cabinet
You can clean the air purifier cabinet with mild, non-abrasive cleanser and a
soft cloth. IMPORTANT: Unplug the unit from its electrical power source.
Do not spray cleansers or furniture polish into the louver or grill areas.
Collector Cell
Indicator light is green under normal operation and flashes red
when the cell requires cleaning. To clean, proceed as follows:
The red "WASH CELL" light will flash or illuminate when it is
time to clean your cell. However, it is recommended that every four to
eight weeks or if snapping sounds become frequent, clean your
electronic air purifier. Your electronic air purifier is still filtering the air
when the red light illuminates. Cleaning your electronic air purifier is a
snap too... and a must for efficient operation.
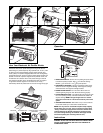
1. Turn the unit off and unplug it from the electric power source. If wall
mounted, remove unit from wall.
2. Remove front grill by unscrewing the retainer screw under the grill on
the cabinet bottom.
(fig. 1)
3. Pull the cell out of the cabinet by using the two small handles on the
front of the cell. (fig. 2)
4. Snap off the charcoal odor absorber from the back of the cell. Change
as necessary for continued odor removal. (fig. 3)
5. Slide off pre-filter. This can be cleaned with the cell and reused. (fig. 4)
NOTE: Handle the electronic cell with care. Damaged metal plates
and/or broken wires will cause the air purifier to malfunction. (Do
not wash charcoal odor absorber; it is disposable.)
Cleaning with Assail-A-Cel
l
®
Cell Cleaner:
6.
Using
Assail-A-Cell
®
Cleaner
, thoroughly saturate the cell and pre-
filter. Be sure to spray between each cell plate and cover every
surface. Allow product to soak for a few minutes, not allowing it to dry.
Rinse thoroughly with water. For extremely heavy deposits, repeat the
process.
IMPORTANT:
Dry the collection cell thoroughly outside of the
air purifier before reinstalling it into the air purifier. Ensure
that all areas including corners and areas that may trap
water are dry before reinstalling into the air purifier. DO NOT
place a wet or damp collection cell in the air purifier.
Replacing the Charcoal Odor
Absorber (Optional)
In addition to air purification, your Oreck provides the additional benefit
of odor removal. The odor removal function is optional. Your Oreck Air
Purifier will continue to remove harmful airborne particles with its
permanent electronic collector cell even if you choose not to use the
optional charcoal odor absorber.
Odor absorption effectiveness will gradually deteriorate over time unless
the charcoal odor absorber is replaced. While every environment is
different, Oreck suggests that the charcoal odor absorber be replaced
every two months or as needed.
IMPORTANT: DO NOT wash the
charcoal odor absorber. Replace, if necessary.
Replacing Cell After Cleaning
1. Snap in the charcoal odor absorber. (fig. 3)
2. Slide in the pre-filter. (fig. 4)
3. Slide cell into cabinet, using handles. (fig. 2)
4. Replace front grill. Unit is now ready for operation. (fig. 1)
NOTE: An occasional “arcing” sound is normal when operating the
unit immediately after cleaning the cell and should stop after a few
minutes of operation.
Replacing Fragrance Cartridge
1. Open cartridge compartment by sliding the compartment release switch.
(fig. 5)
2. Remove fragrance disk from center of cartridge and replace with a
new one.
(fig. 6)
3. Close compartment until it locks. (fig. 7)
NOTE: One fragrance cartridge is included.
Troubleshooting Guide
Service problems that appear to be major can often be solved easily
. You
can be your own troubleshooter by reviewing the chart below. It pinpoints
problems and how to correct them. Remember, check the simple things first.