


4
© Copyright 2006 OMEGA ENGINEERING, Inc. All rights reserved. This document may not be copied, photocopied,
reproduced, translated, or reduced to any electronic medium or machine-readable form, in whole or in part, without the
prior written consent of OMEGA ENGINEERING, INC
5
© Copyright 2006 OMEGA ENGINEERING, Inc. All rights reserved. This document may not be copied, photocopied,
reproduced, translated, or reduced to any electronic medium or machine-readable form, in whole or in part, without the
prior written consent of OMEGA ENGINEERING, INC
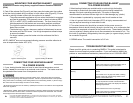
PRIOR TO INSTALLATIONPRIOR TO INSTALLATION
1. Check for suspected damage to the heating blanket like rips, punctures, etc.
2. Verify surface to be heated is free from all sharp edges, weld splatter, rust, oil,
etc. Surface must be clean prior to installing heater.
3. Check that the desired placement of the blanket will not cause damage to the
blanket through impact shock, vibration, ambient temperature, or by neighboring
moving parts.
4. Confi rm voltage / wattage rating of heater is appropriate for power supply
device or temperature controller. The heater is designed to work at a specifi c
voltage to heat properly.
5. Confi rm blanket maximum exposure temperature rating is suitable for
environment. The temperature of the internal heating element may run up to
25% higher than the external surface of the blanket. Use extreme caution for
applications that require a process temperature near the maximum exposure
temperature ratings of the blanket.
- All Silicone rubber heating blanket except SEPHB exposure
temperature range: -60ºF to 450ºF (-51ºC to 232ºC)
- SEPHB exposure temperature range: -60ºF to 400ºF (-51ºC to 204ºC)
T3: 292ºF (145ºC) high limit thermostat
T4A: 158ºF (70ºC) high limit thermostat
6. If the heating blanket is equipped with PSA (pressure sensitive adhesive),
confi rm the heater was manufactured within the last six months. The PSA has a
“shelf life” of six months and must be installed before this time elapses. The date
of manufacture is stamped on the product box.
NOTE: If more than six months has elasped since date of manufacture, the blanket can be sent back
to the factory for re-application of PSA.
7. Confi rm all necessary installation hardware and tools are readily available.
Depending on the application, this may include...
Tools:
wire strippers
cleaning / prep supplies (varies based on what is being cleaned)
medium to hard roller
Read and understand this entire manual before operating this electric heater.
Hardware:
junction box wire ties mounting hardware
plug if connecting heater to a receptacle rather than hard wiring to a
temperature controller or junction box.
temperature controller and
sensor
silicone RTV insulating material
high-temperature adhesive tape
MOUNTING YOUR HEATING BLANKET
Your silicone rubber heating blanket can be mounted on both fl at and curved
surfaces. However, do not allow your heater to exceed the maximum “bend
radius”. The typical bend radius is approximately 2” (51mm). To determine the
bend radius, slowly bend the heater until it begins to crease or fold. The point
prior to creasing is the bend radius. Your heater may be more fl exible in one
direction than the other, however, the heater should be installed with the wires
exiting the bottom if in an outdoor application.
Your heater can be attached to the surface using:
• Factory applied PSA (pressure sensitive adhesive)
• Factory supplied mechanical fasteners
• Factory supplied or recommended mechanical clamping devices
• High-temperature adhesive tape that will not damage the heater
• Thin layer of RTV
For all installations, regardless of adhesion method:
1. For proper temperature control, place the thermocouple, RTD, or other sensing
device, so that it touches the edge of the heating blanket.
- Sensor must be in close proximity to the heater to prevent overheating.
- If heating blanket is installed on a vertical surface, place sensor directly
on lower edge of heating blanket since heat naturally rises.
- Sensor should be connected in accordance with instructions provided
with temperature controller.
- Secure with one strip of aluminum adhesive tape.
2. Ensure heater is in contact with the surface to be heated. If air gaps are
present, heat transfer will decrease and there is a potential to overheat the
heating blanket. Use a medium to hard roller to eliminate trapped pockets of air.
Do not wrap the heater over itself or allow it to contact a second
heater.