Quick Start Guide
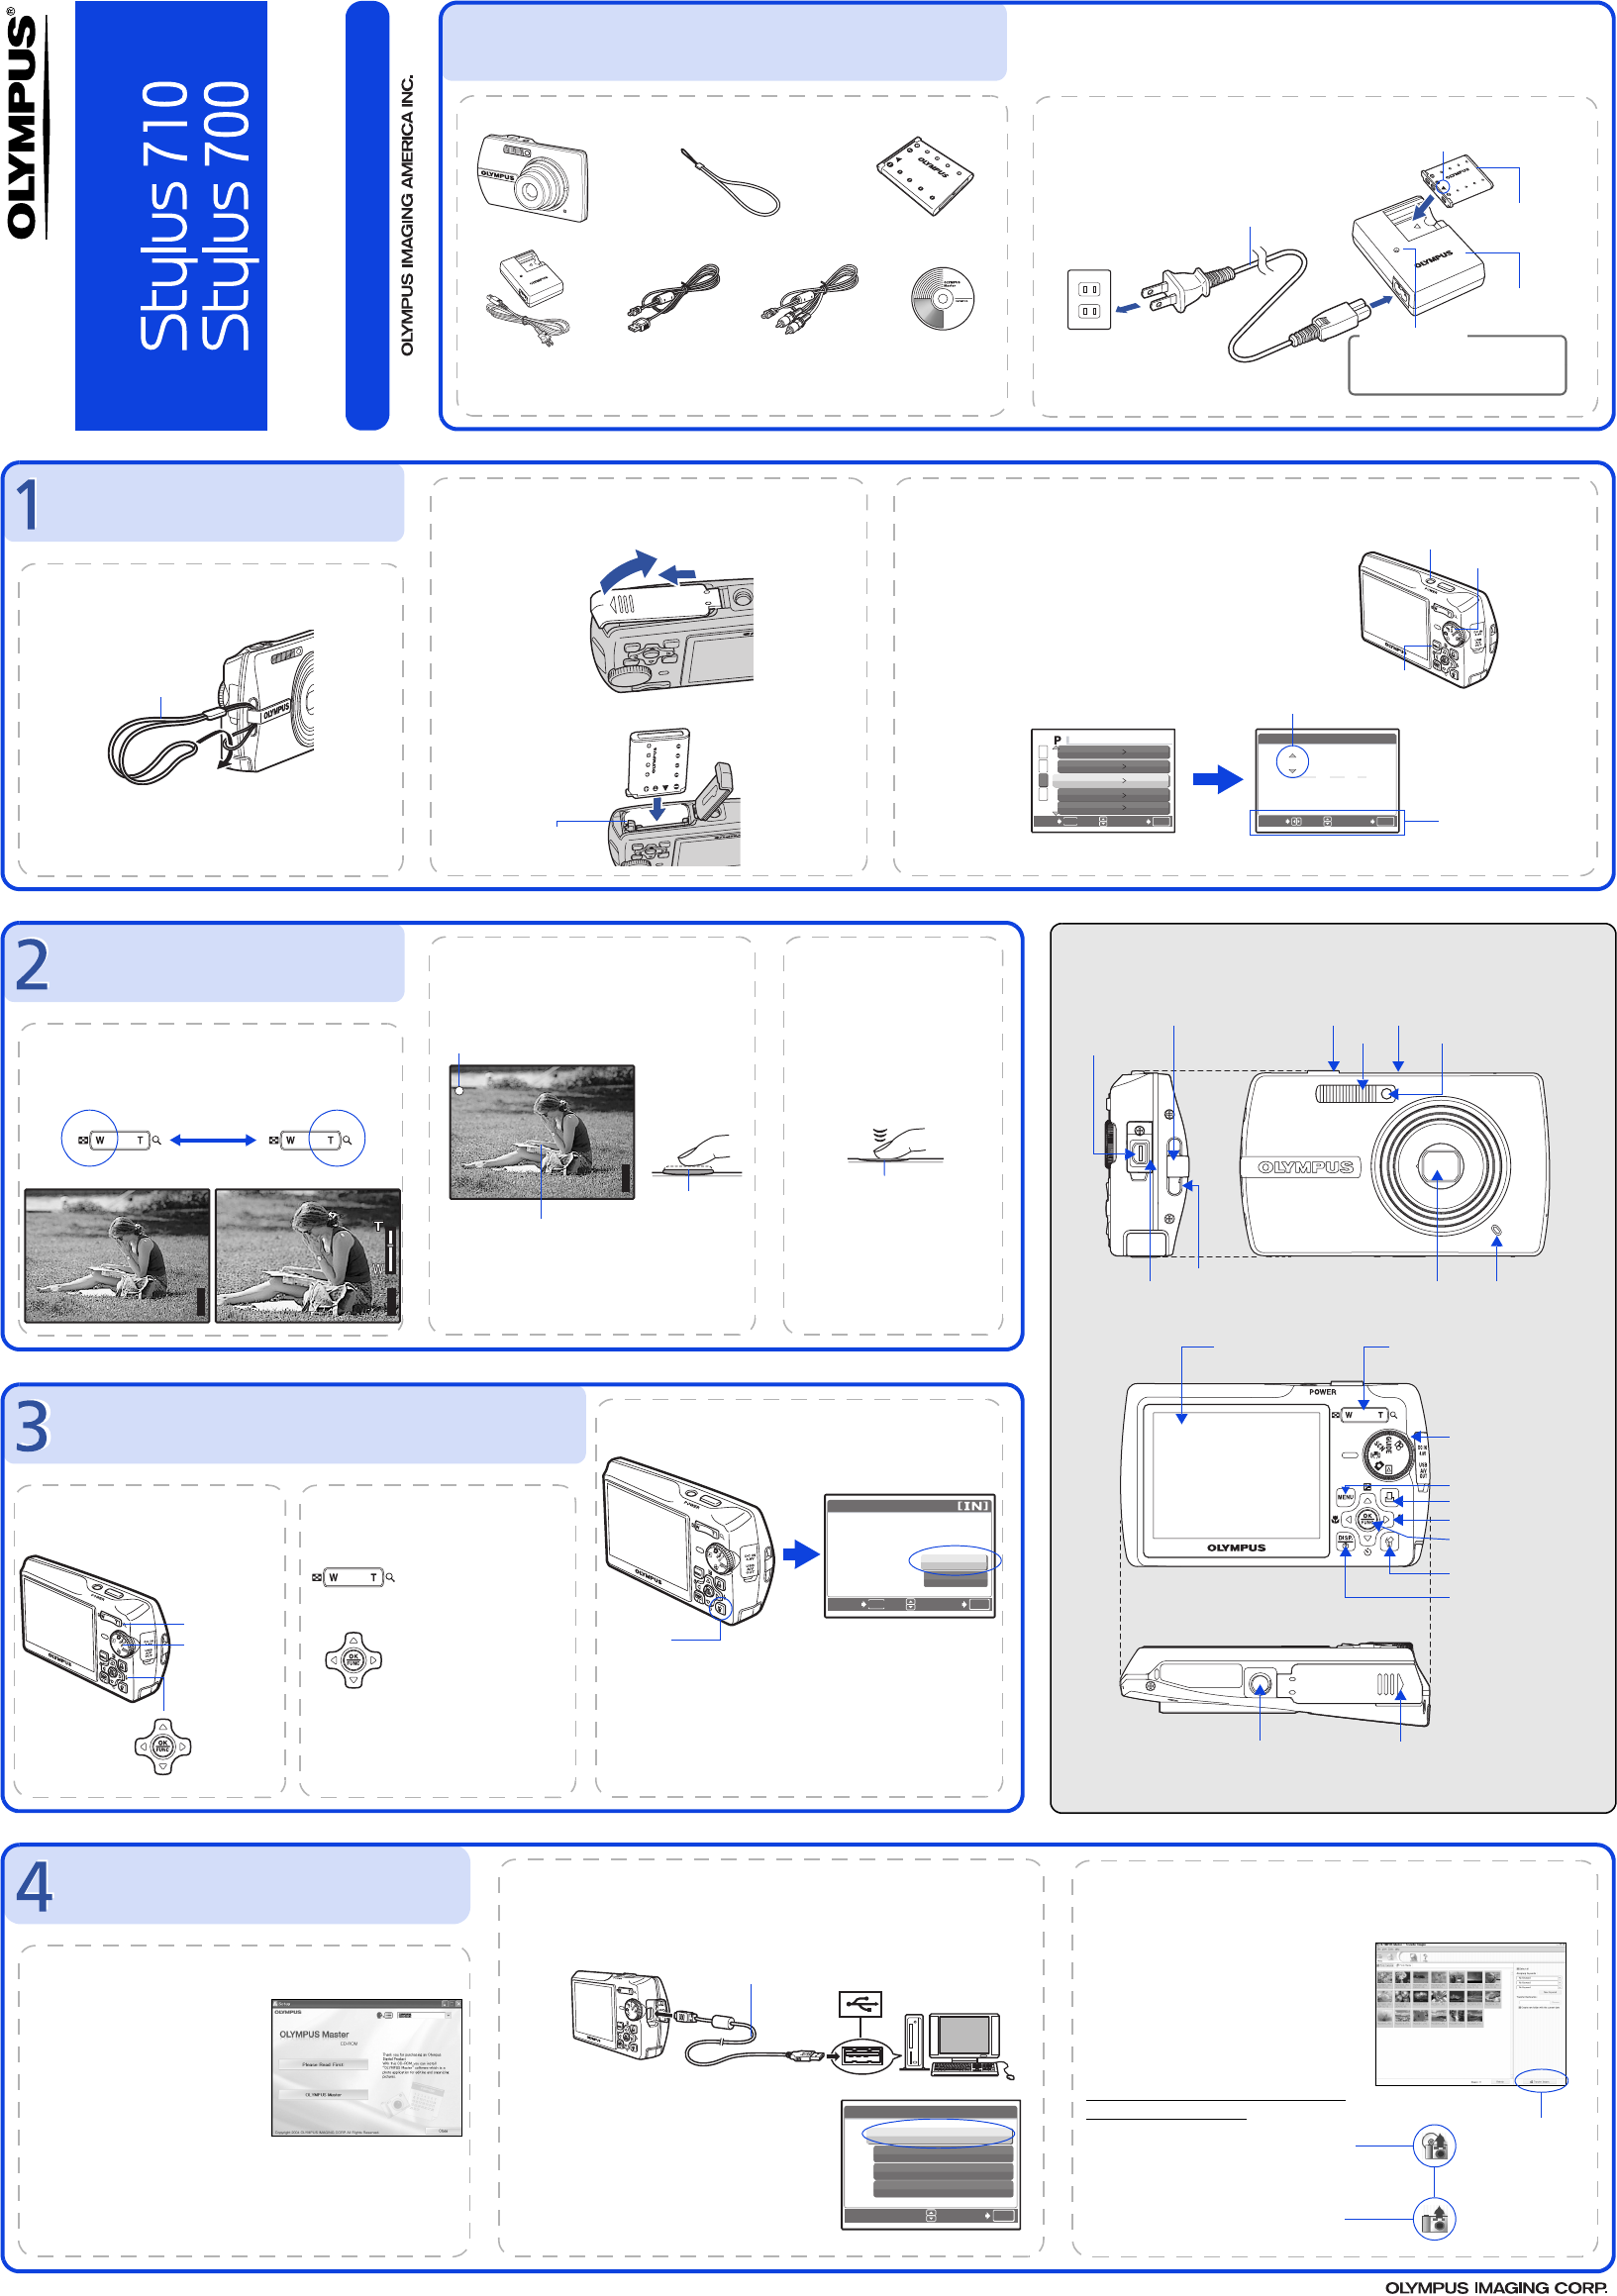
TRANSFER IMAGES
a. Install the software
1 Insert the OLYMPUS Master
CD-ROM.
2 Windows: Click the
“OLYMPUS
Master“ button.
Macintosh: Double-click the
“Installer“ icon.
3 Simply follow the on-screen instructions.
Remember to register your camera when you install OLYMPUS
Master or visit:
www.olympusamerica.com/prodreg
b. Connect the camera to the computer
c. Transfer images to the computer
1 Connect the camera and computer using the USB cable (included).
The monitor will turn on automatically.
2 Select [PC] on the monitor, and press o.
Your PC will now recognize your camera as a
removable storage drive.
USB cable
1
2
OK
ŜŊŏŞ
SET
USB
PC
EASY PRINT
CUSTOM PRINT
EXIT
1 With the camera now connected,
open OLYMPUS Master.
The [Transfer Images] window is
displayed.
2 Select the images you want to
transfer, and click the [Transfer
Images] button.
[Transfer Images] window
[Transfer Images] button
b. Click the “From Camera” icon.
a. Click the “Transfer Images” icon
on the OLYMPUS Master main
menu.
If the [Transfer Images] window is not
displayed automatically:
REVIEW OR ERASE A PICTURE
a. Set the mode dial to
q
b. Take a closer look
Zoom Button
The last picture taken will be displayed.
Press T or W to zoom in
or out.
Press o to return to
the original size.
Prev. Picture Next Picture
Arrow Pad (1243)
Set the mode dial to K to return to
shooting mode.
Press 12 or 43 to
scroll around.
Mode Dial
c. To erase a picture
SELECT
GO
OK
MENU
S
ERASE
YES
NO
1 Display the picture you
want to erase.
2 Press the S button.
3 Select [YES], and press
o.
The picture is
permanently erased.
S Button
GET STARTED
a. Attach the strap
Pull the strap tight so that it does
not come loose.
1
Strap
b. Insert the battery
1 Slide
2 Lift
3 Insert
Battery lock knob
c. Set the date and time
1 Press o button to turn the camera on.
2 Set the mode dial to K.
3 Press m button to display the top menu,
and select [SETUP] > [X].
4 Press 12 to set an item. Press 43 to select
the next field.
o Button
Mode Dial
m Button
OK
ŜŊŏŞ
x
ijııķġįġıIJġįġıIJ
ijııķġįġıIJġįġıIJ
Y
Y
ȁMȁD
ııġĻġıı
ııġĻġıı
SETMOVE
X
OK
SET
MENU
BACK
Ĵ
IJ
ij
ĵ
PIXEL MAPPING
OFF
ALARM CLOCK
OFF
ĨıķįıIJįıIJ
ııĻıı
DUALTIME
Ƚ
ȆȆȆȆ
Ž
ȆȆȆȆ
ȼ
X
s
SETUP
Operation
guide
Date format
BEFORE YOU BEGIN
Gather these items (box contents)
Digital Camera Strap LI-42B Lithium Ion Battery
LI-40C Battery Charger USB Cable AV Cable OLYMPUS Master
Software CD-ROM
Items not shown: Advanced Manual (CD-ROM), Basic Manual, warranty card.
Contents may vary depending on purchase location.
Charge the battery (recommended*)
2
1
AC Wall Outlet
Power Cable
*Battery comes partially charged.
Red light on: Charging
Light off: Charging complete
(Charging time: Approx. 300 minutes)
Charging Indicator
LI-42B Lithium Ion
Battery
LI-40C Battery
Charger
The screen and camera illustrations shown in this manual were produced during
the development stages and may differ from the actual product. Unless
otherwise specified, the explanation about these illustrations is provided in
Stylus710/µ710.
Start Here
CAMERA DIAGRAM
Self-Timer Lamp
Shutter Button o Button
Flash
Lens
Zoom Button
Mode Dial
m Button (MENU)
Arrow Pad (1243)
o Button (OK/FUNC)
Strap Eyelet
Battery Compartment/Card CoverTripod Socket
Connector Cover
Multi-Connector
d Button
S Button (Erase)
< Button (Print)
Monitor
Speaker
Microphoe
For more information, please refer to the Basic & Advanced
Manuals or visit: www.olympusamerica.com/support
VH449601
Printed in China © 2006
TAKE A PICTURE
a. Zoom
P
ʼnŒ
ʼnŒ
Ĵıĸij
Ĵıĸij
ȿijĴıĵ
ijĴıĵ
[
IN
IN
]
44
[ ]
P
ʼnŒ
ʼnŒ
Ĵıĸij
Ĵıĸij
ȿijĴıĵ
ijĴıĵ
[
IN
IN
]
44
[ ]
Zoom Out: Zoom In:
c. Take the pictureb. Focus
1 Press the shutter
button completely to
take the picture.
(Pressed Completely)
Shutter Button
1 Using the monitor, place the AF target
mark over your subject.
2 Press and hold the shutter button halfway
to lock the focus.
The green lamp indicates the focus is locked.
P
ʼnŒ
ʼnŒ
Ĵıĸij
Ĵıĸij
ȿijĴıĵ
ijĴıĵ
[
IN
IN
]
44
[ ]
Green Lamp
AF Target Mark
(Pressed Halfway)
Shutter Button
Pictures are recorded in
the internal memory.
Pictures can also be
recorded to an
optional xD-Picture
Card (It is called just
“card” in the attached
instruction manual.)
d4302qsg_e_7.fm Page 1 Tuesday, December 20, 2005 12:02 PM


