INSTALLATION INSTRUCTIONS
READ & SAVE THESE INSTRUCTIONS!
CAUTIONS
1. Before wiring the paddle fan, turn off the electric power supply
at the main fuse or circuit breaker box and leave
it off until the installation is complete.
2. Mount the outlet box so it will support a minimum of
45 pounds. The outlet box must be mounted flush to ceiling.
Do not use a plastic outlet box.
3. Do not install paddle fan with less than 7 feet clearance
between floor and lowest edge of fan blades.
4. If you are unfamiliar with electric wiring, acquire
the services of a qualified electrician.
5. Use proper cable and fittings. Be certain the fan is properly
grounded. Wiring must comply with national and local
electrical codes.
6. Electrical requirements: 120vAC, 60 Hz, single phase,
1 amp. – without optional lighting accessory.
7. Fan blades may be cleaned with a mild soap solution. Do not
use an abrasive cleaner or a strong chemical cleaner.
8. WARNING: To reduce the risk of fire or electrical shock,
do not use this fan with any solid-state speed control
device (NOTE: Refer to NuTone's catalog for appropriate
speed control switches.)
9. WARNING: To reduce the risk of personal injury,
do not bend the blade brackets when installing the
brackets, balancing the blades or cleaning the fan. Do not
insert foreign objects between rotating fan blades.
10. CAUTION: To reduce the risk of electric shock, connect only
to supply circuit provided with a ground fault circuit
interrupter.
11. CAUTION: To reduce the risk of electric shock, fire or
personal injury, a light kit must be marked suitable for use
with this fan and must be marked as suitable for outdoor use.
12. Do not operate reversing switch while fan blades are in
motion. Fan should be turned off and blades stopped before
reversing blade direction.
LOCATION
1. Minimum ceiling height: 8 feet. When fan is installed,
this allows a minimum of 7 feet between the floor and fan
blades.
2. The center of the fan must be located at least 32" from
any vertical surface.
3. Do not mount fan below, next to or between air ducts, beams
or any other obstruction which may interfere with the natural
air flow pattern created by the fan.
4. Fan can be mounted using down rod or closer to ceiling using
ceiling cup as close up adapter.
MOUNTING ON A SLOPED CEILING
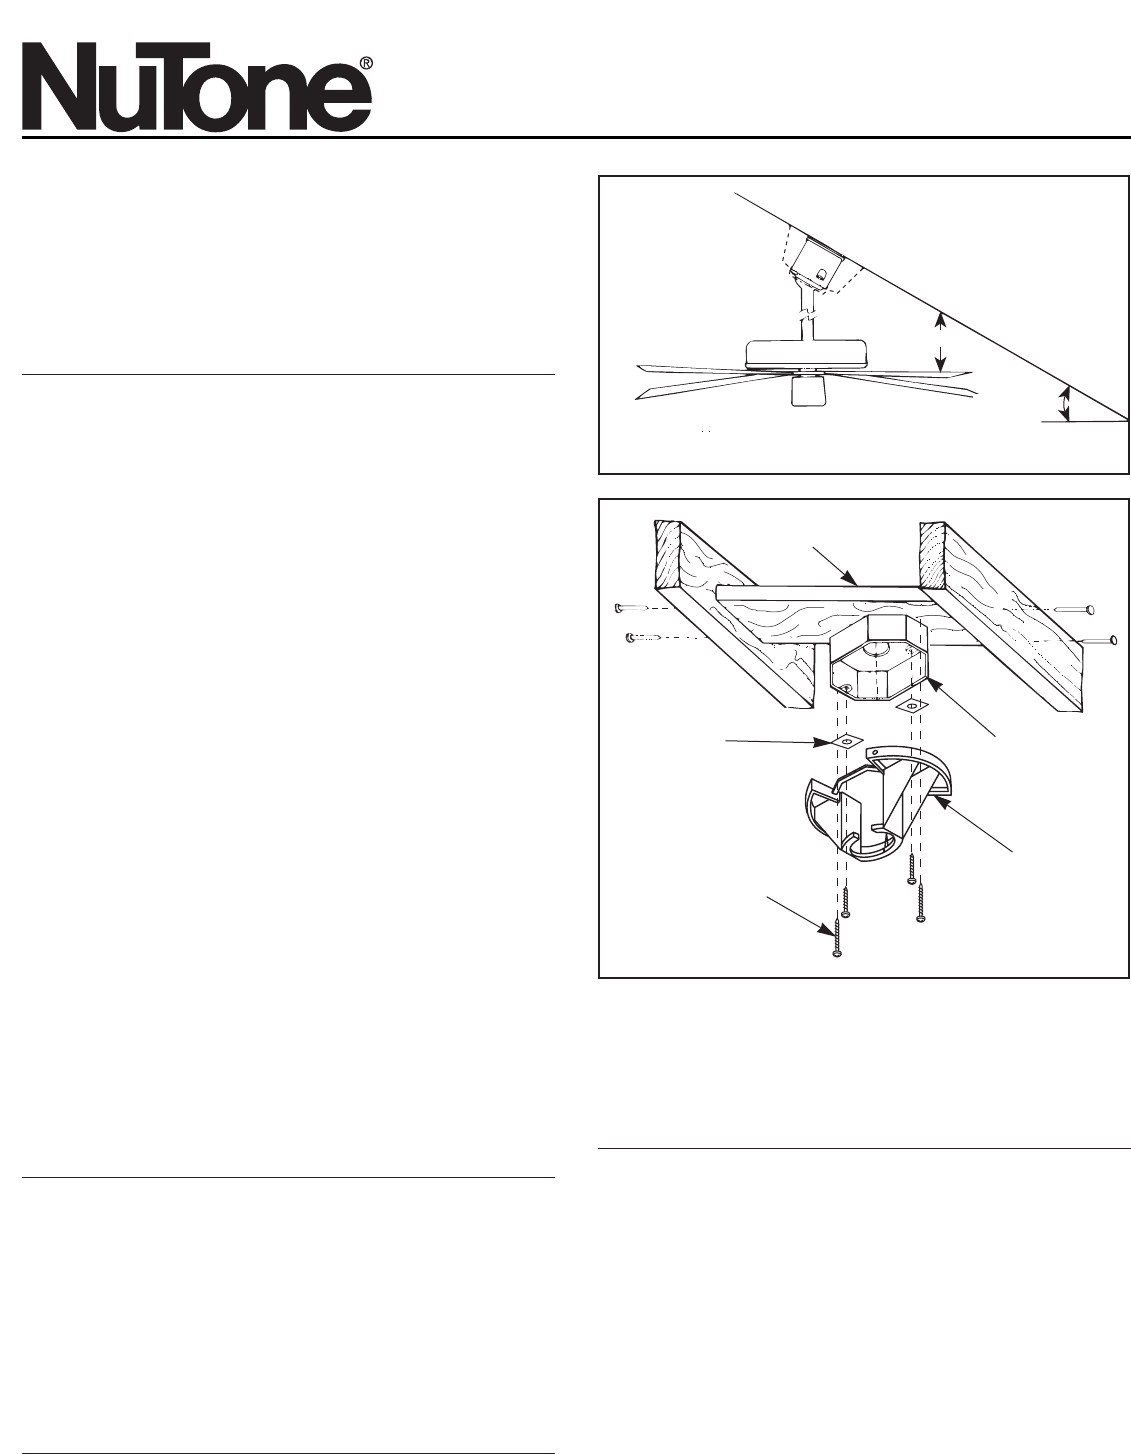
1. Refer to Figure 1. A paddle fan equipped with a ball and
hanger bracket assembly can be safely mounted to a sloped
FIGURE 1
FIGURE 2
ALWAYS MOUNT HANGER
WITH OPENING TOWARD
TOP OF SLOPE
HEADER
OUTLET BOX
RUBBER
PADS
SUPPLEMENTAL
MOUNTING SCREWS
SOCKET
HANGER
ceiling where the maximum angle of the sloped ceiling does
not exceed 25°.
2. For any angled ceiling, use appropriate NuTone Extension
Stems to insure proper clearance between the blades and
ceiling. See NuTone catalog.
MOUNTING OUTLET BOX
Refer to Figure 2.
CAUTION: To reduce the risk of personal injury, install the
supplemental mounting means and use only the hardware
provided with the fan or use a listed outlet box marked as
acceptable for fan support. If the combined weight of the
ceiling fan and any light kit used with it exceeds 35 pounds,
the fan should be supported independently of the outlet
box. The weight of your fan is 20 lbs.
1. Fan mounts to a standard 4" metallic outlet box or a listed fan
support box. For damp location mounting, use outlet box listed
for “Damp Locations”. For outdoor mounting use outlet box
listed for wet locations.
“OpenAire”
MODEL: PFOB-52
