


9
SECTION 5: ADJUSTING YOUR CHIPPER SHREDDER VACUUM
WARNING: Do not at any time make any
adjustments without first stopping engine,
disconnecting spark plug wire, and
grounding it against the engine.
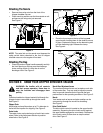
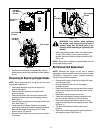
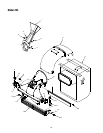
Front Caster Wheels
This chipper shredder vacuum is equipped with front
caster wheels. The casters can be locked in a straight
ahead position or position to swivel freely. Lift and place
pins in the larger holes for locked or straight ahead
operation. Place pins in smaller holes to allow casters
to rotate freely. Lock wheels in straight position when
operating on slopes. See Figure 7.
Figure 7
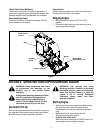
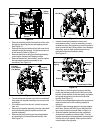
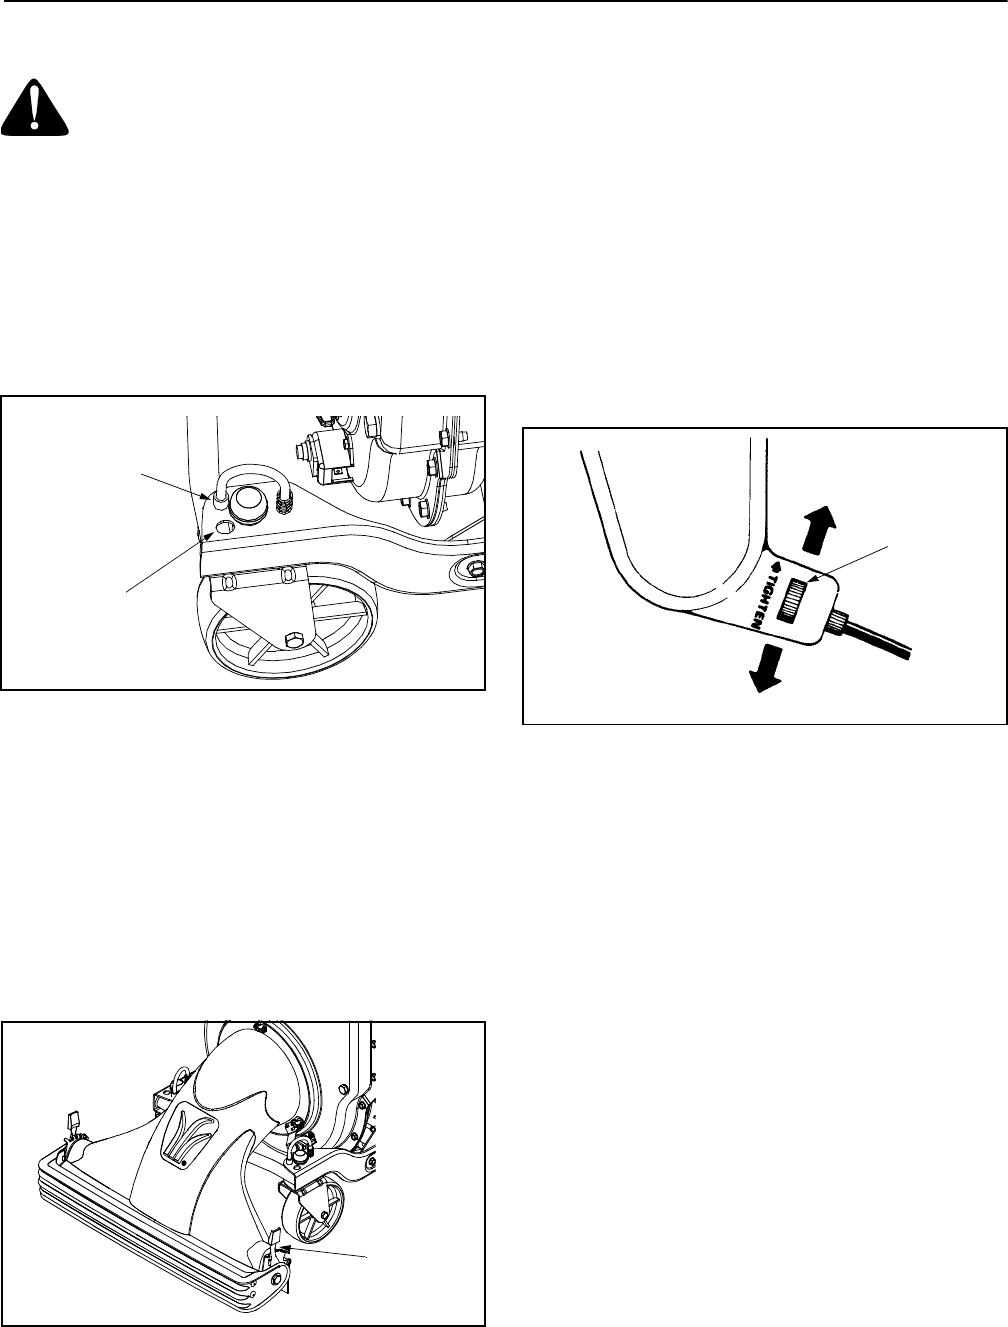
Nozzle Door Height Adjustment
The nozzle adjustment levers are located on each side
of the nozzle door. The nozzle door can be adjusted to
any of five positions, ranging from 1/2” to 3” ground
clearance that will provide the best performance for the
operating conditions. Slide the height adjustment lever
forward or backward for adjusting the nozzle door
upwards or downwards. Height must be adjusted
equally. In general, raise the nozzle to vacuum a thick
layer of leaves and lower the nozzle for smooth
surfaces. See Figure 8.
Figure 8
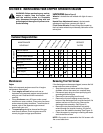
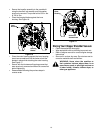
Drive Clutch Cable Adjustment
Adjust the drive clutch control if the chipper shredder
vacuum moves forward with the drive clutch control
disengaged, if it does not self-propel with the drive
clutch control engaged, or if drive belt is slipping (unit
hesitates while engine maintains the same speed). Use
the adjustment wheel located in the clutch control
housing to tighten or loosen the clutch cable. In
addition, the adjustment wheel may also be used to
determine the position in which the drive clutch control
is engaged. If it is more comfortable to have the drive
engaged with the lever further away from the handle,
tighten the clutch cable. See Figure 9.
Figure 9
Engine Adjustments
Refer to the separate engine manual for engine
adjustment instructions.
Smaller Hole
(Rotate Freely)
Larger Hole
(Locked)
Nozzle Door
Adjustment
Lever
Tighten
Loosen
Adjustment
Wheel