


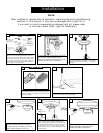
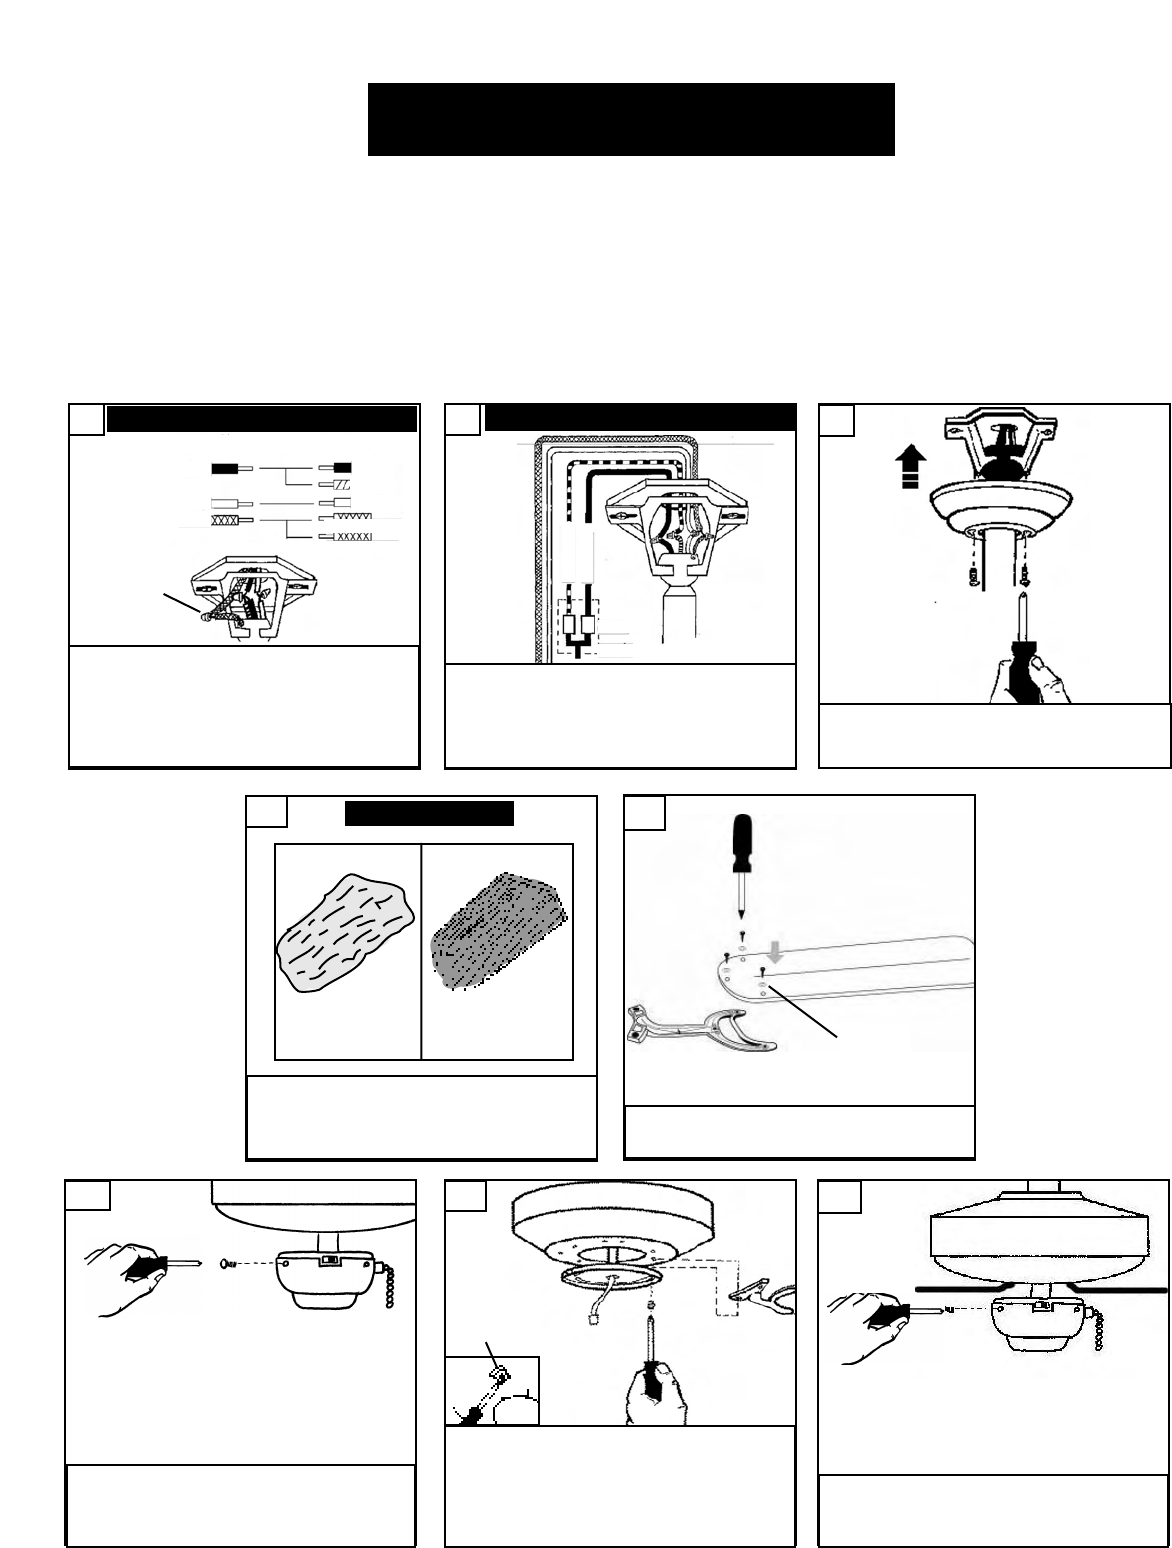
To gain access to the blade bracket
attachment holes remo
ve the switch
housing co
v
er b
y unscrewing the three
screws. Gently slide the co
v
er off
.
12
Combo-Blades feature two high quality finishes
on one blade. Select the one that best comple-
ments your decor, or change the style with just
a flip of the blade.
10
Attach blade brackets to blades using the blade
br
ack
et screws and w
ashers pro
vided.
11
F
or pullchain controls, follow diagram above.
M
ake sure that all exposed wiring is secured
inside wire nuts. Note: Wires from house may
vary in color and may not include ground wire.
After wiring is conplete, gently push wires into
junction box with wire nuts pointing upward.
Refer to point 3 of safety tips.
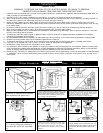
7
H
ouse
F
an
Black
White
G
reen
Black
W
hite
Green(Bracket)
Blue *
For control of fan and optional light from
wall location, follow diagram above.
NOTE: A professional electrician is recom-
mended for this type of installation.
8
Raise the canopy up and align the two holes in
the canopy with the two holes in the hanger
bracket. Secure with two 5/32 x 1/2” screws
provided.
9
Wiring option with wall speed control
Light Switch
Fan Switch
Wall
Control
Remove plastic shipping stabilizer tabs from
motor
, if present. The screws, w
ashers and
motor pads are pre-installed to the blade hold
-
ers. Attach blade assembly to motor by tighten-
ing first screw one turn, then tighten second
screw securely. Then, go back and tighten first
screw securely.
13
After attaching blade; reinstall the
switch housing using the three
screws previously remo
v
ed.
14
COMBO-BLADE
S
tandard wiring option
Green(Downrod)
*
Attach blue wire
only if attaching
l
ight kit with fan
Secure with twist-
lock wire connectors
(included)
Shipping
stabiliz
er tab
Installation
After installation, please refer to operation, maintenance and troubleshooting
sections in this manual. If your fan is packaged with a light kit or
if you wish to install a separately purchased light kit, please refer
to the insert sheet titled: Light Kit Installation
Note:
Fiber
washers