


5
Note:
The day and time will not appear if clock use has been disabled at Function
Selection of remote controller.
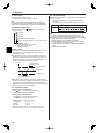
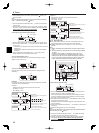
Day of the Week
& Time display
°C
°C
TIME SUN
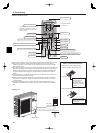
PAR-21MAA
ON/OFF
FILTER
CHECK
OPERATION
CLEAR
TEST
TEMP.
MENU
BACK DAY
MONITOR/SET
CLOCK
ON/OFF
2
4
9
1
a
Time Setting
TIME SUN
2
3
4
Day of the Week Setting
4. Setting the Day of the Week and Time
°C
°C
PAR-21MAA
ON/OFF
FILTER
CHECK
OPERATION
CLEAR
TEST
TEMP.
MENU
BACK DAY
MONITOR/SET
CLOCK
ON/OFF
2
7
2
3
3
8
6
4
5
8
7
1
1
5
6
2
5
6
1
2 6
5
3
3
7
7
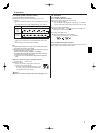
5.1. Turning ON/OFF
<To Start Operation>
Press the ON/OFF button 1.
• The ON lamp 1 and the display area come on.
<Screen Types>
For details on setting the language for the remote controller display, refer
to section 8. Function Selection.
The initial language setting is English.
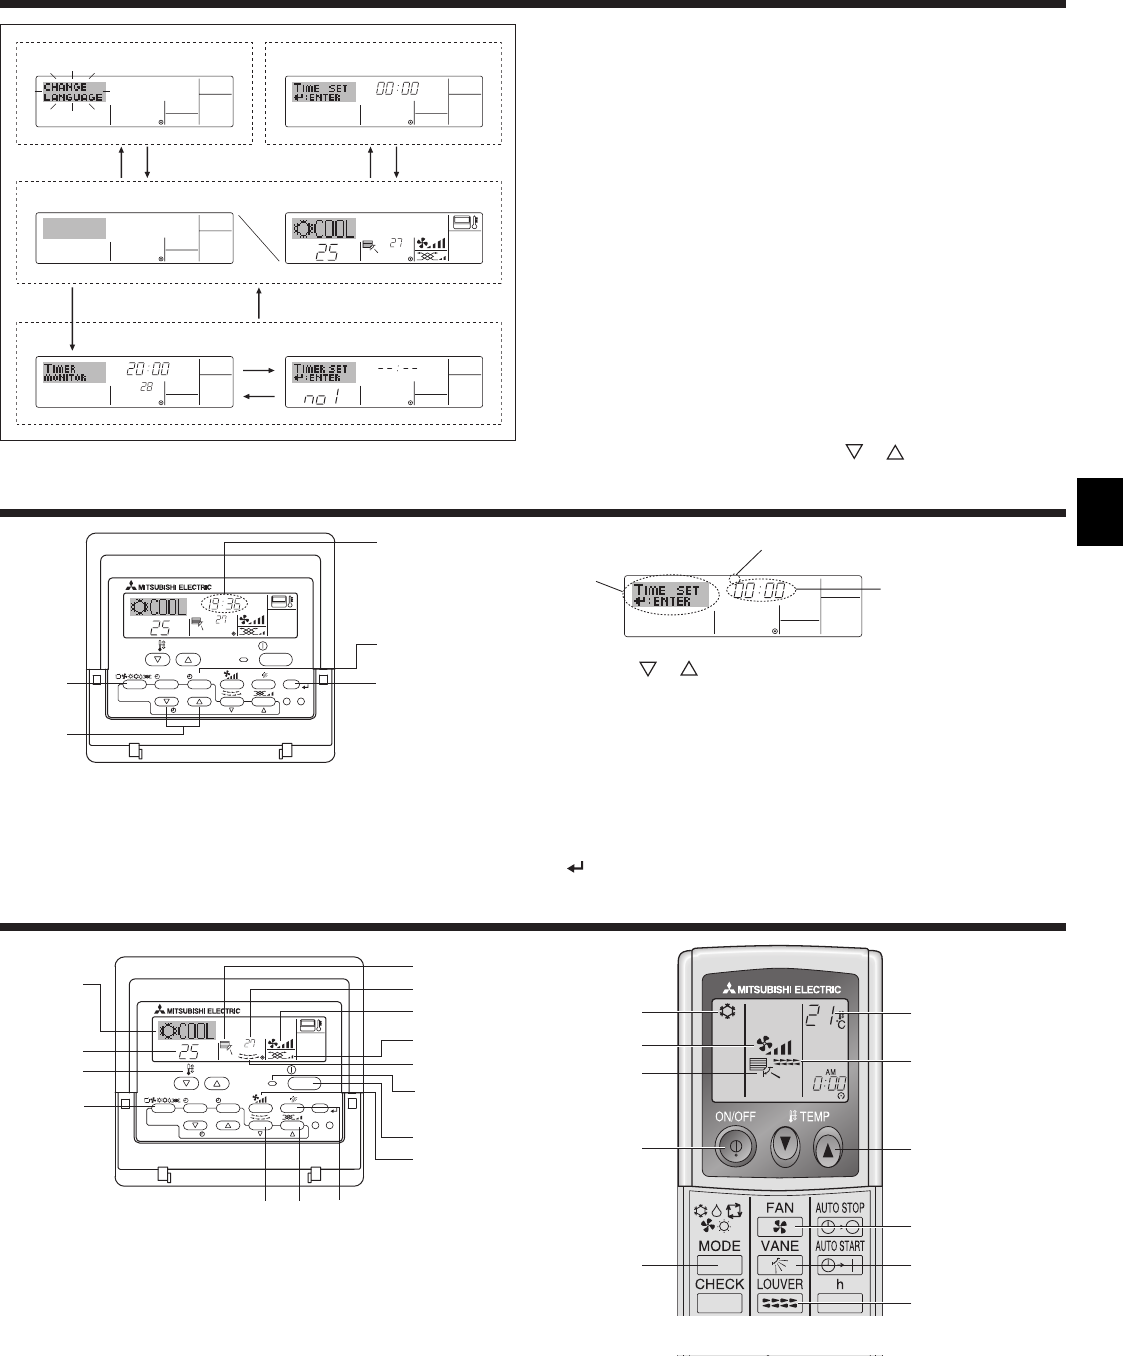
Function Selection of remote controller:
Set the functions and ranges available to the
remote controller (timer functions, operating
restrictions, etc.)
Set Day/Time: Set the current day of the week or time.
Standard Control Screens:
View and set the air conditioning system’s
operating status
Timer Monitor: View the currently set timer (weekly timer,
simple timer, or Auto Off timer)
Timer Setup: Set the operation of any of the timers (weekly
timer, simple timer, or Auto Off timer).
<How to change the screen>
A : Hold down both the Operation mode button and the Timer On/Off
button for 2 seconds.
B : Press the Timer Menu button.
C : Press the Operation mode (Back) button.
D : Press either of the Set Time buttons ( or ).
°F°C
TIMER
MON
OFF
WEEKLY
SUN MON TUE WED THU FRI SAT
WEEKLY
°F°C
°C
TIME SUN
Function Selection of remote controller
Set Day/Time
Standard Control Screens
OFF ON
Timer Monitor Timer Setup
ADC
BC
B
3. Screen Configuration
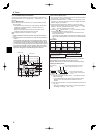
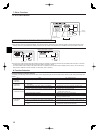
5. Operation
1. Press the or Set Time button a to show display 2.
2. Press the Timer On/Off (Set Day) button 9 to set the day.
* Each press advances the day shown at 3 :
Sun → Mon → ... → Fri → Sat.
3. Press the appropriate Set Time button a as necessary to set the
time.
* As you hold the button down, the time (at 4) will increment first in
minute intervals, then in ten-minute intervals, and then in one-hour
intervals.
4. After making the appropriate settings at Steps 2 and 3, press the Filter
button 4 to lock in the values.