


5
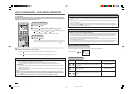
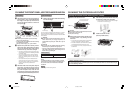
When the remote controller cannot be used (emergency operation)
When the batteries of the remote controller run out or the remote controller malfunctions, the emergency operation
can be done using the EMERGENCY OPERATION switch.
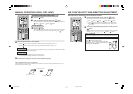
Handling of the remote controller
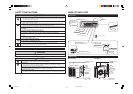
• The range that the signal can reach is about 6 m
when the remote controller is pointed at the front of
the indoor unit.
• When a button is pressed, one or two beeps will be
heard from the indoor unit. If no sound is heard,
operate again.
• Use the remote controller carefully.
If it is dropped, thrown or it gets wet, the remote
controller may not operate.
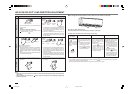
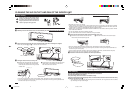
When installing on a wall, etc.
• Install the remote controller holder in a position where
the signal reception sound (beep) can be heard from
the indoor unit when the
ON/OFF
button is pressed.
How to install/remove the remote controller
Installing :Insert the remote controller downward.
Removing :Pull it up.
Dry-cell batteries
■ Reference for replacing batteries
Replace the batteries with new AAA alkaline batteries
in the following cases:
· When the indoor unit does not respond to the remote
control signal.
· When the display on the remote controller becomes
dim.
· When a button of the remote controller is pressed, all
displays appear on the screen, and then disappear
immediately.
Do not use manganese batteries. The remote controller
could malfunction.
• The service life of an alkaline battery is about 1 year.
However, a battery whose time limit is approaching
may be exhausted soon. The recommended usable
time limit is indicated (month/year) on the bottom of
the battery.
• To prevent liquid leakage, take out all batteries when
the remote controller is not going to be used for a
long time.
CAUTION:
If liquid from the batteries gets onto your skin or
clothes, wash it well with clean water.
If liquid from the batteries gets into your eyes, wash
them well with clean water and consult a doctor at
once.
• Do not use rechargeable batteries.
• Replace the 2 batteries with new ones of the same
type.
• Dispose of exhausted batteries in the correct manner.
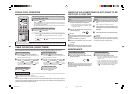
PREPARATION BEFORE OPERATION
Remote controller
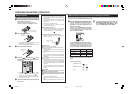
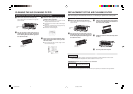
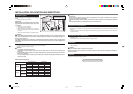
How to set the batteries and the current time
Remove the front lid and insert batteries.
Then reattach the front lid.
Insert the minus pole of the batteries first.
Check if the polarity of the batteries is correct.
Press the RESET button.
• If the RESET button is not pressed, the remote
controller may not operate correctly.
• Be sure to press the RESET button not too strongly.
Press the CLOCK set button.
Press the (Forward) and (Back-
ward) buttons (TIME SET buttons) to set the
current time.
•
Each time the button is pressed, the set time
increases by 1 minute, and each time the
button
is pressed, the set time decreases by 1 minute.
• Pressing those buttons longer increases/decreases
the set time by 10 minutes.
Press the CLOCK set button again and close
the front lid.
To stop the emergency operation, press the
EMERGENCY OPERATION switch once (in
case of EMERGENCY HEAT MODE) or twice
(in case of EMERGENCY COOL MODE).
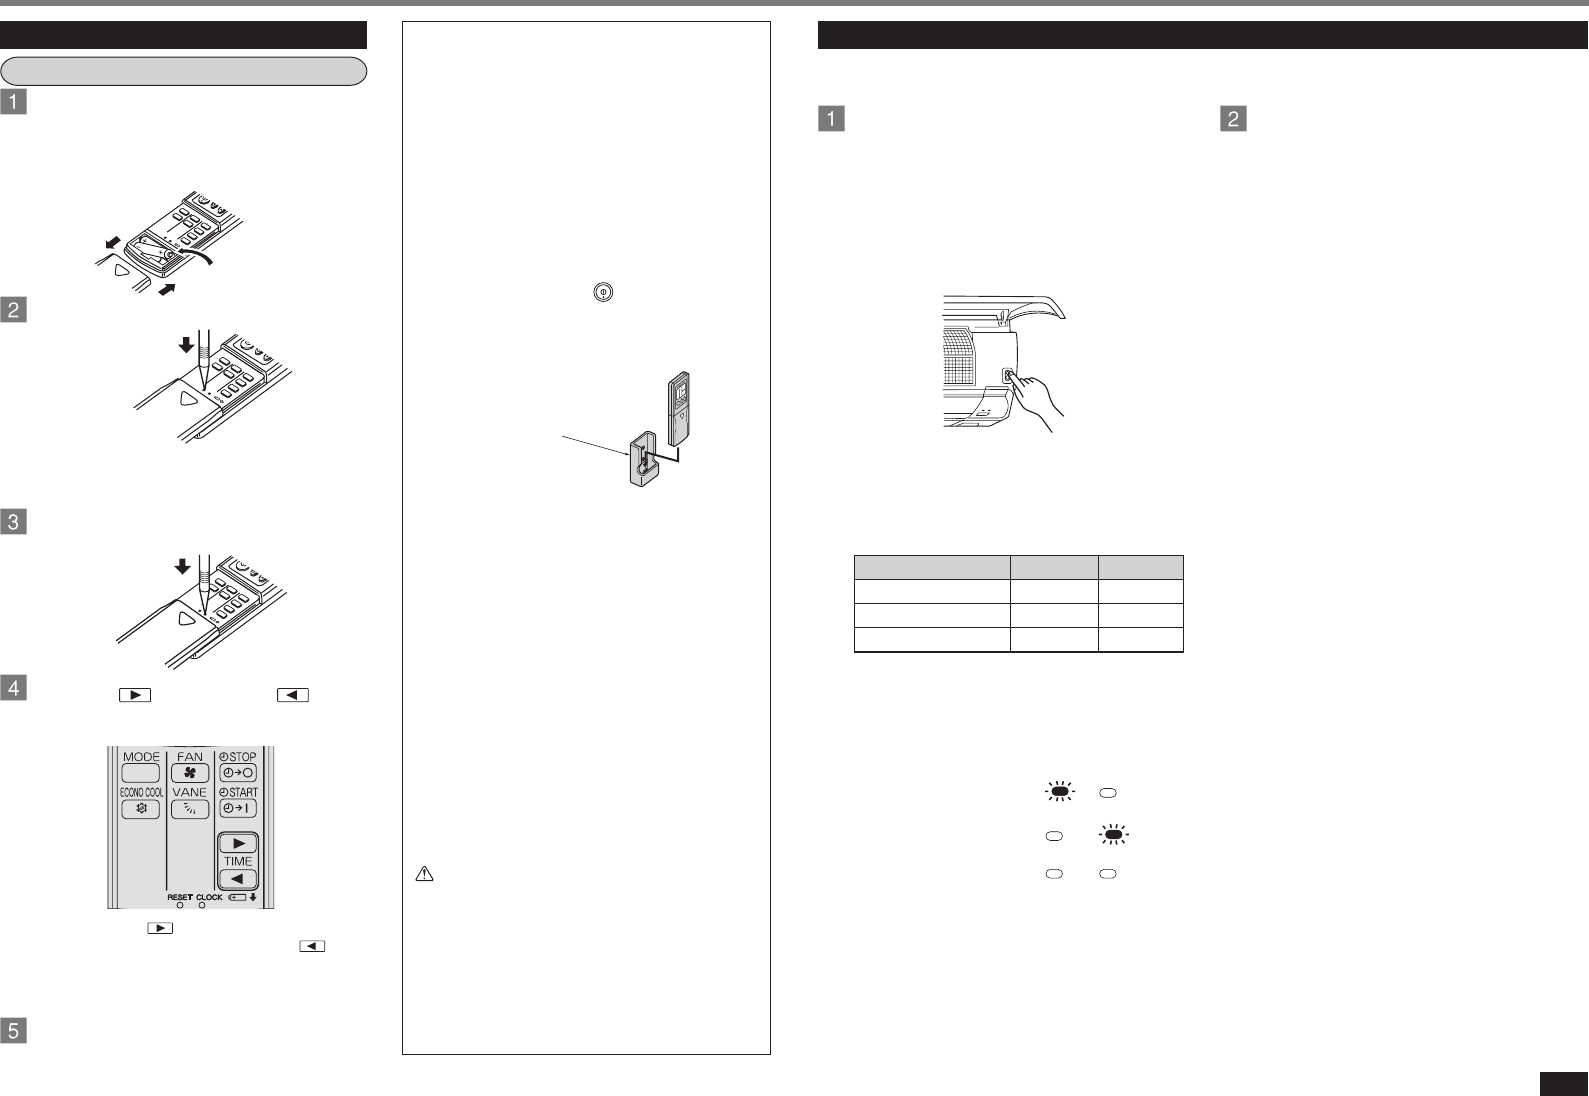
Press the EMERGENCY OPERATION switch.
• Each time the EMERGENCY OPERATION switch is
pressed, the unit will operate in order of
EMERGENCY COOL MODE, EMERGENCY HEAT
MODE and STOP MODE.
However, when the EMERGENCY OPERATION
switch is once pressed, the unit will operate in test
run for 30 minutes and then the operation mode
shifts to EMERGENCY MODE.
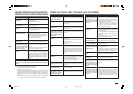
• Details of EMERGENCY MODE are as shown below.
However, the temperature control does not work
for 30 minutes in test run and the unit is set to
continuous operation. The fan speed is set to High
in test run and shifts to Medium after 30 minutes.
Operation mode COOL HEAT
Set temperature 24°C24°C
Fan speed Medium Medium
Horizontal vane Auto Auto
• The operation mode is indicated by the Operation
Indicator lamp on the indoor unit as following
figure.
Operation Indicator lamp
EMERGENCY COOL
EMERGENCY HEAT
STOP
Press using a
thin stick.
In
ser
t the minus pol
e
of the batteries first
.
Press using a
thin stick.
R
e
mot
e
c
ontroll
er
hol
der
➝ ➝
SG79Y404H03 6/14/06, 10:13 AM5