


4
5
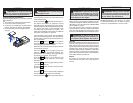
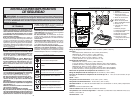
OPERATION
Making a Measurement
Insert the probe into the input. Two probes can be
used simultaneously.
Press and hold the button to turn the meter on.
The display will continue to update the contact
temperature while the temperature probe reaches
thermal equilibrium with the object being measured.
The display will switch to low backlight mode
5 minutes after the last button is pressed. The
meter will automatically power off after an additional
25 minutes if no buttons are pressed.
If the low battery life indicator appears , the
meter will automatically power off 5 minutes after
the last button is pressed (replace the batteries as
soon as possible).
Press the button or button to start the
timer and begin tracking the maximum, minimum
and average temperatures over time.
When the timer is activated the auto power off time
is extended to 30 hours.
Press the button to toggle through the
minimum, maximum, and average readings. The
measurement time readings also toggle through
the minimum, maximum, and average.
Press the button to turn off the timer and
stop tracking minimum, maximum and average
temperatures.
Press the button to toggle between Celsius
(°C) and Fahrenheit (°F).
Press the button to hold or release the dis-
played readings.
Press the button to change what is displayed
in the primary and secondary measurements.
Press and hold the button to turn the meter off.
WARNING Never connect the probe
to an energized circuit.
MAINTENANCE
WARNING To reduce the risk of per-
sonal injury and damage, never immerse your
tool in liquid or allow a liquid to fl ow inside it.
WARNING To reduce the risk of injury,
always remove the batteries from the tool
before performing any maintenance. Never
disassemble the tool. Contact a MILWAUKEE
service facility for ALL repairs.
Cleaning
Clean dust and debris from tool. Keep tool clean, dry
and free of oil or grease. Use only mild soap and a
damp cloth to clean the tool since certain cleaning
agents and solvents are harmful to plastics and other
insulated parts. Some of these include gasoline,
turpentine, lacquer thinner, paint thinner, chlorinated
cleaning solvents, ammonia and household deter-
gents containing ammonia. Never use fl ammable or
combustible solvents around tools.
Repairs
For repairs, return the tool to the nearest service
center listed on the back cover of this operator's
manual.
Maintaining Tool
Keep your tool in good repair by adopting a regular
maintenance program. After six months to one year,
depending on use, return the tool to a MILWAUKEE
service facility for repairs.
If the tool does not start or operate at full power
with new batteries, clean the contacts on the battery
door. If the tool still does not work properly, return
the tool to a MILWAUKEE service facility for repairs.
ACCESSORIES
For a complete listing of accessories refer to your
MILWAUKEE Electric Tool catalog or go online
to www.milwaukeetool.com. To obtain a catalog,
contact your local distributor or service center.
WARNING Always remove batteries
before changing or removing accessories. Only
use accessories specifi cally recommended for
this tool. Others may be hazardous.
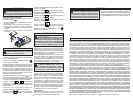
ASSEMBLY
WARNING To avoid an electrical
hazard, turn off the tool and disconnect the
thermocouples before replacing batteries.
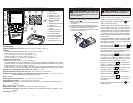
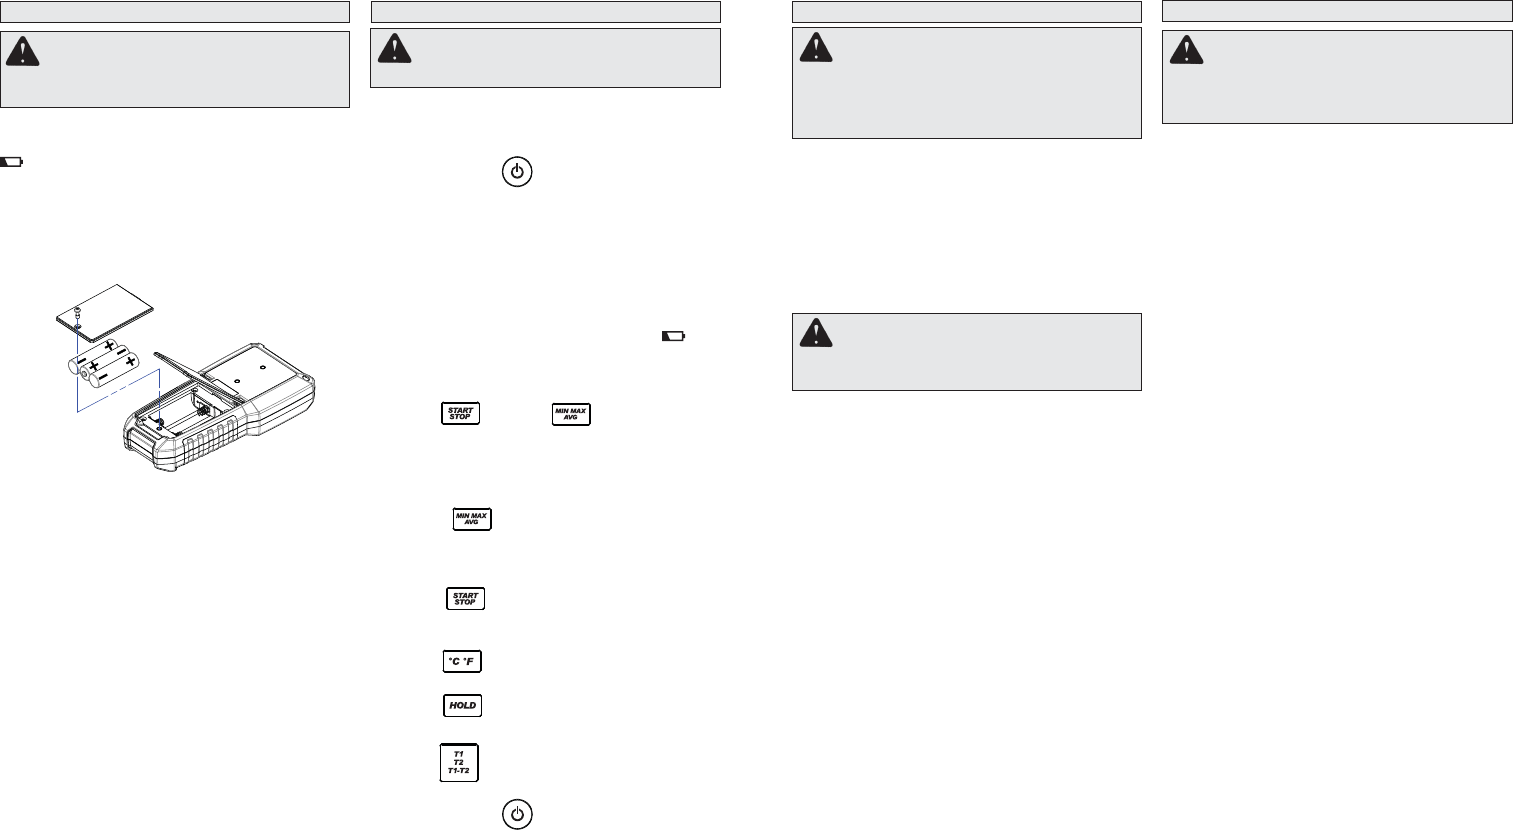
Loading/Changing the Batteries
Replace batteries when the Low Battery indicator
is displayed.
1. Turn meter OFF and disconnect the probes.
2. Unscrew and remove battery door.
3. Insert three (3) AA batteries, according to the
polarity marked in the battery compartment
4. Close the battery door and tighten screws
securely.