


14
15
The most effective time of day to take a light bath is
between 6 am and 8 pm for a recommended period of
2 hours per day.
You can take lightbaths as often as you like but the
treatment is most effective if you take lightbaths of the
below-mentioned duration at least ve days in a row.
Use
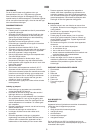
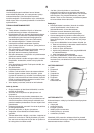
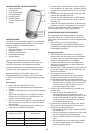
• Place the appliance on a table.
• Plug in and switch on the power.
• Switch on the on/off button (4).
• Sit down in front of the appliance in a position where
you can comfortably see the light and with your face
20-60 cm from the screen (2). You do not need to sit
directly in front of the screen.
• The hinge on the foot (7) can be used to tilt the
appliance: grip the top cover and tilt the appliance
to the desired angle.
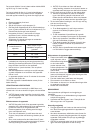
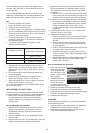
• The duration of the lightbath depends on your
distance from the screen:
• The lightbath can be interrupted and you can do
other things at the same time (e.g. read or watch
television) as long as you sit within 60 cm from the
appliance.
• Do not look directly into the light constantly, but
look at it regularly.
• Always turn off the appliance using the on/off
button, and unplug it, when it is not in use.
• Allow the appliance to cool for at least 15 minutes
before putting it away or moving it.
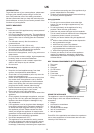
TIP: Carry the appliance by the carrying handle on the
top of the rear part (3).
REPLACEMENT OF LIGHT TUBES
The lifetime of the uorescent tubes is approx. 8,000
hours of normal use. If a tube fails, it must be replaced.
• IMPORTANT! Discard used uorescent tubes in
accordance with the rules for environmentally
harmful waste, e.g. by taking them to a waste
recovery site.
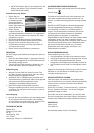
How to dismantle the appliance
• IMPORTANT! Always make sure to switch off the
appliance and remove the plug from the mains
socket before taking it apart to avoid the risk of
electric shocks.
• Place the appliance on a non-scratching surface,
screen down.
• Remove the top cover (1) by unfastening it with your
ngers, rst in one side and then in the other.
• Remove the two screws in the rear base (5) with a
Phillips screwdriver, and carefully detach the rear
and front parts of the base (6) from the rest of the
appliance.
o IMPORTANT! Very carefully detach the two base
parts, since they are connected to the rest of the
appliance with cords that must not be damaged.
• Remove the 9 screws along the side of the rear part.
o The screws of the appliance may be of different
types. Therefore, pay attention to which screws
belong to the different screw holes in order
to place them correctly when reassembling the
appliance.
• Carefully remove the rear part, turn it upside down
and put it down in front of you.
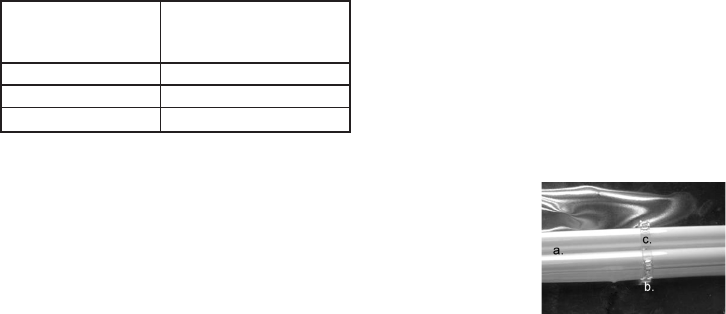
• Replace the uorescent tubes:
o Remove the locking clip (c) by pushing the ends
upwards until they click into place and remove
the clip.
o Grip the socket of the uorescent tube (a) and
pull the tube out of the socket (towards the top
of the appliance).
o Insert a new uorescent tube in the socket as far
as it goes until it clicks into place.
o Press the locking clip onto the holder (b) until it
clicks into place. Check that the uorescent tube
is tted correctly.
o IMPORTANT! Replace the uorescent tubes with
tubes of the same type. Always replace both
tubes at the same time.
How to reassemble the appliance
• Place the rear part on the screen, so that the screw
holes along the side
of the rear part align
with the holes on the
screen. The two parts
click together.
• Assemble the front
base (with the on/off
button) and make
sure the cords are not
caught between the parts.
• Mount the rear base (with the hinged foot).
• Screw the two sections of the base together.
• Place the rest of the screws in the screw holes along
the side of the appliance and fasten them.
• Assemble the top cover.
CLEANING
When cleaning the appliance, you should pay attention
to the following points:
• Remove plug from the mains socket, and allow the
appliance to cool down before cleaning it.
• Never submerge the apparatus in water, and no
water must be allowed to get into it.
Distance to screen
60 cm
40 cm
20 cm
Max. length of light bath
Approx. 2 hours
Approx. 1 hour
Approx. ½ an hour