Troubleshooting (cont'd)
Leakage Checkpoints
Use this guide to check a "Leaking" water heater. Many sus- [ A CAUTION ]
pected "Leakers" are not leaking tanks. Often the source of IRead this manual_efore checking the I
the water can be found and corrected. ] water heater make sure the electric supply has been |
|turned "OFF', and never turn the electric supply/
If you are not thoroughly familiar with electric codes, the [ "ON" before the tank is completely full of water. ]
water heater, and safety practices, contact your local utility or
call Maytag Customer Service at 1-800-788-8899 for an
authorized servicer to check the water heater. [ A CAUTION ]
I
[ Never use this water heater unless it is completely I
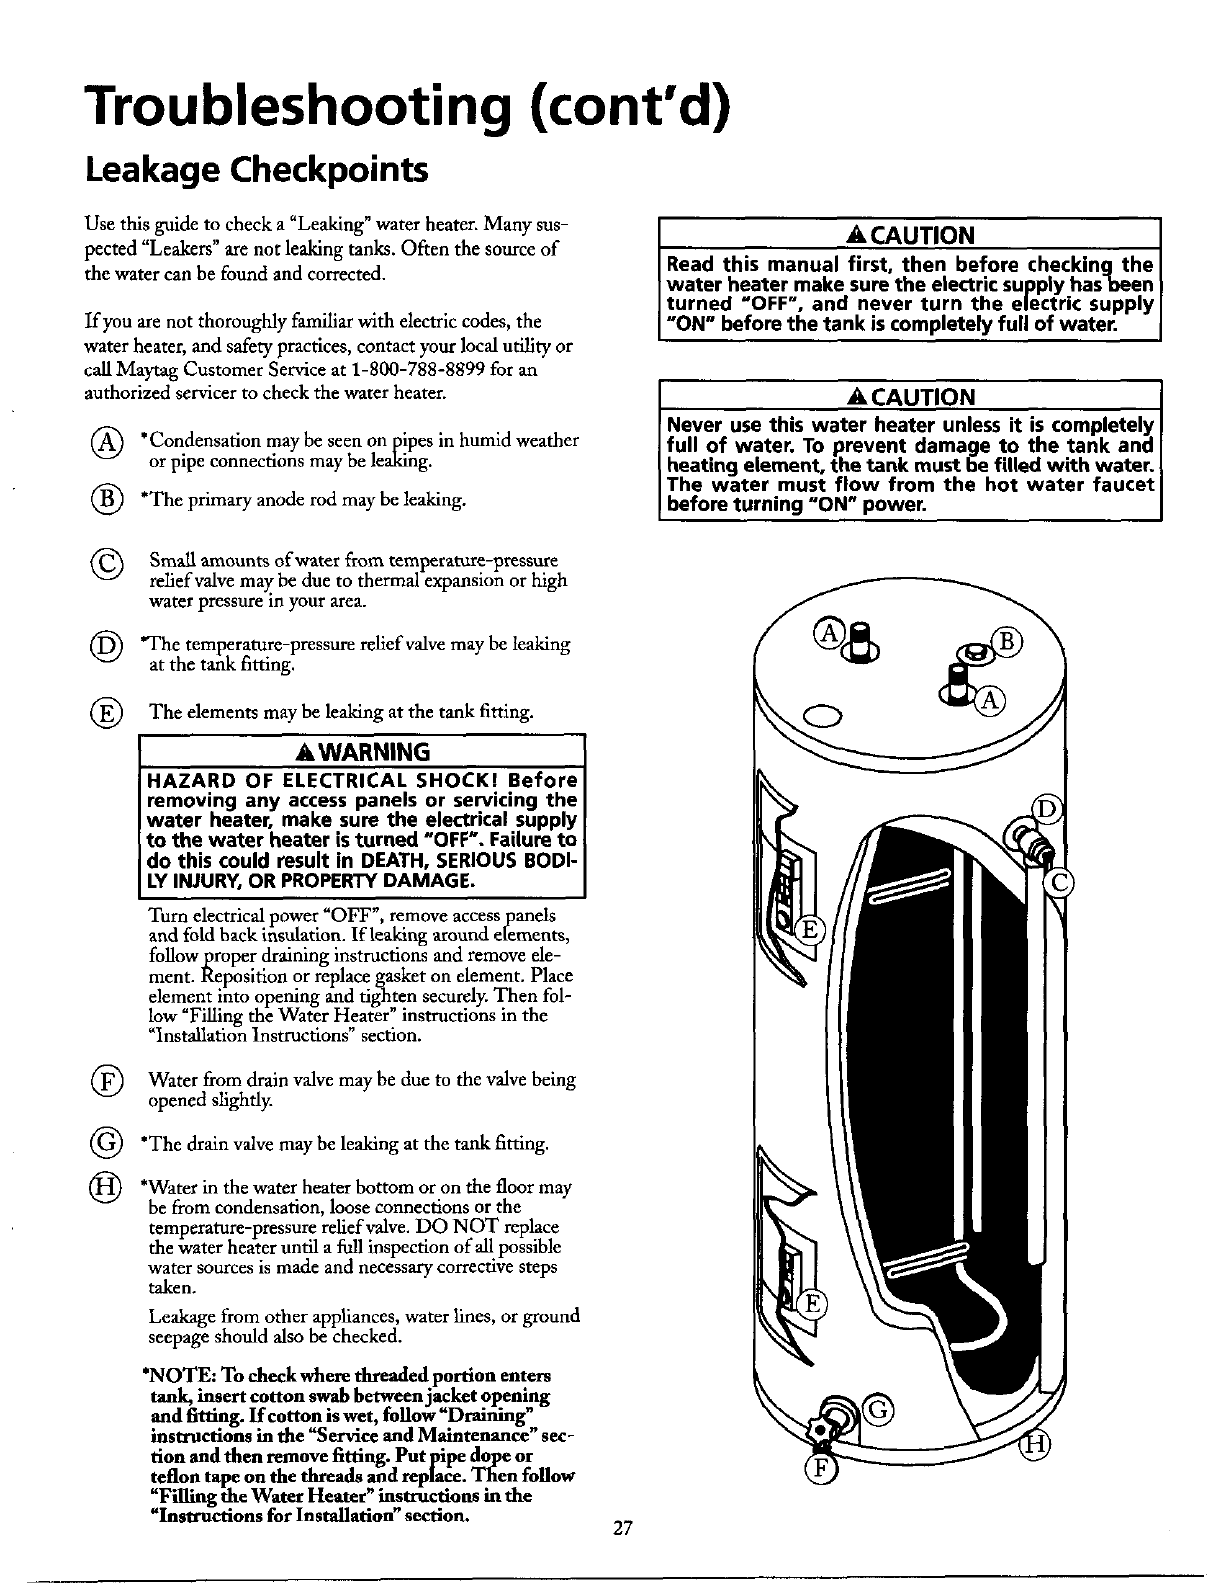
*Condensation maybe seenon pipes in humid weather ] full of water. To prevent damage to the tank and [
or pipe connections may be leaking. [ heating element, the tank must be filled with water. {
IThe water must flow from the hot water faucet I
@ *The primary anode rod may be leaking. [ before turning "ON" power. ]
(_) Small amounts of water from
temperature-pressure
relief valve may.be due to thermal expansion or high
water pressure in your area.
(_) *The temperature-pressure relief valve may be leaking A_¢_
at the tank fitting.
@ The elements may be leaking at the tank fitting. (D
AWARNING
HAZARD OF ELECTRICAL SHOCK! Before
removing any access panels or servicing the
water heater, make sure the ele_rical supply
to the water heater isturned "OFF . Failure to
do this could result in DEATH, SERIOUS BODI-
LYINJURY, OR PROPERTYDAMAGE.
Turn electrical power "OFF _,remove access panels
and fold hack insulation. If leaking around elements,
follow l_roper draining instructions and remove ele-
ment. Keposition or replace gasket on element. Place
element into opening and tighten securely. Then fol-
low "Filling the Water Heater" instructions in the
"Installation Instructions" section.
(_) Water from drain valve be due to the valve
being
may
opened slightly.
(_ *The drain valve may be leaking at the fitting.
tank
*Water in the heater bottom the floor
water OF on
may
be from condensation, loose connections or the
temperature-pressure relief valve. DO NOT replace
the water heater until a _ inspection of all possible
water sources is made and necessary correcuve steps
taken.
Leakage from other appliances, water lines, or ground
seepage should also be checked.
*NOTE: To cheek where threaded portion enters
tank, insert cotton swab between jacket opening
and fitting. If cotton is wet, follow "Draining"
instructions in the "Service and Maintenance" sec-
tion and then remove fitting. Put pipe dope or
teflon tape on the threads and repla_'e. Then follow
"Filling the Water Heater" instructions in the
alnstructions for Installation" section.
27
