


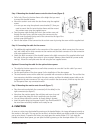
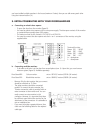

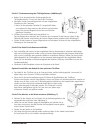
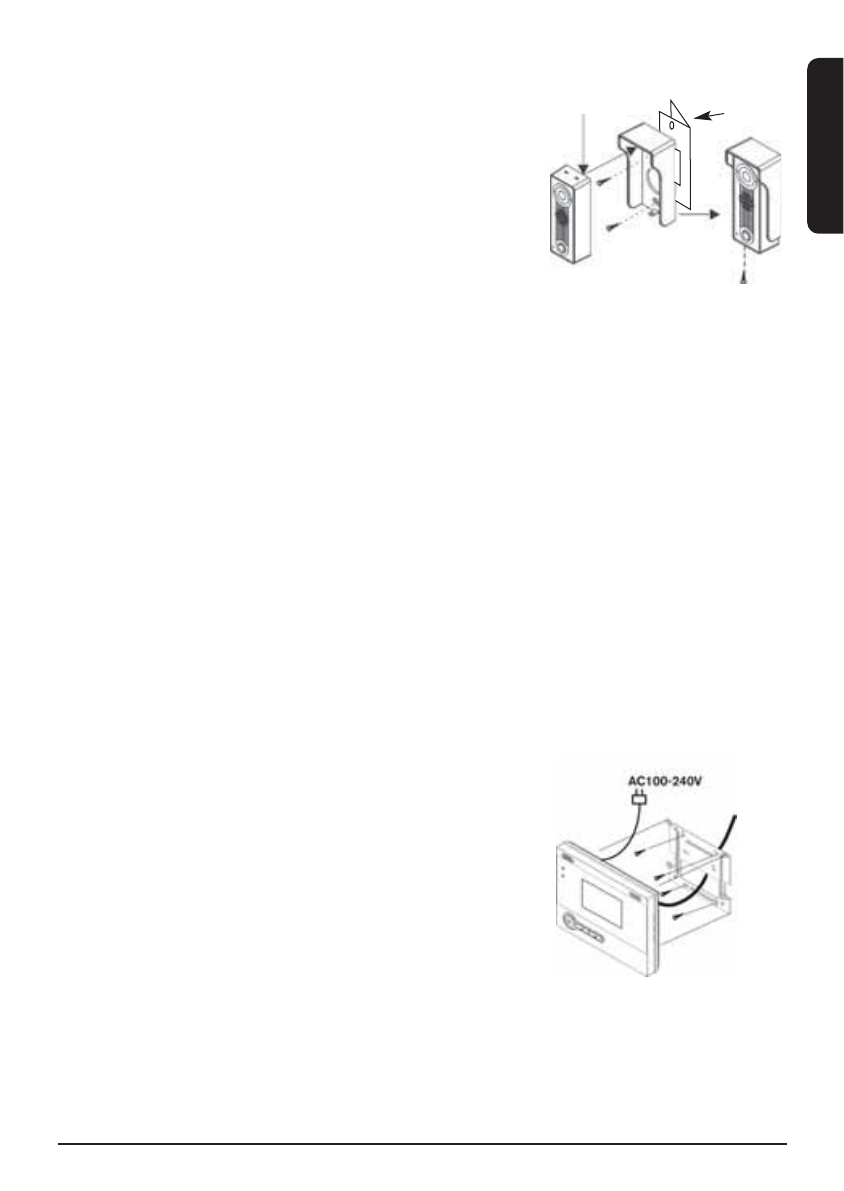
Step 1. Mounting the doorbell camera onto the door frame (figure 6).
• Drill a hole (15mm) in the door frame at the height that you want
to mount the doorbell camera.
• Mount the sun/rain cover onto the door frame using the supplied
screws.
o In case you are using the optional corner bracket (21) then you
need to mount that first onto the door frame and then mount
the sun/rain cover using the supplied screws.
• Pass the power cable through the hole in the sun/rain cover and
through the door frame, and then mount the camera onto the
sun/rain cover by placing the top end of the camera into the lugs of the
sun/rain cover (see figure 6).
• Now fix the bottom of the camera into the sun/rain cover by turning the screw with the supplied tool.
Step 2. Connecting the cable for the camera.
• The additionally supplied cable for the connection of the camera has a black connector at the camera
end, and a black and a white connector at the monitor end (the black connector is for the connection
of an extra optional monitor).
• Attach the black connector of the doorbell camera to the black connector of the supplied cable. Lead
the cable to the spot where the monitor is to be mounted. (Beware: there should be a power socket
near by). Mount the wall plate onto the wall using the four supplied screws.
Optional: Connecting the cable for the optional door opener.
• The cable for the door opener has a small white connector on one side. Use this cable if you want
to install a door opener.
• See the specifications of the door opener for the installation of the door opener.
• The extra monitor comes with a cable that is provided with connectors at both ends. The end that has
two connectors should be connected to the main monitor, and then the already present cable can be
plugged into the extra connector. This way, a link is made in the door-contact, and that way the door
can be opened from any connected monitor.
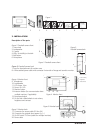
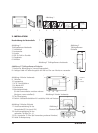
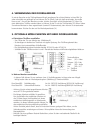
Step 3. Mounting the monitor onto the wall (figure 7).
• Take the monitor and attach the connector(s) of the cable(s) in the
right connectors (see figure 5).
• Now place the monitor against the wall plate and move it up and
down against the plate such that it snap-locks onto the plate.
• You can always detach the monitor by simply sliding it upward.
• Insert the power plug into the power socket. Your DoorGuard400™
has now been successfully installed and is ready for use.
4. FUNCTION
As soon as a visitor rings the doorbell by pressing on the doorbell button, the image will appear instantly on
the monitor in the house. This way you can see who is at the door before you decide to open it (or pretend
you’re not at home). To speak to the visitor, you simply press the monitor button (13). If you have also
installed an electric door opener, you can open the door by pressing on the door-open button (15). In case
5DOORGUARD400
TM
ENGLISH
21
Figure 6.
Figure 7.