Service Manual
29
3
Troubleshooting
(continued)
16. The gas valve will open at the end of the trial for
ignition stage and remain open as the burners fire.
Observe the gas manifold pressure when valves open.
If insufficient gas pressure is supplied to the burners,
the burners will not fire. Record the gas pressure
indicated on the manometer or magnahelic. Subtract
the air pressure in the front chamber (as recorded in
Step 7) from the gross manifold pressure observed at
the end of trial for ignition and when the burners are
firing. The gross manifold pressure will typically be
within the range of 3.0" w.c.to 3.5" w.c.for Natural Gas
and 5.8" w.c. to 6.3" w.c. for LP Gas at full fire. The
difference in the gross manifold pressure and the front
chamber pressure is the net manifold pressure setting
of the gas valve’s regulator. Compare the net setting to
the setting specified for the type of gas used. Adjust
regulator as required. Set the thermostat to a setting
lower than the appliance’s water temperature to turn
the burners off. Allow appliance to run through the
post purge sequence. Turn the power switch to the
“OFF” position.
TABLE - 3E
NET MANIFOLD PRESSURE
Regulator Pressure Less Front Chamber Pressure
Type of Gas Net Manifold Pressure Setting
Natural Gas 1.8" w.c.
LP Gas 4.6" w.c.
NOTICE
The front chamber pressure must be
subtracted from the gross regulator
pressure to obtain actual net manifold
pressure for normal operation. The front
chamber pressure may vary based on
elevation, stages of operation, vent
length and model. For information on
chamber pressure, see the Maintenance
section for Combustion Air Shutter
Adjustment in this manual.
19. Replace the cover screw on the regulator and turn the
power switch to the “ON” position. Set the thermostat to
call for heat. Observe gas regulator pressure again at the
burner “ON” stages. Repeat this sequence until the
proper regulator setting has been obtained.
NOTICE
If the regulator cover screw is not in place
and tight, the appliance will not function
properly.
20. Turn the power switch to the “OFF” position.
21. Turn the gas valves and the manual gas cock knob to the
“OFF” position.
22. Remove the gas pressure fitting from the gas valve and
replace with the 1/8" hex plug (removed in Step 10) and
tighten.
23. Ensure that the chamber pressure reference hose is properly
connected to the gas valve.
24. Turn the gas valve knobs to the “ON” position.
25. Turn the power switch to the “ON”position and replace the
jacket panel. The appliance is now ready to operate.
If manifold pressure cannot be properly maintained, check the
gas supply pressure with a manometer connected to the inlet
pressure tap on the gas control.
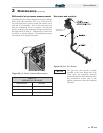
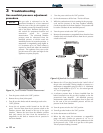
17. If adjustment is necessary, remove the regulator cover
screw on the gas valve (FIG. 3-2).
18. Turn the regulator adjustment screw clockwise to raise
regulator gas pressure, counterclockwise to lower the
regulator gas pressure. Turn the regulator adjustment
screw a 1/4 turn in the desired rotation and cycle the
burners on in the sequence listed in this section and
record the observed chamber and regulator settings.
Subtract to determine the net manifold pressure
setting. Repeat as necessary to achieve the specified net
manifold pressure setting.


