


"JSQPSU3PBE'BMM3JWFS."tt'BY
We reserve the right to change details of design, materials and finish.
XXXMJHIUPMJFSDPN½1IJMJQT(SPVQt
Lighting Systems IS-LFK
1BHFPG *OTUSVDUJPO4IFFUGPS"TTFNCMZBOE*OTUBMMBUJPOPG-',
#
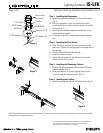
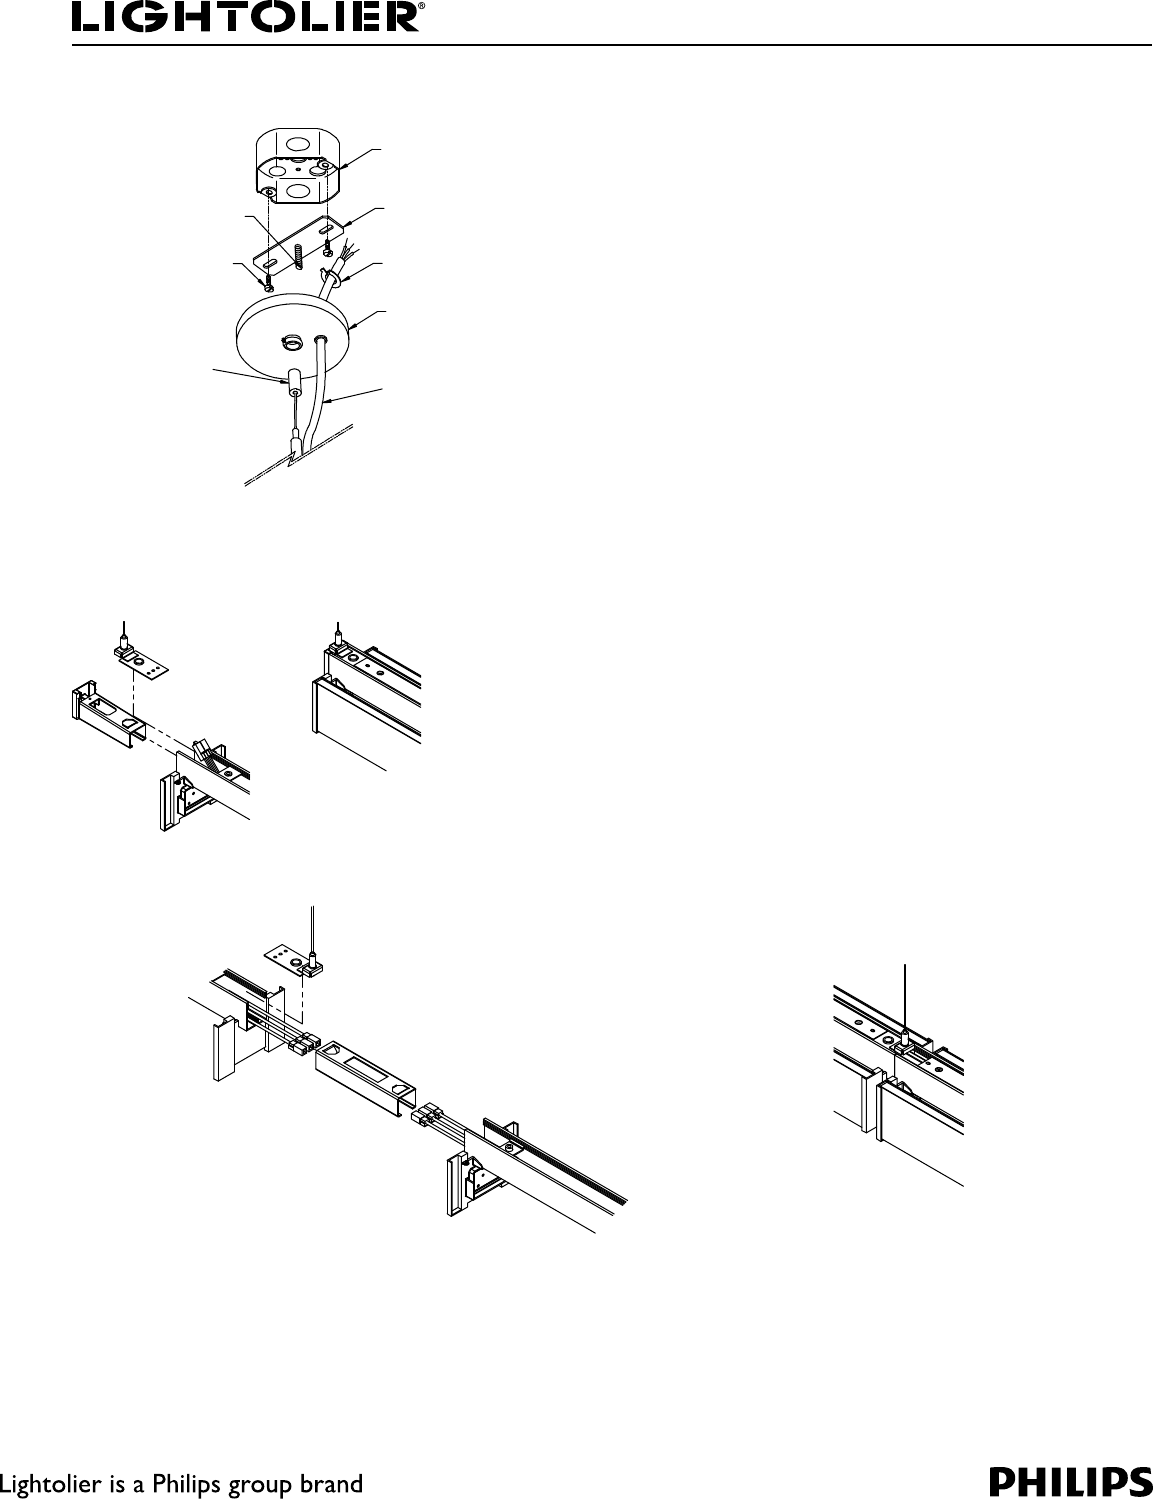
Installing the SuspensionStep 1.
*OTUBMMUIFTVTQFOTJPOBTTFNCMZUPUIFKVODUJPOCPYFTA.
'JH
5IFmSTUTVTQFOTJPOJOFBDISVOTIPVMECFGSPNUIFB.
power feed end set, which contains power cord and an
FOEDBQ'JH
*OTUBMMUIFJOUFSNFEJBUFTVTQFOTJPOBTTFNCMJFTUPUIF$
DFJMJOHTUSVDUVSFTVQQPSU
"UUIFFOEPGFBDISVOJOTUBMMUIFOPOQPXFSGFFEFOED.
set.
Installing the First Fixture
Step 2.
4MJEFUIF1PXFSXJSFJOUPUIFIPMFBOEDPOOFDUUPUIFA.
MFBEXJSFT4MJEFJOUIFIBOHJOHQBSUUPUIFVQQFSTMPUPG
UIFIPVTJOH
1VTIUIFmYUVSFnVTIXJUIUIFFOEDBQB.
*OTUBMMUIFXJSFFOEDPWFS$
Tighten the set screws on the end cap of the starter D.
mYUVSFXJUIBOBMMFOXSFODI
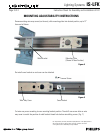
Installing the Remaining Fixtures
Step 3.
$POOFDUUIFXJSJOHCFUXFFOmYUVSFTCFGPSFTMJEJOHUIFA.
mYUVSFTUPHFUIFS'JH
"GUFSFBDIBEEJUJPOUPZPVSSVOUJHIUFOEPXOUIFTFUB.
TDSFXTUPIPMEUIFmYUVSFTJOQMBDF'JH
Installing the End Cap
Step 4.
*OTUBMMUIFOPOQPXFSFOEDBQUPUIFFOEPGSVO'JHA.
NOTE: Mounting locations can be moved approximately 6” towards the center of the fixture, but end reflectors re-cut, and mounting plate
must be slide and re-tightened in place.
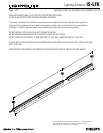
1/4-20 Stud
#8-32 Screws
(By Others)
1/4-20 Coupling
Junction Box
(By Others)
Crossbar
Strain Relief
Canopy 4-1/2ӯ
SJT Power Cord
Figure 1
Figure 2
Figure 3