


INSTRUCTION SHEET NO.
IS:1102T
E0403 Page 2 of 2
LIGHTOLIER a GENLYTE THOMAS company.
631 Airport Road, Fall River, MA 02720
READ AND UNDERSTAND THESE INSTRUCTIONS BEFORE INSTALLING FIXTURE.
This fixture is intended for installation in accordance with the National Electrical Code and local or Federal
code specifications. To assure full compliance with codes and regulations, check with your local electrical
inspector before installation. To prevent electrical shock, turn off electricity at fuse box before proceeding.
Retain these instructions for maintenance reference.
®
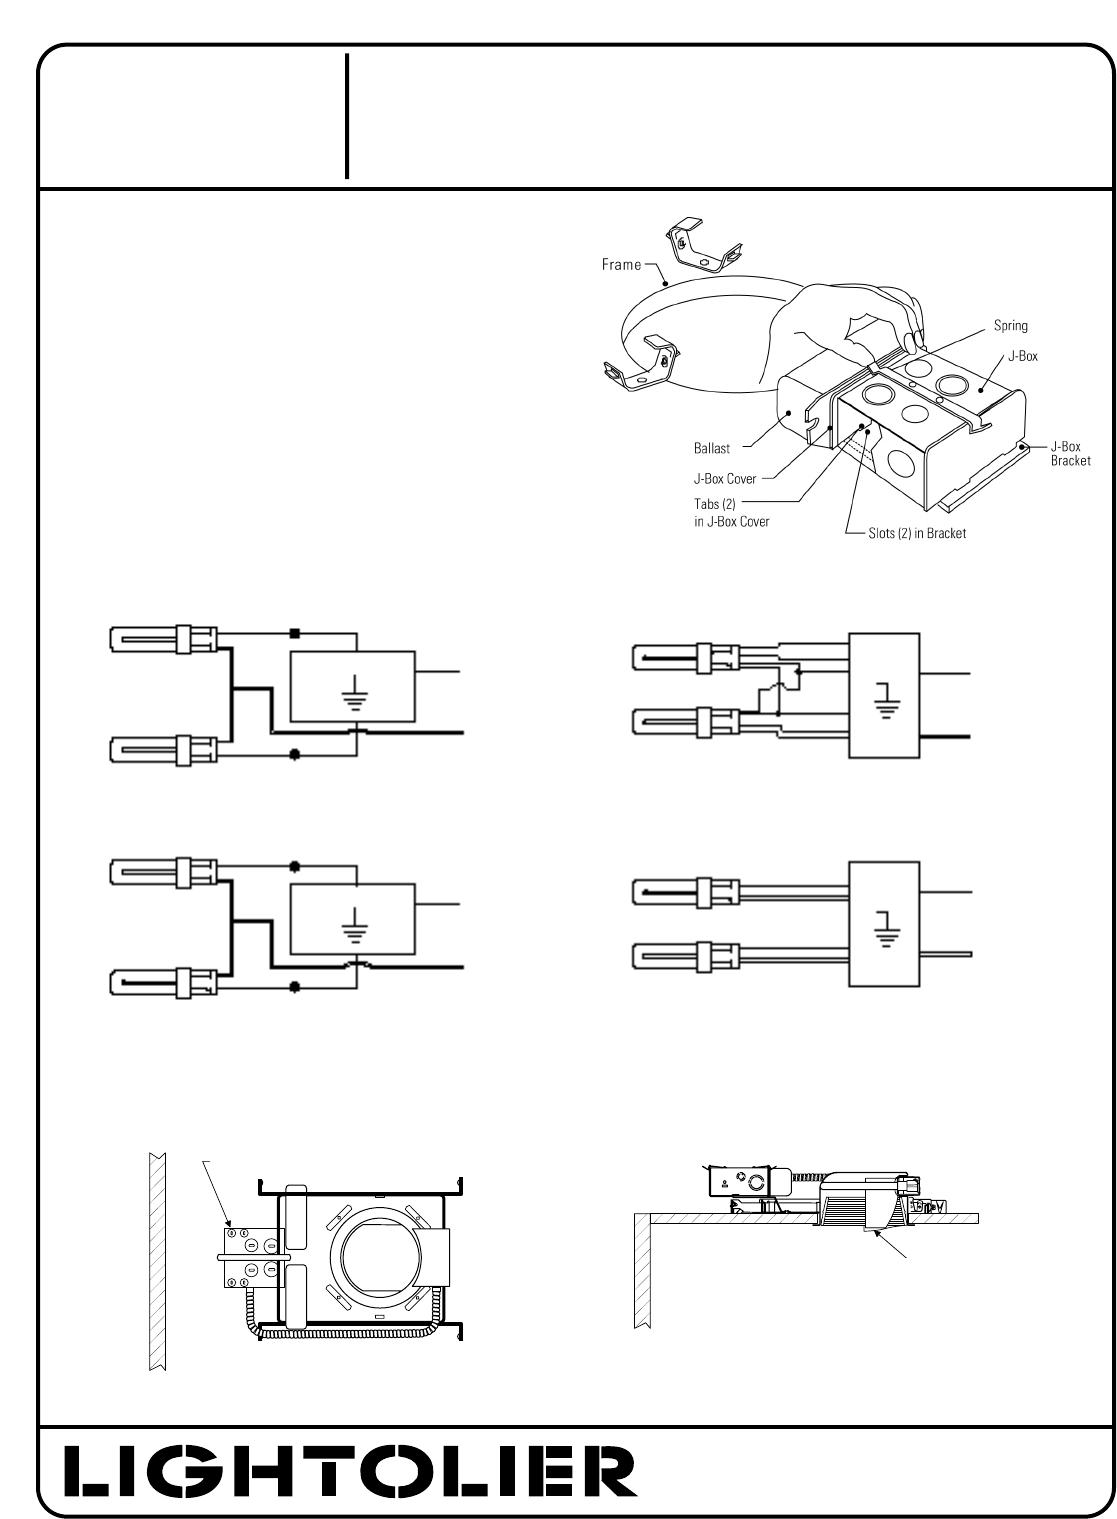
BALLAST REPLACEMENT (MAGNETIC VERSION SHOWN)
1. TURN OFF POWER.
2. Remove Reflector Trim from ceiling (see Reflector Trim instructions).
3. Remove Ballast assembly by lifting spring on top of J-Box and
pulling ballast outward (Fig. E).
4. Disconnect all wiring.
5. Replace Ballast on J-Box Cover (see label on old ballast for proper
replacement).
6. Insert ballast assembly through ceiling and rewire fixture (see wire
diagram on ballast label).
7. Reassemble new ballast assembly to J-Box by placing tabs with
slots in J-Box bracket then snap onto spring.
8. Install Reflector Trim.
Frame-In Kit Installation when using
Wall Washer Trim (1135T)
J-BOX ON FACING WALL
WALL WASHER FACE PLATE
TOP VIEW SIDE VIEW
WALL
WALL
Fig. E
Black
Black
Black
Black
Black
Black
Black
Black
Black
Black
Blue
Blue
Blue
Blue
Blue
Red
Red
White
White
Red
White
Ballast
Ballast
White
White
White
White
Yellow
Yellow
White
Electronic
Ballast
Electronic
Ballast
Wiring Diagram For Magnetic HPF Ballast
All 2-Pin Electronic Ballast
Wiring Diagram For Magnetic NPF Ballast All 4-Pin Electronic Ballast